UI elements
Account Manager
Account Manager is a panel at the bottom of the screen. This panel can have multiple tabs.
You can configure Account Manager at the broker configuration level and for each sub-account separately. To do this, you should use one of the following options.
- At the broker level, use
/config
→
d→accountManager. - At the sub-account level, use
/accounts
→
d→ui→accountManager.
Note that the data for Account Manager in any case is sent to
/state
→ d → amData
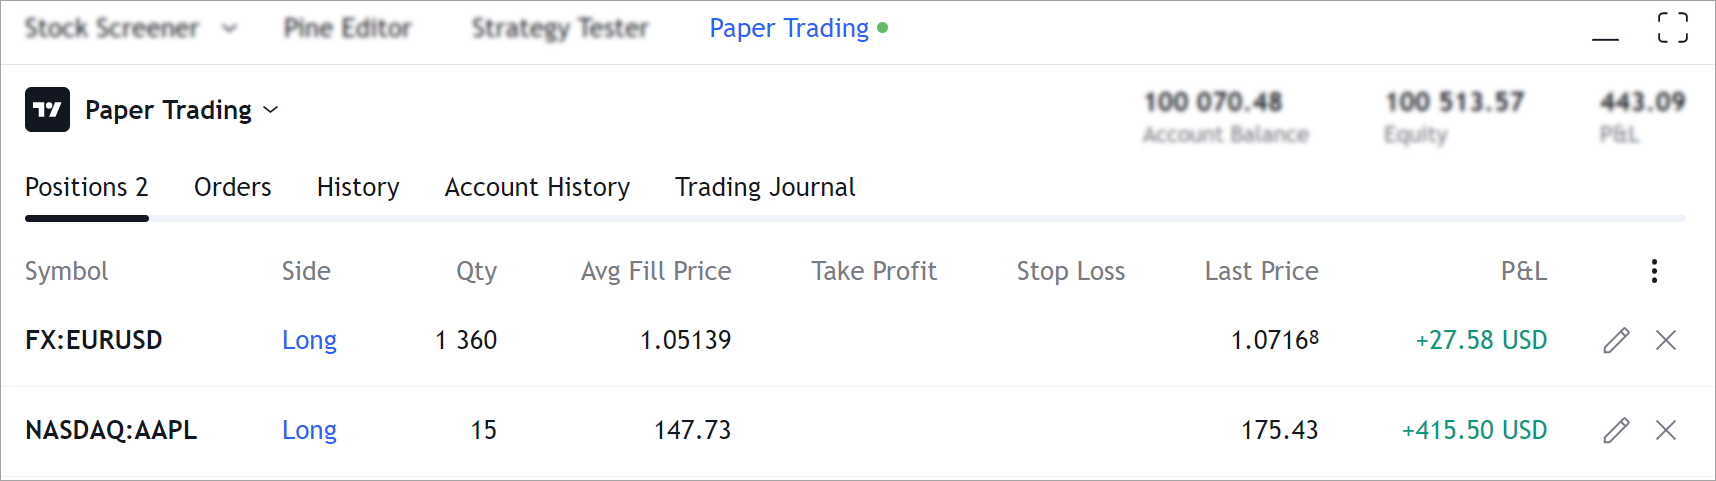
Account Summary Row
Account Summary Row is a line that is always displayed after login into the integration. It contains the most important information about the current state of the selected sub-account.
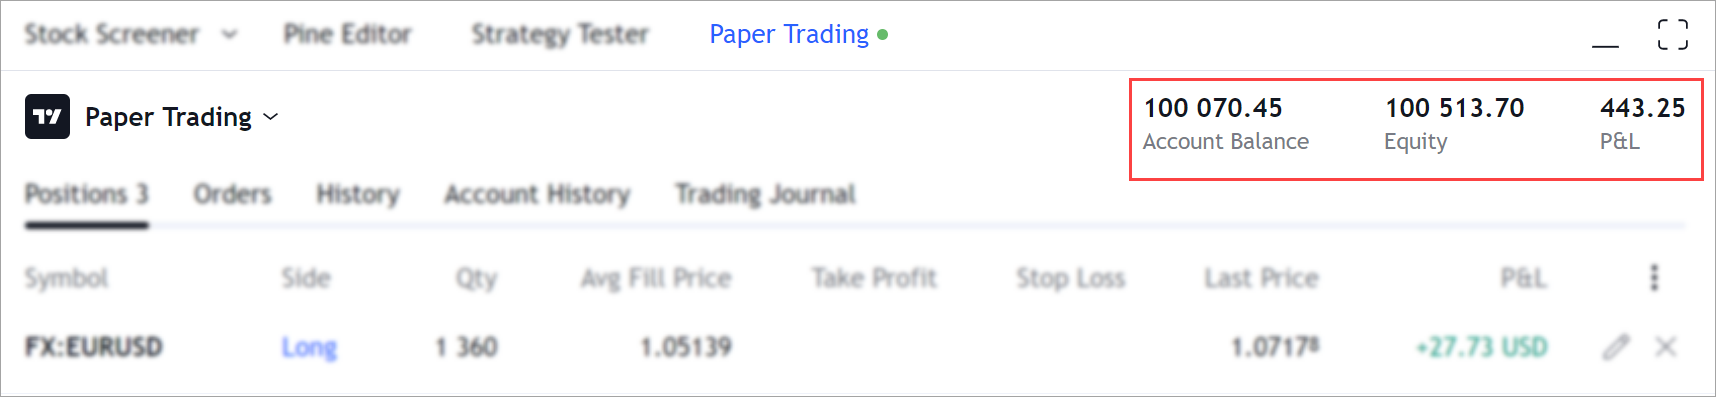
By default, Account Summary Row displays the values of the /state request into three fields:
balanceinto the Account Balance,unrealizedPLinto the Profit,equityinto the Equity.
The equity parameter is used in the order ticket to calculate risks.
This parameter is optional and can be calculated automatically as
balance + unrealizedPl. If you calculate equity in a different way,
provide the required value of equity in the response to
/state.
{
  "s": "ok",
  "d": {
    "balance": 41757.91,
    "unrealizedPl": 1053.02,
    "equity": 42857.56,
  }
}
But Account Summary Row allows to display other required broker information after configuration. You can configure it at the broker or sub-account level. Setting at the broker level will allow displaying the same information for all sub-accounts. Setting at the sub-account level allows you display information for the user-selected account. In this case, the information can be different for different sub-accounts.
{
  "s": "ok",
  "d": [
    "ui": {
      "accountSummaryRow": [
        {
          "id": "accountBalance",
          "title": "Account Balance"
        },
        {
          "id": "Equity",
          "title": "Realized P/L"
        },
        {
          "id": "Open Profit",
          "title": "Unrealized P/L"
        }
      ],
    },
  ]
}
For custom configuration of the Account Summary Row follow the steps below.
- Enable the
supportCustomAccountSummaryRowflag in the /accounts request. - Configure the Account Summary Row fields in the
/config
request in the
d→accountSummaryRowobject if you need to configure it at the broker level. - Set up
ui→accountSummaryRowobject in the /accounts to configure the Account Summary Row fields at the account level. The account level setting has a higher priority and will be applied if there is a configuration at both levels. - Set up
accountSummaryRowDataobject in the /state to configure the Account Summary Row fields. - In the
/state
request in the
accountSummaryRowDataobject, send the values for Account Summary Row. The order and size of the sent array must match the order and size of the array specified in the configuration.
If the display area of the Account Summary Row is undersized, the elements will be hidden sequentially, starting with the very first. This can happen on low-resolution screens. Therefore, arrange information in order of increasing importance.
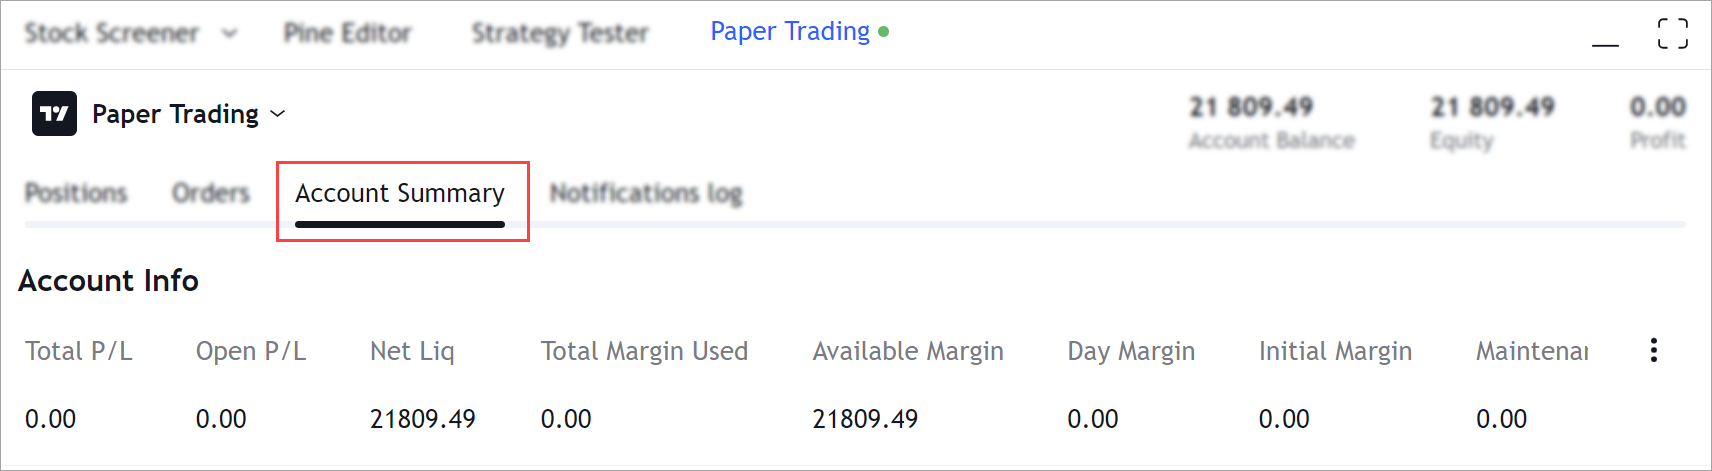
Account Summary Tab
Account Summary Tab displays the fields received by
the /state
request as a set of tables. Only one table is displayed by default. It
uses the balance, unrealizedPL, and equity (optional) fields.
The information displayed in the Account Summary Tab can be flexibly configured at the broker or sub-account level. The settings made at the broker level will be displayed the same for all sub-accounts. Setting at the sub-account level will allow displaying information for the account selected by the user, and the information may be different for different sub-accounts.
- At the broker level, the
accountManagerobject is returned in the /config request. - At the account level, the
accountManagerobject is returned in the /accounts request inside theuiobject.
In both cases, it contains an array of table objects. The columns of the table are defined within each such array.
Regardless of the configuration level, values for the tables are
returned in the
/state
query in the amData object. The amData object is an array of tables.
It contains a nested array of strings with a nested array of columns as
string values. This object must be the same size as the object defined
in the configuration.
Demo accounts support
There are two ways to support demo accounts on TradingView platform mentioned below.
- By adding subaccounts that are configured in the /accounts endpoint.

- By adding the LiveDemo Switcher. Please reach out to TradingView team to enable this feature.

Executions
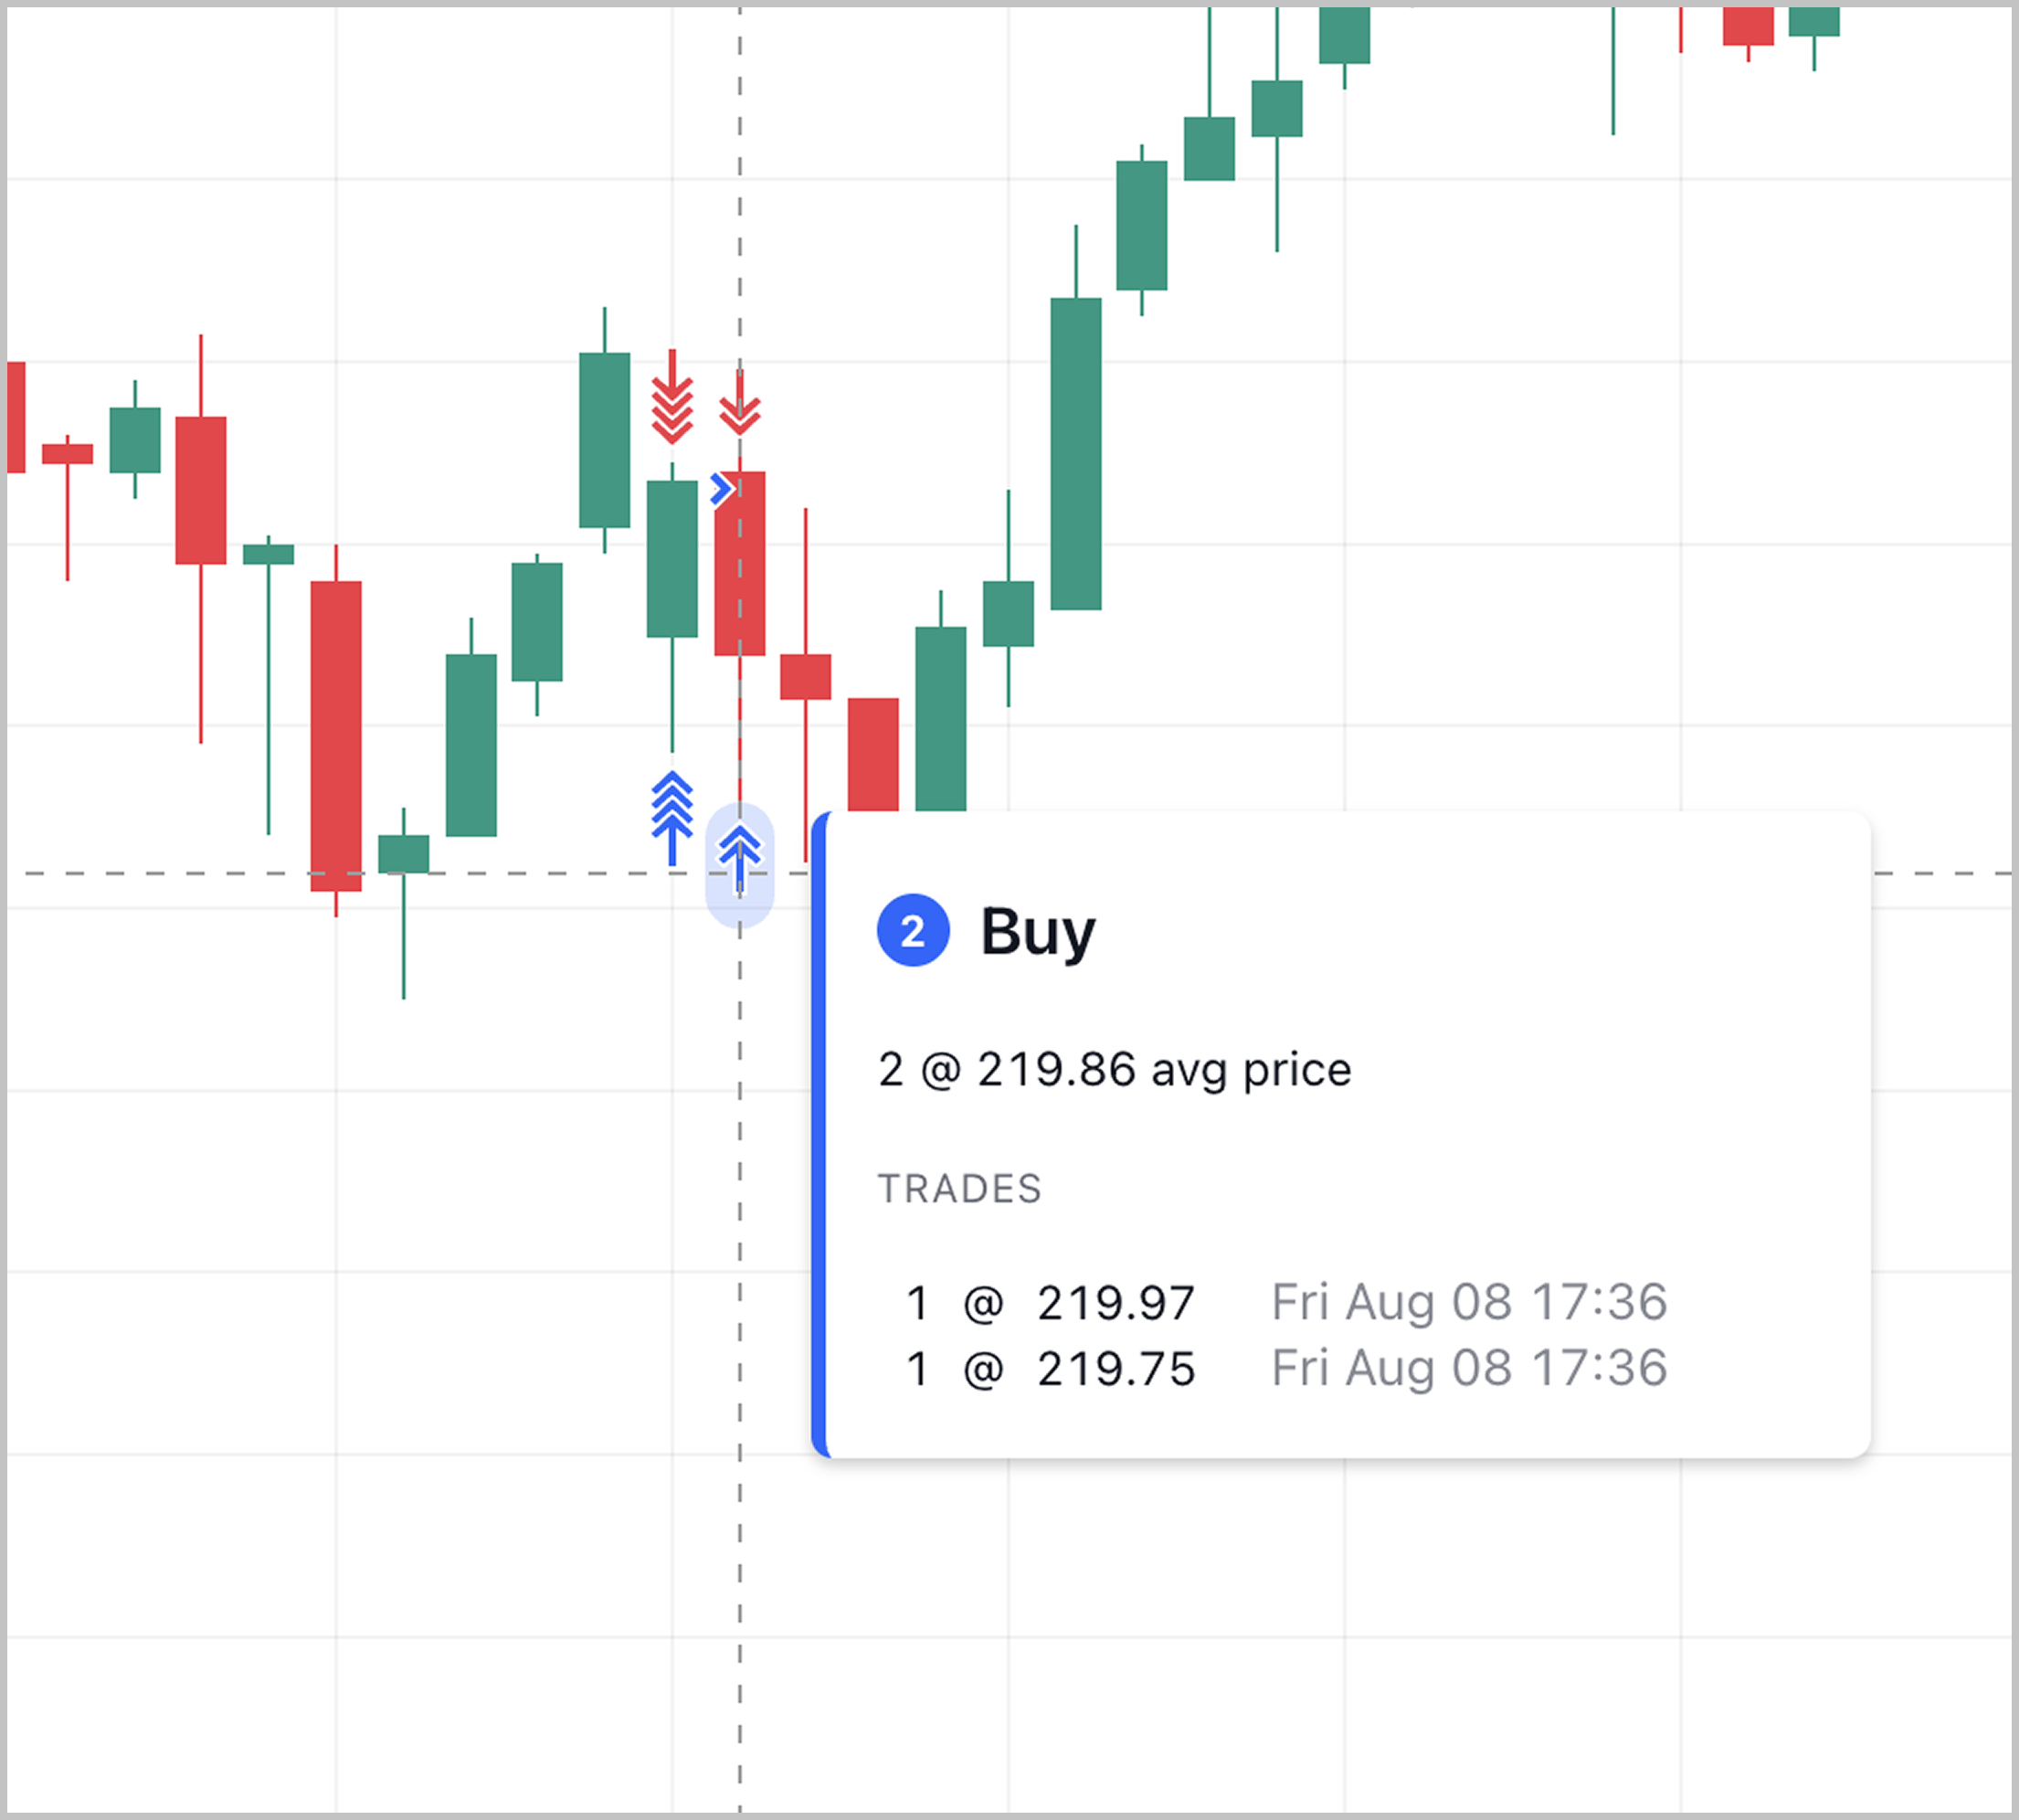
Orders with the Filled status should be returned in the /executions response. This feature allows users to see such orders on the chart.
Fills or trades are displayed as arrows with a specific price, specific quantity and a specific side (buy or sell) for each instrument.
Custom maxCount parameter value can be set from the TradingView side if
required.
Order Ticket
Purchase behavior:
- There is a Short Position and we set a trailing stop to buy.
- When the market price goes down, the Stop Order price goes down as well.
- But, if the market price rises, the Stop Order price remains unchanged.
- And in the end, if the market continues to grow and reaches the price set in the order, it will be executed.
Selling behavior:
- There is Long Position and we set a trailing stop to sell.
- When the market price rises, the Stop order price rises as well.
- But, if the market price goes down, the Stop order price remains unchanged.
- And if the market continues to fall and reaches the price established in the order, it will be executed.

Crypto Order Ticket
Crypto Order Ticket can be used for spot trading. To enable it, please set the supportCryptoExchangeOrderTicket flag in the /accounts endpoint to true. Please note that qty in the Place Order request is sent in base currency.

Custom order info
The supportCustomOrderInfo flag controls the availability of the /orderInfo endpoint. When set to true, this flag enables the retrieval of broker-specific data based on the parameters of a placed or modified order. It is also necessary to set fields that trigger an update to the data in the Order Info section whenever its values change. These fields should be set in the orderInfoConfig in /config.
If supportCustomOrderInfo set to true:
- The /orderInfo endpoint becomes active.
- The broker-provided data is fetched and displayed in the Order Info section of the Order Ticket.
- The displayed data updates dynamically whenever the user modifies order parameters (price, ticks, quantity, bracket settings etc.)

Order preview
To show users additional order details without modifying or placing orders, you can implement the /previewOrder endpoint. For example, you can display the estimated order cost, commission, and expiry date, as well as any warning or error messages in the Order confirmation dialog.
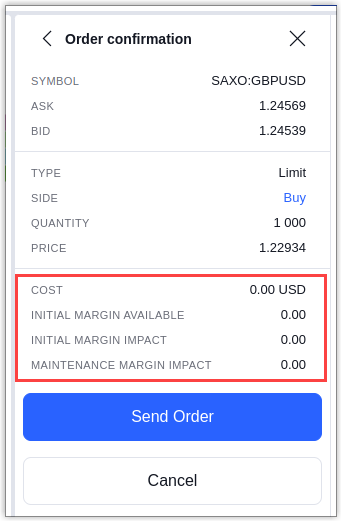
To use the /previewOrder endpoint, set the supportPlaceOrderPreview and/or supportModifyOrderPreview flags to true in the /accounts endpoint.
supportPlaceOrderPreviewis used when you want to provide more information about an order before a user places it.supportModifyOrderPreviewis used when you want to provide more information about an order before a user modifies it.
When a user places or modifies an order, the request is first sent to /previewOrder. In response, you can specify all the necessary information that will be displayed in the Order confirmation dialog. In Order confirmation, the user can click the Send Order button. This action will send the Place Order or Modify Order request.
Durations
TradingView REST API allows you to configure the duration (or Time In
Force) separately for each of the supported order types. By default,
any item from the durations list will be shown in the Order Ticket only
for Limit, Stop, Stop-Limit orders. If this list should be
different from the default one for any of the durations elements, you must submit
it for this item in the supportedOrderTypes field. It must be an array
of order types for which this duration will be available.
If a duration has Date Picker or/and Time Picker it is necessary to return datetime in /orders response which is equal to durationDateTime in Place Order request.
Leverage
Leverage can be displayed in the Order Ticket in two ways.
- If leverage is a constant value it can be displayed in the Order Info. It is necessary to set
supportLeverageflag tofalsein /accounts and returnmarginRatevalue in /instruments.

- If leverage is a dynamic value set by users, it can be displayed using the Leverage button. It is necessary to set
supportLeverageandsupportLeverageButtonflags totruein /accounts.getLeverage,previewLeverageandsetLeveragerequests are sent in this case.

Margin Used scale configuration
Margin Used scale can be displayed in the Order Ticket.

The below is required to show the Margin Used scale:
- Margin Used scale feature should be enabled from the TradingView side
- It is necessary to return
marginRatein the /instruments response. - It is necessary to return
marginAvailablein the /state response.
Risk and reward
Setting bracket orders (Stop-Loss or Take-Profit) as a percentage of the account balance or in the account currency is enabled by default. It can be disabled by setting supportRiskControlsAndInfo flag to false in the /accounts on a sub-account level.
The risk control related information, such as the trade value, will not be shown in the Order Ticket and on the Chart if supportRiskControlsAndInfo flag is set to false.
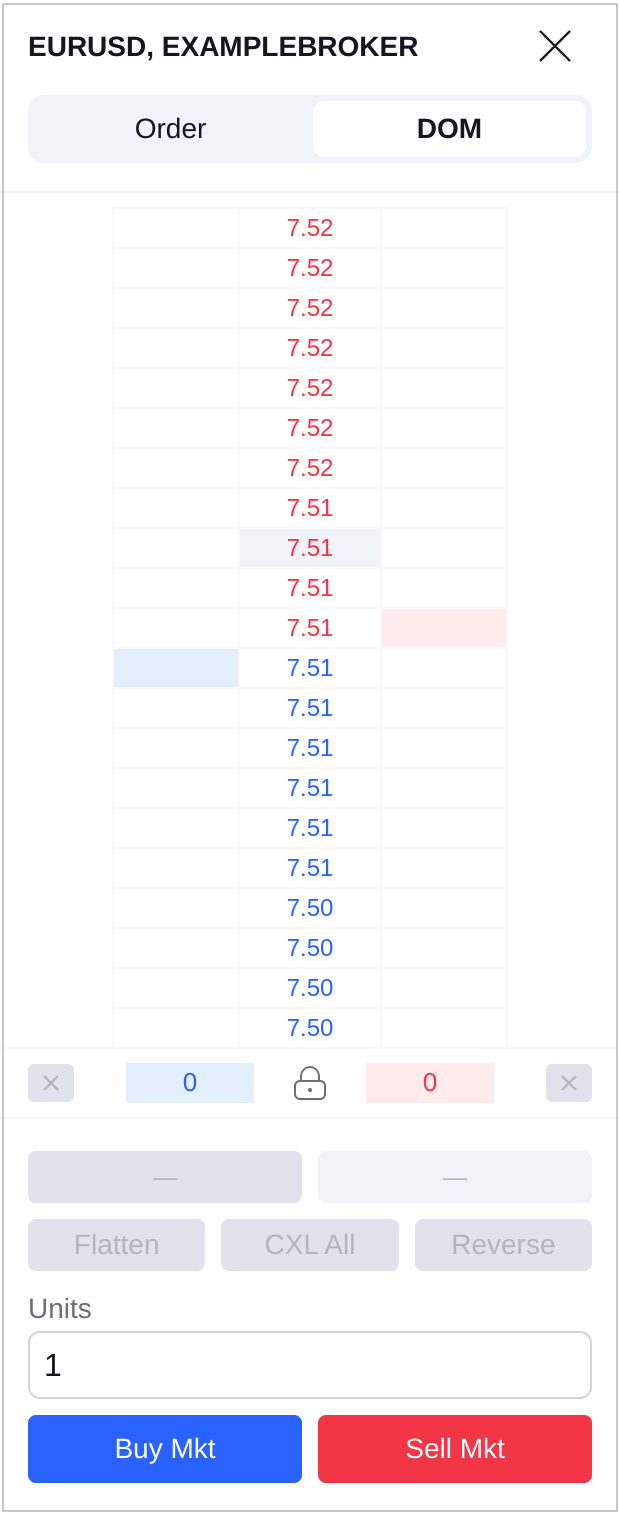
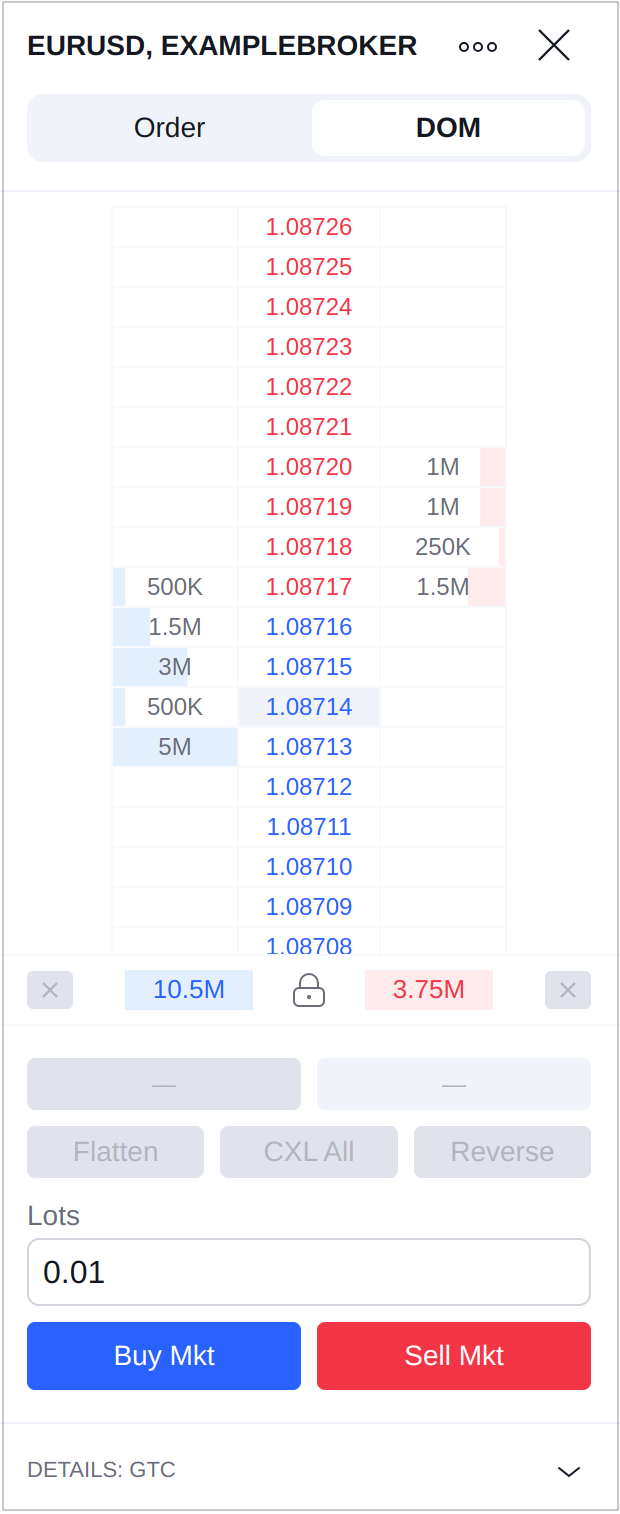
Depth Of Market
Depth of Market or DOM (also known as Order Book), is a window that shows how many open buy and sell orders there are at different prices for a security. Let's say the current price is \$1, the DOM will show how many orders there are at \$0.90, \$1.10, etc. It's a great tool to see where the supply and demand levels are.
By default, DOM widget is enabled in the UI. However, you can control the way DOM operates from your side.
Examples of DOM implementation
By default, supportDOM flag in /accounts is set to true and the DOM widget is displayed as below:
If you provide Level 2 data, you can enable it in the TradingView UI by following the next steps:
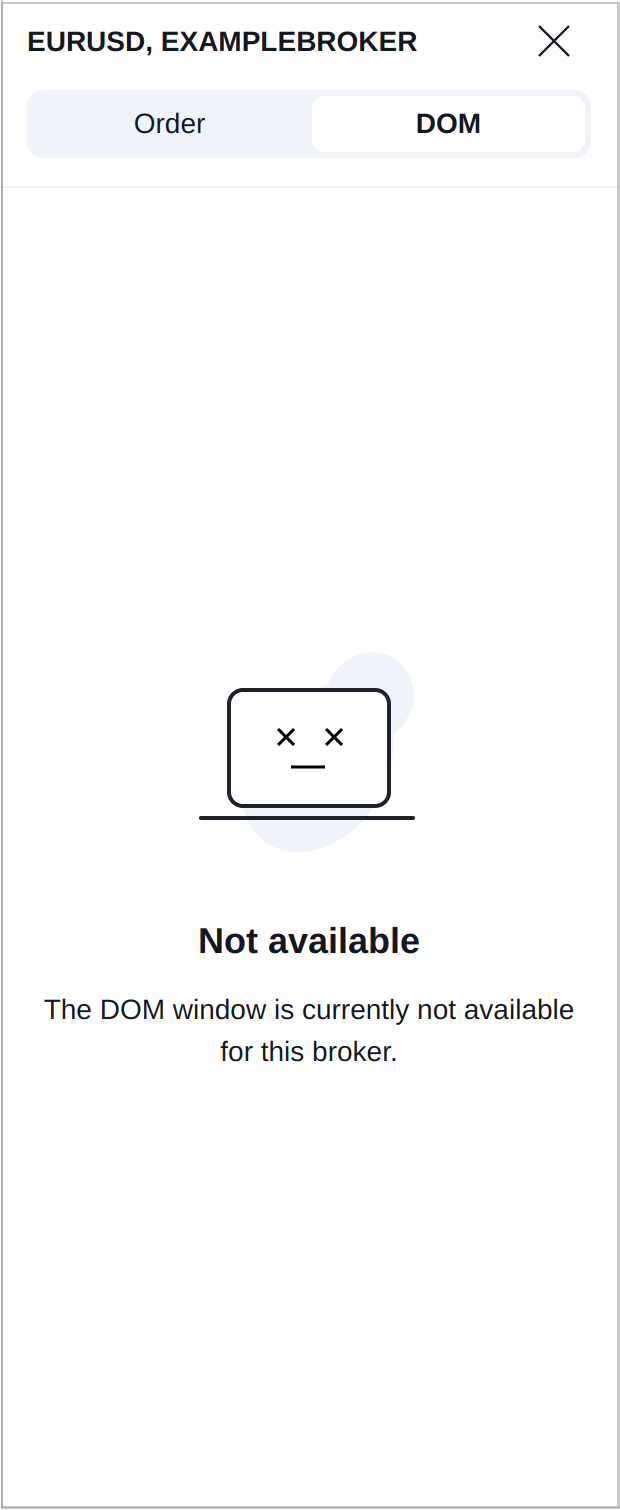
If you wish to deactivate DOM, set the supportDOM flag in
/accounts
to false. In this case, the DOM widget will look as below:
Informational popup
An informational message can be shown to users right after the successful authentication process. This feature is often used to display regulatory required messages.
Two conditions should be met in order to show the popup:
- Provide TradingView team with a list of
keyvalues that correspond to certain messages. - Return
connectWarningConfigwith the necessarykeyvalue in /accounts response.
Please note that the text of an informational message should be provided from your end and reviewed by the TradingView team before it becomes available within the integration.