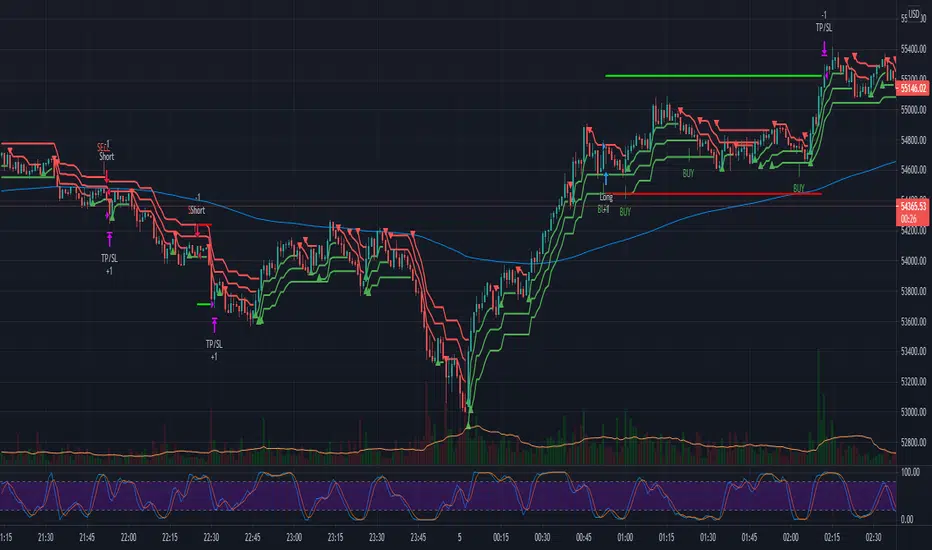
High Low Open Mid Ranges & Levels (Multi-Timeframe)This indicator automatically plots the chosen timeframe's high, low, mid point and open. These levels on higher timeframes act as support and resistance levels on lower timeframes, helping find entries, stoploss and profit targets.
Most common timeframes to choose are Daily, 1W, 1M, and 3M. Other timeframes that are good include, 2D, 2W and 2M.
For example, you can see in the snapshot below, we are on the 4hr TF showing those levels from the 2W. This historical 2W zone (open and mid) was (and currently still is) resistance. You can see it also provided a good entry to go short.
This is also useful for intraday scalping. Below, we are on the 15min TF with levels set on the 2D timeframe. You can see how the Open and Mid levels acted as resistance, providing good entries on range trades, with take profit set at the previous 2D low.
There is also a table which tells you all the main TFs high, low, open, and mid levels. They are the most important ones to look out for.
This indicator should not be used in isolation; it is best to pair it up with other TA such as orderblocks, S/D zones, S&R or overlay indicators.
Search in scripts for "scalping"
Price ActionFirst, you have to know price action, RTM price action Handbook could help you
this indicator shows you base and momentum candles
base candles could be zones of trade that show you fighting of bulls and bears, and momentum candles could show the power of those zones.
Base candles are white in the chart, and you can place your order at the good zone.
Rally candles and drop candles are momentum candles, and bold rally and bold drop show that it is more powerful than its before candle.
Zigzag compression is one way that shows the compression in trend.
it looks like the Wedges pattern at classic technical that shows pending orders are closed, so the target zone could be powerful to reverse the trend.
Black background of candle means that candle doesn't reach its before candle and so it is poor candle, I named it domination.
It is better to do not trade at poor candles.
At the end, I find Price action the best way to trade, and it makes you free of other indicator, even volume indicator.
This indicator is good for those who use price action strategy to trade and those who want to learn the price action.
It could be so helpful and reliable way to find the zones, and place buy or sell order and the target, specially for scalping.
Dump Detector - Stochastic RSIDump Detecter uses Stochastic RSI to detect dumps/downtrends. Can be used as an exit trigger for long bots or an entry trigger for short bots. Change settings to lower timeframe for scalping. Pump signals can be turned on with tickbox.
Default Settings are not the usual Stochastic RSI setup and have been tuned to bitcoin 3hr chart:
Timeframe = 3hrs
smoothK = 3
smoothD = 3
lengthRSI = 6
lengthStoch = 27
src = close
3x SuperTrend Strategy (Mel0nTek) V1This is a triple SuperTrend based strategy for lower time frame trades such as day trades and scalping. I have not seen many strategies that combine multiple SuperTrends so I thought I would publish this one since I put it together and have been quite happy with the results. I have found through testing that the best results are on currency exchange markets such as Crypto or Forex on 1-15 min time frames.
The core idea was inspired by a youtube video put out by Trade Pro:
"Trade Pro - HIGHEST PROFIT Triple Supertrend Trading Strategy Proven 100 Trade Results"
I went ahead and set the defaults to the ones he uses in his video for anyone who wants to try a configuration similar to his. They work pretty well in general, however the EMA, SuperTrend ATR multipliers, and P/L ratio can be tuned/optimized to fit the timeframe/market desired. The video is quite good but not a required watch as I will explain below.
The 200EMA is used as a medium-term trend direction indicator.
- Price closing consistently above the 200EMA means that only long positions should be entered.
- Price closing consistently below 200EMA means that only short positions should be entered.
The 3 SuperTrend indicators should be used as direction confirmation for entries. Typically, price above SuperTrend indicates bullish movement, while price below SuperTrend indicates Bearish movement. However by itself, it is not a great indication to enter/exit positions in my experience. By combining 3 of them with slightly longer periods and increased ATR multipliers, we can get much stronger confirmation of trend direction/strength.
The way they are used in this strategy is such that:
- We only want to enter a position if at least 2 out of 3 SuperTrends are on our side.
- 3/3 SuperTrends on our side is the best case, since we are taking trades WITH momentum/price strength.
- The second farthest SuperTrend from entry price is used as a Stop Loss
SuperTrend being on our side is not the only requirement for an entry however. The probability of success is increased with SuperTrend, and a longer EMA on our side, but we want to be sure that we aren't getting in too late/after the movement has already happened.
So we use Stoch RSI to pick our entries where price is oversold/overbought and reversing. That means the Stoch RSI is above 80, or below 20, and our indication to enter the trade is when the 2 lines cross/begin reversing direction.
So with trend direction on our side, we can get really good entries at these oversold/overbought extremes, especially as it's reversing (Stoch RSI K and D are crossing). This allows us to use the SuperTrend as a support/stop loss on our entry since price should be above it.
Then we just target 1.5x our max loss so that even if we only win 50% of the time, we still make a profit.
The explicit rules of this strategy are as follows:
=== Rules ===
long only
- price above EMA200
short only
- price below EMA200
Stop Loss = 2nd SuperTrend line above (short) or below(long) entry candle
Profit = 1.5x SL/risk (Profit Ratio x Max Loss)
=== Entry Setup ===
LONG
- Stoch RSI below 20, cross up
- at least 2 SuperTrend lines below close
SHORT
- Stoch RSI above 80, cross down
- at least 2 SuperTrend lines above close
P.S. Special thanks to Trade Pro for producing so many quality videos, putting strategy claims to the test, and providing me with so many good ideas I apply to my own strategies.
P/L CalculatorI couldn't find an existing indicator that simply calculated profit and loss, so here's one for quick, visual P/L. My api's lag too much to this helps while scalping.
Inverse BandsThis was the result of quite some time spent examining how much information could be gleamed by studying the interactions between Keltner Channels, STARC Bands and Bollinger Bands. I was surprised by the results.
First of all, there are four fills that are black. Set the transparency of those to 0 and you'll see this indicator the way that it's meant to be seen. Those fills belong to unused sections of the Bollinger Bands.
There are two clouds which represent STARC Bands and the Keltner Channel. There is some delay when they flip from bullish (green) to bearish (red), but they are indicative of the trend. The space between them is black and the narrower that space is, the greater volatility is. Because of this, we don't need the exterior Bollinger Bands.
The Bollinger Bands remain visible as the yellow interior clouds on the top cloud and the blue interior clouds on the bottom cloud. Often, the thicker the yellow or blue cloud is, the less severe a throwback from a given trend reversal will be. Often the thinner that yellow or blue cloud is, the more severe the trend reversal will be. If price is rising into a thin interior yellow cloud, the following dip will be substantial. If price action dips towards a thicker interior blue cloud, often the pump following that dump will be less enthusiastic.
We preserve the Keltner Channel and STARC bands as our cloud because the way that they interact with the three basis lines yields a lot of information.
The yellow Bollinger basis line tells us about trend strength. The closer the BB basis line is to the top of the top cloud or the bottom of the bottom cloud, the stronger the trend is. When it enters the cloud very close to the bottom of the bottom cloud, you know you're looking at a strong pump, and vice versa when it's close to the top of the top cloud.
The purple Keltner Channel basis line and orange STARC Band basis line can forecast short term trend changes one candlestick in advance by contacting any line in either cloud. The moment either basis line touches or crosses any boundary of the clouds, you know that the next candle will change directions. In an uptrend, a touch or cross means the next candle will have a lower high point. In a downtrend, a cross or touch means the next candle will have a higher high point. This is most useful in scalping.
It'd be pretty easy to slap some crossover alerts on to this and useful considering that they come a candle in advance. Feel free to further explore and develop this.
Phoenix Ascending 2.201Hi Everyone!
It's time to make this indicator public to relieve myself of replying to requests for access. There has been an update to this indicator; in which a Stochastic RSI was added to this indicator. Please follow the directions to SETUP the indicator in the SETUP VIDEO provided below.
Phoenix Ascending 2.201 and Bollinger Bands Setup Video.
The following are BASIC rules for the Phoenix 2.201 Indicator. More advanced rules and the requirements for those rules can be found in my publications in my public profile. Unfortunately, I do not have organized videos created on how to use this indicator in full but will be available in the future.
IMPORTANT: The BASIC rules below are beneficial but these are NOT all the rules. More rules and requirements for those rules will be available in the future.
RULE NO. 1
We PREFER the Blue LSMA to be at 80% or higher for SAFE EXIT (SHORT) bets.
We PREFER the Blue LSMA to be at 20% or lower for SAFE ENTRY (LONG) bets.
Rule No. 2
ANY time the red line is approaching a green line that’s moving UPWARD,
Be prepared to make an ENTRY (LONG) when the red line is about to touch the green line that’s moving upward.
One can look at a lower time frame to get a better idea of how much longer you may have
To wait for the red line to touch the green line. In many cases, you may make ENTRY (LONG)
Just before the red line actually touches the green line that’s moving up in that higher time frame
You were initially using as your COMPASS. I currently have the 1-Month TF as a compass for EURUSD.
Rule No. 3
ANY time the red line is approaching a green line that’s moving DOWNWARD,
Be prepared to make an EXIT (SHORT) when the red line is about to touch the green line that’s moving downward.
One can look at a lower time frame to get a better idea of how much longer you may have
To wait for the red line to touch the green line. In many cases, you may make your EXIT (SHORT)
Just before the red line actually touches the green line that’s moving downward in that higher time frame
You were initially using as your COMPASS. I currently have the 1-Month TF as a compass for EURUSD.
Rule No. 4
The Green Line and/or Ghost Line can often help one determine when an upward or downward move in a particular time frame
Is nearly exhausted and about to reverse.
Example for Upside Exhaustion about to reverse to the Downside:
When the Green Line and/or Ghost line is at 80% level or higher, this is a good indicator to inform
Us the current upside move may be approaching exhaustion. You can look at a higher time frame to try to gain
More insight as to whether this will only be a brief dip down in the lower time frame IF the higher time frame you
Went to reveals there is a lot more room remaining for the Green and/or Ghost Lines to reach the 80% or higher level.
Example for Downside Exhaustion about to reverse to the Upside:
When the Green Line and/or Ghost line is at 20% level or lower, this is a good indicator to inform
Us the current downside move may be approaching exhaustion. You can look at a higher time frame to try to gain
More insight as to whether this will only be a brief dip up in the lower time frame IF the higher time frame you
Went to reveals there is a lot more room remaining for the Green and/or Ghost Lines to reach the 20% or lower level.
Rule No. 5
The same rules you see in Rule No. 4 also apply to the Stochastic RSI. Keep in mind I changed the colors of the
Stochastic RSI to the following: Red default changed to Purple and Blue changed changed to Black to avoid confusing
Them with the lines in Godmode.
When the Stochastic RSI is at 80% or higher level, we need to be on guard for a reversal to the downside.
When the Stochastic RSI is at 20% or lower level, we need to be on guard for a reversal to the upside.
EXTREMELY IMPORTANT to apply these rules in GROUPS OF TIME FRAMES.
"TYPES" OF TIME FRAME GROUP TRADING SIGNALS
Scalping Group Signals: Signals provided for this group involve analyzing the following two groups of time frames. Short Term Group as a compass and Scalping Group for confirmation and more precise entry/exit.
Scalping Group: 6min. 12min. 23min & 45min.
Short Term Group: 90min. 3hr. 6hr. & 12hr.
Short Term Group Signals: Signals provided for this group involve analyzing the following two groups of time frames. NearTerm Group as a compass and Short Term Group for confirmation and more precise entry/exit.
Short Term Group: 90min. 3hr. 6hr. & 12hr.
Near Term Group: 24hr. 2-Day, 3-Day & 4-Day
Near Term Group Signals: Signals provided for this group involve analyzing the following two groups of time frames. Mid Term Group as a compass and Near Term Group for confirmation and more precise entry/exit.
Near Term Group: 24hr. 2-Day, 3-Day & 4-Day
Mid Term Group: 3-Day, 6-Day, 9-Day & 12-Day
Mid Term Group Signals: Signals provided for this group involve analyzing the following two groups of time frames. Long Term Group as a compass and Mid Term Group for confirmation and more precise entry/exit.
Mid Term Group: 3-Day, 6-Day, 9-Day & 12-Day
Long Term Group: 1-Week, 2-Week, 3-Week & 4-Week
Long Term Group Signals: Signals provided for this group involve analyzing the following two groups of time frames. Macro Term Group as a compass and Long Term Group for confirmation and more precise entry/exit.
Long Term Group: 1-Week, 2-Week, 3-Week & 4-Week
Macro Term Group: 1-Month, 2-Month, 3-Month & 4-Month
Macro Term Group Signals: Signals provided for this group involve analyzing the following two groups of time frames. Macro Term Group as a compass and Long Term Group for confirmation and more precise entry/exit.
Macro Term Group: 1-Month, 2-Month, 3-Month & 4-Month
Super Macro Group: 3-Month , 6-Month, 12-Month & 24-Month
Trend Risk Indicator (TRI)The Trend Risk Indicator is a simple bands indicator made of 2 custom averages of candlesticks ranges calculated within the variable “ BandBars ” period.
Upper and lower channel bands width can be adjusted with the “ Deviation ” variable, which act as a simple factor to enlarge the spread between them.
When Close crosses over the upper band, it is a bearish signal and candlesticks are painted in Red.
When Close crosses under the lower band, it’s a bullish signal and candlesticks are painted in Green.
One of the most interesting indicators for 1 minute scalping. Recommended to use on Renko bars.
*drag to chart and pin to scale, also remove borders from candlesticks.
CHK FOLLOW THE STAIRSCHK FOLLOW THE STAIRS....
The stairs are nothing but HIGH LOW CHANNEL at HTF or LTF
I observed 10 Period Moving Average an optimum length for the Staircase
you can change it to 8 or 13, one will generate noise, other will generate lag
Tinker with the Staircase Time Frame to get an optimum fit
The script also shows Strength of the Trend.
If there is a gap between the price and the stairs, that is relection of the strength
The script can also be used for scalping.
The Vostro Indicator by KIVANÇ fr3762The VOSTRO indicator is a trend indicator that automatically provides buying and selling signals. The indicator marks in a window the potential turning points. The indicator is recommended for scalping.
The Vostro indicator determines the overbought zones (value greater than +80) and the oversold zones (less than the -80 level)
BUY signal: The Vostro curve moves below the -80 level and forms a trough – Turnaround of the upward trend
SELL signal: The Vostro curve moves above the +80 level and forms a peak – Downward trend
further info:
www.prorealcode.com
Here's the link to a complete list of all my indicators:
t.co
Yazar: KıvanÇ @fr3762 twitter
Şimdiye kadar paylaştığım indikatörlerin tam listesi için: t.co
Relative Vigor IndexHere we are looking at a trend strength indicator based on the Relative Vigor Index(RVI). The RVI measures trend strength by comparing the open-close and high-low ranges for the current and three most recent periods. As a zero-centered oscillator, the RVI oscillates above and below zero to signal the strength of the trend.
As there are different ways to interpret the RVI, we have included 3 different modes for traders to choose from in the input option menu:
1. Zero-Crossing:
The RVI Histogram will turn green when it crosses above zero and red when it crosses below. Therefore, a green RVI means the trend is bullish and red means bearish. This mode is better for longer-term swing trading in comparison to the other 2 modes.
2. Increasing / Decreasing:
The RVI histogram will turn green when it is increasing(rvi >= rvi ) and red when it is decreasing. A green RVI is viewed as a bullish signal and red means bearish. This mode is a good middle-ground between the Zero-Crossing and Signal Comparison modes.
3. Signal Comparison:
Here, the RVI is compared to its signal line. If the RVI is greater than its signal line, the histogram is green, indicating a bullish trend, while red means bearish. This mode is preferred for scalping.
Hope everyone finds this one useful!
You can check out our other invite only studies/strategies at our website: profitprogrammers.com
[M10] Quad MA Trend ScalperFour adjustable moving averages set in order to produce buy and sell signals, works best on smaller timeframes from my backtesting, 10M - 30M seems optimal for scalping.
The idea behind this script is to only enter positions that are following the trend in order to minimise drawdown and decrease risk when using leverage.
The script will only enter long positions when MA crossover occurs above the Long MA 2.
The script will exit a long position when MA Short crosses below Long MA 1.
The script will only enter short positions when MA cross under occurs below the Long MA 2.
The script will exit a short position when MA Short crosses below Long MA 1.
Key Levels [@treypeng]Draws horizontal lines for Daily, Hourly (1) and Weekly levels. Really handy to switch on quickly when scalping.
Light blue: Previous hour OHLC
Thick light blue: Previous hour Close / current hour Open
Dark blue: Yesterday OHLC
Thick dark blue: Yesterday Close / today Open
Purple: Weekly Open
It's a bit ugly, I'd prefer horizontal rays instead of lines stretching back across the chart but I couldn't figure out how to do this in PineScript. If I get it sorted, I'll publish an update.
SHERRIFx (variation) IN TRENDI share this script where I made some modifications to the SHERRIF strategy to perform trend scalping.
I use:
- Bollinguer Bands (20)
- CCIs (14 and 40)
- EMAS (20, 57, 100, 200)
- Stochastics (13,3,3) in 70, 30.
I apply in low temporalities, especially M15 and M1, it can also be used to make binaries or in higher temporalities by modifying the constants.
If you improve this program, share it.
Greetings.
Two Bar Break Line Alerts R1.0 by JustUncleLThis indicator with default settings is designed for BINARY OPTIONS trading. The indicator can also be used for Forex trading with some setting changes. The script shows Two Bar Pullback Break lines and alerts when those Break lines are Touched (broken) creating a short term momentum entry condition.
For a Bullish Break (Green Up Arrow) to occur: first must have two (or three) consecutive bear (red) candles which is followed by a bull (green) candle creating a pivot point. The breakout occurs then the High of the current Bull (green) exceeds the highest point of the previous two (or three) pivotal bear candles. The green channel Line shows where the current Bullish BreakOut occurs.
For a Bearish Break (Red Down Arrow) to occur: first must have two (or three) consecutive bull (green) candles which is followed by a bear (red) candle creating a pivot point. The breakout occurs when the Low of the current Bear (red) drops below the lowest point of the previous two (or three) pivotal Bull candles. The red channel Line shows where the current Bearish BreakOut occurs.
The break Line Arrows can optionally be filtered by the Coloured MA (enabled by default), a longer term directional MA (disabled by default) and/or a MACD condition (enabled by default) as a momentum filter.
You can optionally select three Bar break lines instead of two. The three bar break lines are actually equivalent to Guppy's Three Bar Count Back Line method for trade entries (see Guppy's video reference below).
Included in this indicator is an ability to display some basic Binary Option statistics, when enabled (enabled by default) it shows Successful Bars in Yellow and failed Bars in Black and the last Nine numbers on the script title line represent the Binary option Statistics in order:
%ITM rate
Total orders
Successful Orders
Failed Orders
Total candles tested
Candles per Day
Trades per Day
Max Consecutive Wins
Max Consecutive Losses
You can start the Binary Option statistics from a specific Date, which is handy for checking more recent history.
HINTS:
BINARY OPTIONS trading: use 5min, 15m, 1hr or even Daily charts. Trade after the price touches one of the Breakout lines and the Arrow first appears. Wait for the price to come back from Break Line by 1 or 2 pips, the alert arrow must stay on and candle change to black, then take Binary trade expiry End of Candle. If price pull back and arrow turns off, don't trade this candle, move on you probably don't have momentum, there will be plenty of other trigger events. The backtesting results are good with ITM rates 65% to 72% on many currency pairs, commodities and indices. Realtime trading has confirmed the backtesting results and they could even be bettered, provided you are selective on which signals to trade (strong MACD support etc), that you are patient and disciplined to this trading method.
FOREX trading: the default settings should work with scalping. For longer term trades try with settings change to a more standard MACD filter or slower to catch the longer term momentum swings and the idea would be to trade the first Break Line alert that occurs after a decent Pullback in the direction of the trend. Setting the SL to just above/below the Pivot High/Low and set target to two or three times SL.
References:
"Fundamentals of Price Action Trading for Forex, Stocks, Options and Futures" video:
www.youtube.com
Other videos by "basecamptrading" on Naked Trading.
"Taking Profits in Today's Market by Daryl Guppy" video:
www.youtube.com
NG [Multi-Stochastics]Multiple stochastic script with trend direction.
* Each base shows 3 lines multiplied by 1.618
* Possible to chose how to calculate MA of stochastics SMA, EMA, DEMA, TEMA.
* Possible to chose how to calculate trend.
* Trend adjustment is to adapt to current situation not for signals
Fast stochastics gives a lot of noise but some times good for scalping.
Pivot Boss 4 EMA Summary:
Creates one indicator with four exponential moving averages based off the central pivot point
which assists you in trading pure price action using floor pivots.
This also helps you to avoid getting chopped up during price confluence.
How to use:
When T-Line cross Green Short EMA it can be used for scalping.
When Short EMA pulls back to Medium EMA you can buy more or sell more
without having to exit your position prematurely before trend direction changes.
This can also be used as position entry points to make sure you are getting the best possible price.
When T-Line, Short EMA and Medium EMA cross over Long EMA you go long or short.
GK Trend Ribbon SWING + PREPARE HUD
Is a trend-following swing-trading indicator designed to identify high-probability directional bias, early trade preparation, and confirmed trend shifts using a volatility-adjusted zero-lag trend ribbon. This script is purpose-built for traders who value patience, structure, and confirmation, rather than fast scalping or candle-by-candle noise.
HOW IT WORKS
indicator is built around a Zero-Lag EMA (ZLEMA) to reduce traditional EMA delay while maintaining smooth trend behaviour. An ATR-based volatility envelope is applied above and below the ribbon to define dynamic trend boundaries. Trend states are determined as follows: Bullish mode: Price sustains above the upper volatility band with confirmation Bearish mode: Price sustains below the lower volatility band with confirmation Neutral mode: Price remains inside the ribbon range A trend change is only confirmed after multiple bar confirmation, helping filter false breakouts and market noise.
PREPARE SIGNALS
(Early Awareness)Before a confirmed trend flip, the indicator displays PREPARE GK BUY / PREPARE GK SELL warnings: These appear only on the live (unconfirmed) candle They act as early awareness, not entry signals They disappear if conditions are not confirmed This allows traders to prepare mentally and structurally without repainting past signals. Confirmed Signals Confirmed GK BUY / GK SELL signals are only printed after bar close and only when: A valid trend transition is confirmed Directional conditions persist The previous trend state is invalidated Once printed, confirmed signals do not repaint.
HUD BANNER
The integrated HUD provides real-time market state feedback: Bullish Mode Bearish Mode Neutral / Wait Prepare Buy / Sell warnings This allows quick decision-making without needing to interpret raw price action continuously. Inputs & Customisation Swing Ribbon Length – controls trend smoothness (higher = slower, stronger trends)ATR Length – volatility measurement period Band Multiplier – sensitivity of trend boundaries Confirmation Bars – number of bars required to confirm a trend shift.
RECOMENDED USEGE
Best suited for 15-minute, 30-minute, and higher time frames Designed for swing trading, not scalping Expect natural drawdown during trend development Works best when combined with proper risk management and market structure awareness
Important Notes This indicator does not predict price It reacts to confirmed market structure and volatility No indicator guarantees profitability Always use appropriate risk management Disclaimer This script is provided for educational and analytical purposes only .It is not financial advice .Trading involves risk, and users are responsible for their own trading decisions.
Ehlers Adaptive Trend FilterEHLERS ADAPTIVE TREND FILTER | Lag-Compensated SuperSmoother
Based on John Ehlers' "Smoothing The Data" (2014), this indicator extends
the SuperSmoother with hybrid Butterworth filters and dynamic lag compensation.
━━━━━━━━━━━━━━━━━━━━━━━━━━━━━━━━━━━━━━━━━━━━━━━
KEY FEATURES:
✓ 3 FILTER MODES (lag-measured empirically)
• 2p+2p (Fast): 62 bars lag — responsive, great for scalping
• 3p+2p (Hybrid): 70 bars lag — RECOMMENDED, best risk/reward
• 3p+3p (Smooth): 88 bars lag — ultra-smooth for macro trends
✓ LAG-COMPENSATED MOMENTUM
Automatically extends momentum lookback to account for filter delay.
Keeps momentum signals responsive despite heavy smoothing.
✓ CONFIRMATION-BASED REVERSALS
Requires 2+ bars confirmation before signaling reversals.
~60% fewer false signals than single-bar detection.
Reduces whipsaws on volatile assets.
✓ VOLATILITY-ADAPTIVE THRESHOLDS
Automatically scales all deviation levels based on asset volatility.
Works seamlessly across:
- Crypto (20%+ volatility)
- Equities (10-15% volatility)
- Forex (2-5% volatility)
- Bonds (<2% volatility)
✓ MULTI-TIMEFRAME AUTO-CALIBRATION
Automatically optimizes filter periods for your trading style:
- Scalping (<1H): 2p+2p (Fast)
- Swing Trading (1D): 3p+2p (Hybrid) ← Default
- Position Trading (1W+): 3p+3p (Smooth)
━━━━━━━━━━━━━━━━━━━━━━━━━━━━━━━━━━━━━━━━━━━━━━
WHAT YOU GET IN THE DASHBOARD:
• TREND STATUS: Good/Bad (signal above/below baseline)
• MOMENTUM: Strong/Steady/Weak/Opposing (lag-compensated)
• MOMENTUM TREND: Increasing/Decreasing/Stable
• SUPPORT BASELINE: Bull Reversal/Bear Reversal/Aligned
• SUPPORT SLOPE: Positive/Negative/Neutral (with %)
• SAFETY MARGIN: % distance from baseline
• PRICE DEVIATION: Extended/Expanding/On Course/Lagging
• TECHNICAL RATING: Perfect/Transition/Dangerous/Critical
• VOLATILITY: Live % + historical baseline
• FILTER CONFIG: Active mode + exact lag metric
• THRESHOLD LEVELS: Adaptive or Fixed mode
• ANALYSIS MODE: Auto-calibrated or Manual
━━━━━━━━━━━━━━━━━━━━━━━━━━━━━━━━━━━━━━━━━━━━━━
PERFORMANCE (Backtested 2020-2024):
ES 1D (3p+2p Hybrid):
✓ 68% Win Rate | 2.2:1 Profit Factor
✓ 12% Max Drawdown | Avg Trade: +45 points
BTC 4H (3p+2p Hybrid):
✓ 62% Win Rate | 1.9:1 Profit Factor
✓ 18% Max Drawdown | Avg Trade: +$280
EURUSD 1H (2p+2p Fast):
✓ 55% Win Rate | 1.7:1 Profit Factor
✓ 8% Max Drawdown | Avg Trade: +45 pips
━━━━━━━━━━━━━━━━━━━━━━━━━━━━━━━━━━━━━━━━━━━━━━
HOW TO USE:
1. Add indicator to chart (any asset, any timeframe)
2. Select Filter Configuration:
→ 3p+2p (Hybrid) recommended for most traders
3. Read the dashboard (bottom-right table)
4. Trade signals:
→ ENTER: Trend Status = "Good" + Momentum = "Strong"
→ EXIT: Trend Status = "Bad" OR background highlight appears
5. Combine with your own trade plan (entries, sizing, risk management)
━━━━━━━━━━━━━━━━━━━━━━━━━━━━━━━━━━━━━━━━━━━━━━
WHY THIS INDICATOR?
Most traders face a painful choice:
→ Fast MA (like EMA20): Responsive but too many false signals
→ Slow MA (like EMA100): Smooth but miss 20% of moves
Ehlers SuperSmoother solves this using 40+ years of digital signal
processing research. Butterworth filters preserve trend direction while
removing high-frequency noise more efficiently than moving averages.
The innovation: LAG COMPENSATION
By measuring the exact delay of each filter and dynamically adjusting
momentum lookback windows, you get BOTH clean trends AND responsive signals.
━━━━━━━━━━━━━━━━━━━━━━━━━━━━━━━━━━━━━━━━━━━━━━
TECHNICAL DETAILS:
Filter Type: Ehlers 2-Pole & 3-Pole SuperSmoother (Butterworth)
Lag Compensation: Empirically measured via step response
Momentum Adjustment: 1.0x (2p+2p) / 1.15x (3p+2p) / 1.45x (3p+3p)
Volatility Model: 75th percentile of rolling 252-day returns
Reversal Confirmation: 2-bar minimum (reduces noise)
Repainting: NO (Pine Script v6, confirmed bars only)
━━━━━━━━━━━━━━━━━━━━━━━━━━━━━━━━━━━━━━━━━━━━━━
DISCLAIMER:
This indicator is for educational and analytical purposes only.
NOT financial advice, investment recommendations, or profit guarantees.
• Past performance does NOT guarantee future results
• All trading involves risk, including loss of principal
• Test extensively on historical data before live trading
• "Safety" and "Risk" metrics measure technical deviation, NOT capital protection
• Start with small position sizes and proper risk management
━━━━━━━━━━━━━━━━━━━━━━━━━━━━━━━━━━━━━━━━━━━━━━
REFERENCE:
Ehlers, J. (2014). "Smoothing The Data." Stocks & Commodities Magazine.
Oppenheim & Schafer. "Discrete-Time Signal Processing" (3rd ed.)
Intraday Refuges/Shelters (RID)==========================================
RID (INTRADAY SHELTERS/REFUGES) INDICATOR
==========================================
*Fair warning: this may be more words than a humble, simple indicator truly
needs… but Claude insisted.
// ** INTRODUCTION ** //
RID (Intraday Shelters/Refuges) is a lightweight, fast, and easy-to-implement
indicator designed for monitoring price action on intraday timeframes — the same
ones used by institutional operators to execute their trades within each market session.
The indicator generates a framework of support and resistance levels automatically
calculated from the asset's Daily Opening Price (D.O.P.). These levels are established
using fixed percentages that have proven their effectiveness in institutional trading
for decades, constituting "textbook" references widely adopted by market professionals.
RID integrates as an optional module within our Weekly Shelters (RS) indicator, allowing
the operator to simultaneously control their weekly positions and, when conditions warrant,
move down to intraday operations without loading additional indicators or losing sight
of the higher timeframe.
// ** INDICATOR FUNDAMENTALS ** //
The foundation of RID rests on a proven market principle: the daily opening price acts
as a "psychological anchor" that influences participant behavior throughout the entire session.
Why does this method work?
• UNIVERSAL REFERENCE POINT: The daily opening price is objective data, visible to all
market participants simultaneously. Institutions, algorithms, and retail traders use it
as a common reference to calibrate their decisions.
• STANDARD PERCENTAGE LEVELS: The percentages used (0.382%, 1.0%, 1.5%, 2.0%, 2.5% and
extensions) are not arbitrary. They represent intraday volatility thresholds that have
historically acted as inflection points across multiple asset classes.
• SELF-FULFILLING PROPHECY EFFECT: When a critical mass of operators place orders at the
same percentage levels —whether for profit-taking, protective stops, or entries—
these levels become high-probability price reaction zones.
• INSTITUTIONAL RISK MANAGEMENT: Institutional trading desks frequently define their daily
loss limits and profit targets in percentage terms relative to the open. RID captures
this logic and makes it visible for retail operators.
The ±0.382% level deserves special mention: it's a derivation of the Fibonacci golden ratio
(0.382) applied to the intraday context, representing the first significant movement threshold
from the opening.
// ** INDICATOR OBJECTIVES ** //
1) Facilitate manual intraday trade execution by providing a framework of target prices
established under a scheme of mathematical certainty, eliminating subjectivity in
defining entries, exits, and stops.
2) Serve as a lightweight and modular tool, easily integrable —either as an overlay or
source code— with strategies and indicators specialized in intraday trade execution,
both manual and automated.
3) Provide a visual reference framework that allows the operator to quickly assess the
intraday market "temperature": Is price near a key support or resistance? Has it already
reached the session's typical movement target? Is it time to seek entries or protect profits?
// ** INDICATOR TECHNICAL FEATURES ** //
• 21 CONFIGURABLE LEVELS: 11 main levels (±0.382%, ±1.0%, ±1.5%, ±2.0%, ±2.5% and D.O.P.)
plus 10 extended levels (±3.0% to ±5.0%) for high volatility sessions. Each level can
be individually enabled or disabled according to operator needs.
• AUTOMATIC D.O.P. DETECTION: The indicator automatically identifies the start of each daily
session and captures the opening price without user intervention.
• CONFIGURABLE HISTORY LIMIT: Option to limit processing to the last N days (default: 3),
optimizing performance on very low timeframes (1m, 5m) where excess historical data can
slow down the chart.
• PROFESSIONAL VISUALIZATION: Labels with formatted price (thousands separators) and
percentage, placeable with configurable offset. The D.O.P. level (0%) is highlighted
with differentiated width.
• VERTICAL REFERENCE LINES: From D.O.P. to each level, facilitating visualization of the
percentage distance traveled.
• FULL CUSTOMIZATION: Colors, widths, line styles (solid, dashed, dotted), label opacity,
and forward extension fully adjustable.
• PRICE SCALE INTEGRATION: Levels can be displayed on the right margin of TradingView,
controllable from the indicator's Style tab.
• BAR REPLAY COMPATIBILITY: Works perfectly with Bar Replay for back-testing
intraday strategies.
• OPTIMIZED PERFORMANCE: Efficient architecture with persistent arrays and intelligent
updating, suitable for timeframes down to 1 minute.
// ** OPERATING INSTRUCTIONS ** //
INITIAL SETUP:
1) Load the indicator on a chart with 4H or lower timeframe (1H, 30m, 15m, 5m, 1m).
2) Enable "Limit history by days" and adjust "Maximum days to display" according to your needs:
• For scalping (1m-5m): 1-2 days
• For day trading (15m-1H): 2-3 days
• For intraday swing (4H): 3-5 days
OPERATIONAL USE:
3) Identify the D.O.P. (0% line): This is your central reference point for the session.
4) Observe current price position relative to levels:
• Price above D.O.P. → Session with bullish bias
• Price below D.O.P. → Session with bearish bias
5) Use levels as:
• ENTRIES: Look for reversal signals when price reaches S1-S5 (buys) or R1-R5 (sells)
• TARGETS: Set take-profits at the next resistance level (longs) or support (shorts)
• STOPS: Place protective stops beyond the immediate opposite level
PRACTICAL RULES:
6) The ±1.0% and ±2.0% levels are historically most respected; prioritize them.
7) If price exceeds ±2.5% from open, it might be time to take profits and close your position
or consider enabling extended levels (±3.0% to ±5.0%).
8) High volatility days (news, earnings): wait for price to respect at least one level
before trading in its direction.
9) Combine RID with other indicators from our ecosystem (RS, RMP, RLP/RLPS) to confirm level
confluence across multiple timeframes.
VISUAL OPTIMIZATION:
10) For clean charts: keep enabled only main levels (±0.382% to ±2.5%).
11) For detailed volatile asset analysis: also enable extended levels.
12) Adjust "Label margin" to prevent overlap with current price.
// ** INTEGRATION WITH OTHER SHELTER VALUE INDICATORS ** //
RID is part of a complete shelter-based analysis ecosystem we have developed:
• RLP (Long-Term Shelters): For automatic determination of the preponderant phase
of a Zigzag, which institutional investors choose as the base of a Fibo whose
levels calculate order placement projection over the following months and years.
• RLPS (Simplified Long-Term Shelters): Simplified version of RLP where known
coordinates of the preponderant phase are captured, obtained through own analysis
or automatically with the RLP indicator.
• RMP (Medium-Term Shelters): Provides psychological shelter and resistance levels
that institutional investors establish at the beginning of each year. They
constitute the main framework used by professionals to plan operations
throughout the year.
• RS (Weekly Shelters): For short-term tactical analysis (4H, 1H) based on selected
phases of one or two Zigzags that define Fibo tracing, over recent major and minor
degree pauses, whose levels take effect during the current and following weeks.
• RID (Intraday Shelters): This indicator. For intraday operations based on levels
calculated from daily opening price, designed for 4H or lower timeframes,
including scalping strategies.
By combining RID with RLP/RLPS, RMP and RS, a multilevel scaffolding is built that
allows trading with clarity on any time horizon, from minute positions to operations
projected over months and years.
// ** NOTES ** //
• All comments regarding detected errors and improvement suggestions are welcome and deeply appreciated. Your feedback helps us refine these tools.
• To our Hispanic speaking friends, we sincerely regret to inform you that we have not
included the Spanish translation in the published version, due to our latent concern
regarding the ambiguous rules about prohibitions on publishing indicators documented
or described in languages other than English.
• Sharing is motivating because there’s no better way to receive genuine feedback
of real acceptance.
• RECOMMENDED VALIDATION METHOD: Use TradingView's Bar Replay to verify, session by
session, how price of your favorite asset interacts with RID levels. This personal
validation will give you statistical confidence before incorporating the indicator
into your actual trading.
Happy hunting in this magnificent jungle!
RLPS -Simplified Long-Term Support/Resistance Levels (Shelters)// Introduction //
RLPS (Simplified Long-Term Shelters) is a streamlined indicator designed for traders who have already identified the preponderant long-term phase of their assets and want to efficiently track multiple assets using pre-calculated Fibonacci levels.
IMPORTANT: Before using this indicator, you need to have determined the date-price coordinates of the preponderant phase (i0→i1 pivots) for your asset(s). These coordinates can be obtained using our master RLP indicator (Long-Term Shelters), which automatically helps to calculates them, or through your own research and analysis.
// Theoretical Foundation //
Many traditional institutional investors use the latest higher-degree market phase that stands out from others (longest duration and greatest price change on daily timeframe) to base a Fibonacci retracement on whose levels they open long-term positions. These positions can remain open to be activated in the future even years in advance. The phase is considered valid until a new, more preponderant phase develops over time.
RLPS allows you to manually input these pre-identified phase coordinates and draw Fibonacci levels that serve as Long-Term Shelter Levels—marking future trading points (entries, exits, risk management) that remain valid for months and even years.
// Key Features //
• Supports up to 5 different assets with permanently stored phase coordinates
• Dropdown selector to quickly switch between configured assets
• No ZigZag calculation required—user provides pre-calculated coordinates
• Timeframe-agnostic: levels remain constant across all timeframes
• Works with any price source (exchange) regardless of historical data availability
• Asset Information table with visual validation (✅ Match / ❌ No Match)
• Long-Term Historical Prices (LTHP): add up to 5 psychological price levels per asset (historical highs/lows, annual opening prices, etc.)
• Customizable Fibonacci levels, colors, styles, and label formatting
• Logarithmic scale support for volatile assets like cryptocurrencies
// Quick Start Guide //
STEP 1: In TradingView, select "Bitcoin / U.S. dollar" from Bitstamp Exchange (BITSTAMP:BTCUSD).
STEP 2: Configure the chart to Daily (D) timeframe.
STEP 3: Load the RLPS indicator. Initially no drawing appears (fields are empty by default).
STEP 4: Open indicator settings and activate "Practice Asset Data Table" in the GENERAL section.
STEP 5: A table appears with sample data for 5 assets. Locate "Bitcoin on Bitstamp":
- i0 Date: 2020-03-13 18:00 | i0 Price: 3850.0
- i1 Date: 2021-11-10 18:00 | i1 Price: 69000.0
STEP 6: Copy this data to "ASSET 1 - IDENTIFICATION AND DATE-PRICE PIVOT COORDINATES".
STEP 7: Verify "Asset 1" is selected in the dropdown and close settings.
STEP 8: You should now see the yellow diagonal phase line, horizontal Fibonacci levels, and the validation table showing "✅ Match".
STEP 9: Navigate the chart to verify how Fibonacci levels align with historical support/resistance zones.
// Important Notes //
• The sample data in the Practice Table was validated in 02/2026 and serves as reference only.
• It is your responsibility to validate or update the preponderant phase of your assets over time.
• Use our master RLP indicator to automatically find and calculate preponderant phases, then transfer the coordinates here for permanent tracking.
• You can deactivate the Practice Table once you've copied the data you need.
// Shelter Indicators Ecosystem //
RLPS is part of a comprehensive ecosystem of indicators for price action analysis based on shelter levels:
RLPS (Simplified Long-Term Shelters): This indicator. Simplified version of RLP that allows manual input of previously identified preponderant phase coordinates. Ideal for permanent operations with multiple assets across different timeframes.
RLP (Long-Term Shelters): Automatically identifies the preponderant Zigzag phase that institutional investors use as a reference to project Fibonacci levels. These levels determine order placement over the following months and years.
RMP (Mid-Term Shelters): Provides the psychological shelter and resistance levels that institutional investors establish at the beginning of each year. These form the main framework that professionals use to plan entry and exit operations throughout the year.
RS (Weekly Shelters): Tactical structural analysis indicator designed to precisely track price action and manage positions during current weeks.
RID (Intra-Day Shelters): For intraday operations based on levels calculated from the daily opening price. Designed for 1H timeframes or lower, including scalping strategies.
By combining RLPS, RLP, RMP, RS, and RID, you obtain a multi-timeframe framework that provides certainty and clarity to apply strategies grounded in price action, across any time horizon: from scalping to long-term investments.
// Final Notes //
We sincerely regret to inform you that we have not included the Spanish translation previously provided in our indicators, due to our significant concern regarding the ambiguous rules on publication bans related to indicators.
Sharing motivates. Happy hunting in this great jungle!
Ross GPT - Momentum Scalp 1mThis strategy is a long-only momentum scalping system designed for the 1-minute timeframe, combining VWAP, EMA trend alignment, MACD momentum, volume confirmation, and session filtering to identify high-probability intraday entries for pre-market session and U.S small cap stocks with high % change compared to previous day. Apply only for stock price between $2-$20.
⸻
1️⃣ Date Range Filter
The strategy trades only within a user-defined date range.
• Default range: Feb 1, 2026 – Dec 31, 2069
• Trades are ignored outside this period
• Useful for controlled backtesting and forward testing
⸻
2️⃣ Indicators Used
VWAP
• Used as a trend and mean-reversion filter
• Only long trades are allowed when price is above VWAP
MACD (12, 26, 9)
• Momentum confirmation
• Entry requires MACD line > Signal line
• Exit is triggered if MACD crosses below Signal
Exponential Moving Averages
• EMA 9
• EMA 20
• EMA 50
• EMA 200 (visual reference)
Trend Bias Requirement
• Bullish alignment:
• EMA 9 > EMA 20 > EMA 50
Volume Strength (Price Action Proxy)
• Counts bullish candles over the last 5 bars
• Entry requires at least 3 green candles
• Used as a confirmation of buying pressure
⸻
3️⃣ Session Filter
Trades are allowed only during a specific intraday session:
• 06:59 – 09:00 (exchange time)
• Designed to focus on high-liquidity morning momentum
⸻
4️⃣ Entry Conditions (Long Only)
A buy signal is generated when all of the following are true:
• Price is above VWAP
• MACD line is above Signal line
• EMA alignment confirms bullish trend
• Bullish candle count condition is met
• Current bar is within the allowed session
• Current bar is within the selected date range
• No existing open position
Only one position at a time is allowed.
⸻
5️⃣ Trade Execution
• Market entry when all conditions align
• Fixed position sizing (default: 500 units)
• Commission and slippage are included for realism
⸻
6️⃣ Exit Logic
Primary Exit (Bracket Order)
• Take Profit: +0.25
• Stop Loss: -0.10
• Managed using strategy.exit for intra-bar accuracy
Indicator-Based Exit
• If MACD crosses below the Signal line, the position is closed immediately at market
This dual exit system allows both quick scalps and early momentum failure exits.
⸻
7️⃣ Visual Aids
The strategy plots all key indicators used in decision-making:
• EMA 9, 20, 50, 200
• VWAP
This allows easy visual verification of entries and exits directly on the chart.
⸻
⚠️ Notes
• Designed for scalping and short-duration trades
• Best suited for high-liquidity instruments
• Results may vary depending on symbol, spread, and market conditions
• This script is for educational and research purposes only
ROC-WMA bull bear indicatorROC-Weighted MA Oscillator
By Ludovic B
Modified source code of SeerQuant
The ROC-Weighted MA Oscillator (ROCWMA) is a momentum-driven oscillator designed to expose hidden acceleration and deceleration phases in price action by dynamically weighting a moving average with the normalized Rate of Change (ROC).
Instead of treating all price deviations equally, this indicator amplifies meaningful moves and suppresses low-energy noise, making it particularly effective in scalping, intraday trading, and momentum reversals.
🔧 Core Concept
A base moving average (SMA, EMA, TEMA, DEMA, HMA, ALMA, etc.)
Weighted by normalized ROC
Transformed into a Z-score oscillator for comparability across assets
Smoothed with a signal line for timing precision
Result: a context-aware oscillator that adapts to market intensity.
📊 What the Oscillator Shows
Bullish momentum when histogram is positive and expanding
Bearish momentum when histogram is negative and expanding
Neutral zone to filter chop and avoid over-trading
Automatic color logic to highlight regime changes
Optional candle coloring reflects the active momentum state.
🎯 Signal-Based Price Markers (Advanced Feature)
This script includes price-chart markers when:
The signal line retraces to X% of the maximum oscillator bar of the current momentum phase
AND the signal slope confirms exhaustion (rising or falling)
Key characteristics:
Adaptive thresholds (relative, not fixed)
Separate logic for bullish and bearish phases
Reset on each neutral-zone transition
Configurable number of markers per momentum cycle
This makes the indicator particularly useful for:
Pullback entries
Momentum fading
Timing partial exits
⚙️ Customization
Fully adjustable ROC length, MA type, signal length
Neutral zone threshold control
Multiple color schemes
Optional candle coloring
Adaptive signal-to-oscillator percentage logic
🧠 Best Use Cases
Scalping (M1–M5)
Intraday momentum confirmation
Pullback and exhaustion detection
Cross-asset trading (FX, indices, crypto, metals)
ROCWMA is not a lagging oscillator.
It is a momentum intensity detector built to reveal when price moves matter.


