📊 Watchlist Analysis – 12th Sept 2025
________________________________________
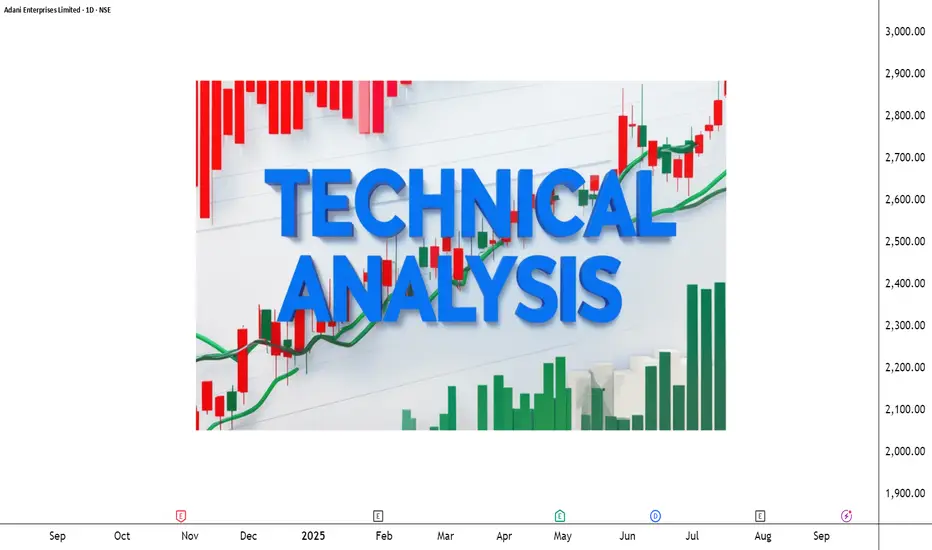
📌 ADANIENT (2398.80) – Rising Wedge
Momentum: Strong | Bullish | Risk: Low | Volume: High
Important Resistance Levels: 2499.68 / 2580.66 | Stop Loss: 2337.72
📊 Technical Indicators Explained
Adani Enterprises (ADANIENT) is flashing strong technical signals. A rising wedge structure 🔺 shows price tightening towards resistance, with today’s bullish breakout candle 🔥 backed by heavy volume surge 🚀. The RSI breakout ⚡ confirms strengthening momentum, while the BB Squeeze-Off release 📊 hints at a fresh volatility expansion. With support zones holding firm and price eyeing higher resistances, the stock is entering a decisive breakout zone.
Support & Resistance Zones
🟢 Support: 2353 | 2307 | 2275
🔴 Resistance: 2432 | 2464 | 2510
Investment Outlook & Conclusion
📈 Bullish Case – Strong momentum with volume support may push towards higher resistances.
📉 Bearish Case – A drop below SL can attract downside pressure.
⚡ Momentum Case – Aligned with momentum; good for short-term swings.
📅 Perspective – Short-term breakout play; long-term needs stability.

________________________________________
📌 AUROPHARMA (1109.20) – Double Bottom
Momentum: Strong | Bullish | Risk: High | Volume: High
Important Resistance Levels: 1175.93 / 1233.96 | Stop Loss: 1059.87
📊 Technical Indicators Explained
Aurobindo Pharma (AUROPHARMA) is flashing multiple bullish signals. A double bottom pattern 📉➡️📈 near ₹1016 confirms a strong reversal base, followed by a bullish breakout candle 🔥 backed by massive volume surge 🚀. The RSI breakout ⚡, Bollinger Band expansion 📊, and SuperTrend flip ✅ add conviction to the momentum. With supports holding firm and resistances ahead, the stock is entering a high-probability breakout zone.
Support & Resistance Zones
🟢 Support: 1074 | 1040 | 1018
🔴 Resistance: 1131 | 1153 | 1189
Investment Outlook & Conclusion
📈 Bullish Case – Heavy volume breakout supports upside continuation.
📉 Bearish Case – Failure to sustain above 1080 can bring weakness.
⚡ Momentum Case – Strong near-term upside; suitable for aggressive traders.
📅 Perspective – Short- to medium-term; long-term investors should watch risk levels.

________________________________________
📌 TATACHEM (968.25) - Symmetrical Triangle
Momentum: Strong | Bullish | Risk: Low | Volume: High
Resistance Levels: 1007.92 / 1039.84 | Stop Loss: 944.08
📊 Technical Indicators Explained
Tata Chemicals (TATACHEM) is showing strong bullish signals forming a Symmetrical Triangle. A bullish engulfing candle 🔥 near support highlights renewed buying interest, while an RSI breakout ⚡ confirms strengthening momentum. The Bollinger Band breakout 📊, along with VWAP support ✅, suggests rising participation. With a recent BB squeeze compression 🎯 now opening up, volatility expansion could fuel a decisive move. The stock is positioned in a potential breakout zone 🚀
Support & Resistance Zones
🟢 Support: 950 | 932 | 919
🔴 Resistance: 981 | 994 | 1012
Investment Outlook & Conclusion
📈 Bullish Case – Triangle consolidation may resolve higher on breakout.
📉 Bearish Case – Below SL, stock could revisit support levels.
⚡ Momentum Case – Neutral-to-positive; volume confirmation needed.
📅 Perspective – Short-term breakout opportunity; medium-term cautious stance.

________________________________________
📌 SHRIRAMFIN (620.05) – Downward Sloping Channel
Momentum: Strong | Bullish | Risk: Low | Volume: High
Resistance Levels: 643.69 / 664.48 | Stop Loss: 602.11
📊 Technical Indicators Explained
Shriram Finance (SHRIRAMFIN) has given a downward sloping channel breakout 📉➡️📈, signaling a shift from weakness to strength. An RSI breakout ⚡ confirms bullish momentum, while a BB Squeeze-Off setup 🎯 points to potential volatility expansion. The bullish price action 🔥 backed by rising volumes 🚀 suggests renewed buyer confidence. With resistances overhead, the stock now stands at a critical breakout zone, where follow-through buying could unlock further upside.
Support & Resistance Zones
🟢 Support: 608 | 595 | 588
🔴 Resistance: 628 | 635 | 648
Investment Outlook & Conclusion
📈 Bullish Case – Strong buying interest; scope for further upside.
📉 Bearish Case – Failure to hold above 602 may weaken momentum.
⚡ Momentum Case – Positive; traders may ride short-term moves.
📅 Perspective – Short-term play; long-term view requires caution.

________________________________________
⚠️ Disclaimer – Please Read Carefully
The information shared here is meant purely for learning and awareness. It is not a buy or sell recommendation and should not be taken as investment advice. I am not a SEBI-registered investment advisor, and all views expressed are based on personal study, chart patterns, and publicly available market data.
Trading — whether in stocks or options — carries risk. Markets can move unexpectedly, and losses can sometimes exceed the money you have invested. Past performance or past setups do not guarantee future results.
If you are a beginner, treat this as a guide to understand how the market works — practice on paper trades before risking real money. If you are experienced, always assess your own risk, position sizing, and strategy suitability before entering trades.
Consult a SEBI-registered financial advisor before making any real trading decision. By engaging with this content, you acknowledge full responsibility for your trades and investments.
💬 Found this useful?
🔼 Give this post a Boost to help more traders discover clean, structured learning.
✍️ Drop your thoughts, questions, or setups in the comments — let’s grow together!
🔁 Share with fellow traders and beginners to spread awareness.
👉 “If you liked this breakdown, follow for more clean, structured setups with discipline at the core.”
🚀 Stay Calm. Stay Clean. Trade With Patience.
Trade Smart | Learn Zones | Be Self-Reliant 📊
________________________________________
📌 ADANIENT (2398.80) – Rising Wedge
Momentum: Strong | Bullish | Risk: Low | Volume: High
Important Resistance Levels: 2499.68 / 2580.66 | Stop Loss: 2337.72
📊 Technical Indicators Explained
Adani Enterprises (ADANIENT) is flashing strong technical signals. A rising wedge structure 🔺 shows price tightening towards resistance, with today’s bullish breakout candle 🔥 backed by heavy volume surge 🚀. The RSI breakout ⚡ confirms strengthening momentum, while the BB Squeeze-Off release 📊 hints at a fresh volatility expansion. With support zones holding firm and price eyeing higher resistances, the stock is entering a decisive breakout zone.
Support & Resistance Zones
🟢 Support: 2353 | 2307 | 2275
🔴 Resistance: 2432 | 2464 | 2510
Investment Outlook & Conclusion
📈 Bullish Case – Strong momentum with volume support may push towards higher resistances.
📉 Bearish Case – A drop below SL can attract downside pressure.
⚡ Momentum Case – Aligned with momentum; good for short-term swings.
📅 Perspective – Short-term breakout play; long-term needs stability.
________________________________________
📌 AUROPHARMA (1109.20) – Double Bottom
Momentum: Strong | Bullish | Risk: High | Volume: High
Important Resistance Levels: 1175.93 / 1233.96 | Stop Loss: 1059.87
📊 Technical Indicators Explained
Aurobindo Pharma (AUROPHARMA) is flashing multiple bullish signals. A double bottom pattern 📉➡️📈 near ₹1016 confirms a strong reversal base, followed by a bullish breakout candle 🔥 backed by massive volume surge 🚀. The RSI breakout ⚡, Bollinger Band expansion 📊, and SuperTrend flip ✅ add conviction to the momentum. With supports holding firm and resistances ahead, the stock is entering a high-probability breakout zone.
Support & Resistance Zones
🟢 Support: 1074 | 1040 | 1018
🔴 Resistance: 1131 | 1153 | 1189
Investment Outlook & Conclusion
📈 Bullish Case – Heavy volume breakout supports upside continuation.
📉 Bearish Case – Failure to sustain above 1080 can bring weakness.
⚡ Momentum Case – Strong near-term upside; suitable for aggressive traders.
📅 Perspective – Short- to medium-term; long-term investors should watch risk levels.
________________________________________
📌 TATACHEM (968.25) - Symmetrical Triangle
Momentum: Strong | Bullish | Risk: Low | Volume: High
Resistance Levels: 1007.92 / 1039.84 | Stop Loss: 944.08
📊 Technical Indicators Explained
Tata Chemicals (TATACHEM) is showing strong bullish signals forming a Symmetrical Triangle. A bullish engulfing candle 🔥 near support highlights renewed buying interest, while an RSI breakout ⚡ confirms strengthening momentum. The Bollinger Band breakout 📊, along with VWAP support ✅, suggests rising participation. With a recent BB squeeze compression 🎯 now opening up, volatility expansion could fuel a decisive move. The stock is positioned in a potential breakout zone 🚀
Support & Resistance Zones
🟢 Support: 950 | 932 | 919
🔴 Resistance: 981 | 994 | 1012
Investment Outlook & Conclusion
📈 Bullish Case – Triangle consolidation may resolve higher on breakout.
📉 Bearish Case – Below SL, stock could revisit support levels.
⚡ Momentum Case – Neutral-to-positive; volume confirmation needed.
📅 Perspective – Short-term breakout opportunity; medium-term cautious stance.
________________________________________
📌 SHRIRAMFIN (620.05) – Downward Sloping Channel
Momentum: Strong | Bullish | Risk: Low | Volume: High
Resistance Levels: 643.69 / 664.48 | Stop Loss: 602.11
📊 Technical Indicators Explained
Shriram Finance (SHRIRAMFIN) has given a downward sloping channel breakout 📉➡️📈, signaling a shift from weakness to strength. An RSI breakout ⚡ confirms bullish momentum, while a BB Squeeze-Off setup 🎯 points to potential volatility expansion. The bullish price action 🔥 backed by rising volumes 🚀 suggests renewed buyer confidence. With resistances overhead, the stock now stands at a critical breakout zone, where follow-through buying could unlock further upside.
Support & Resistance Zones
🟢 Support: 608 | 595 | 588
🔴 Resistance: 628 | 635 | 648
Investment Outlook & Conclusion
📈 Bullish Case – Strong buying interest; scope for further upside.
📉 Bearish Case – Failure to hold above 602 may weaken momentum.
⚡ Momentum Case – Positive; traders may ride short-term moves.
📅 Perspective – Short-term play; long-term view requires caution.
________________________________________
⚠️ Disclaimer – Please Read Carefully
The information shared here is meant purely for learning and awareness. It is not a buy or sell recommendation and should not be taken as investment advice. I am not a SEBI-registered investment advisor, and all views expressed are based on personal study, chart patterns, and publicly available market data.
Trading — whether in stocks or options — carries risk. Markets can move unexpectedly, and losses can sometimes exceed the money you have invested. Past performance or past setups do not guarantee future results.
If you are a beginner, treat this as a guide to understand how the market works — practice on paper trades before risking real money. If you are experienced, always assess your own risk, position sizing, and strategy suitability before entering trades.
Consult a SEBI-registered financial advisor before making any real trading decision. By engaging with this content, you acknowledge full responsibility for your trades and investments.
💬 Found this useful?
🔼 Give this post a Boost to help more traders discover clean, structured learning.
✍️ Drop your thoughts, questions, or setups in the comments — let’s grow together!
🔁 Share with fellow traders and beginners to spread awareness.
👉 “If you liked this breakdown, follow for more clean, structured setups with discipline at the core.”
🚀 Stay Calm. Stay Clean. Trade With Patience.
Trade Smart | Learn Zones | Be Self-Reliant 📊
📊 STWP | Mentor | Demand & Supply Specialist
🎯 Helping you become a self-reliant & independent trader
🎓 Learn more: simpletradewithpatience.com
📲 WhatsApp: wa.me/919987567889
🔍 Trade with Clarity. Learn with Patience.
🎯 Helping you become a self-reliant & independent trader
🎓 Learn more: simpletradewithpatience.com
📲 WhatsApp: wa.me/919987567889
🔍 Trade with Clarity. Learn with Patience.
Disclaimer
The information and publications are not meant to be, and do not constitute, financial, investment, trading, or other types of advice or recommendations supplied or endorsed by TradingView. Read more in the Terms of Use.