Higher-Timeframe Bias:
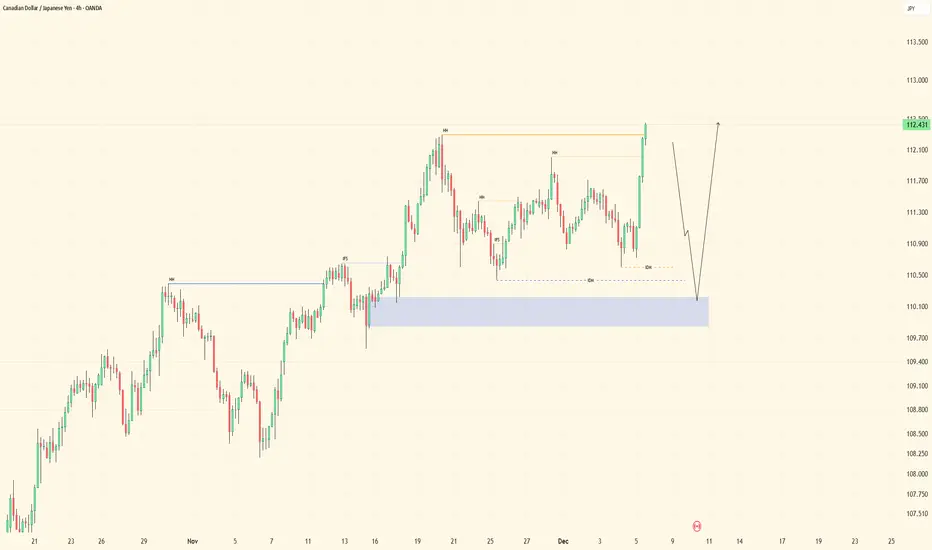
CADJPY remains bullish. HTF structure is clean, visual, and directional — price continues to respect bullish order-flow, confirming upward intent.
Mid-Term Perspective:
Going into the upcoming week, we’re looking for continuations.
I’m waiting on a sell-side liquidity sweep, but keep in mind:
Price is moving with strong volume and has already cleared mid-term highs.
That type of aggressive delivery typically leads to:
• A clean sweep of the current leg
• Followed by price dropping into the higher-timeframe order block below
That HTF OB is where the meaningful reaction is expected.
Important Note — Patience With LTF:
When price drops directly into a HTF structure, we do not jump straight to lower timeframes.
Reason:
LTF can easily be pushed around inside a HTF zone — it’s “big boy structure.”
Instead, we follow a disciplined, top-down sequence.
Execution Sequence:
1. Wait for price to sweep sell-side liquidity
2. Expect a drop into the HTF order block
3. Do not go to LTF yet
4. Wait for a mid-term CHoCH off the strong HTF zone
5. Once mid-term structure confirms, refine the POI
6. After mitigation of the refined mid-term POI → then drop to LTF for confirmation
This is the proper mapping sequence — a clean top-down approach.
If Price Doesn’t Follow Our Steps:
No panic, no emotion.
We simply:
• Track price
• Monitor delivery
• Follow the footprints
That’s our job as day traders — observe, map, adjust.
Plan:
We wait for market open.
We let Smart Money align the direction.
Then we execute with precision.
Patience is key. Follow the footprints. Let’s go.
Disclaimer
The information and publications are not meant to be, and do not constitute, financial, investment, trading, or other types of advice or recommendations supplied or endorsed by TradingView. Read more in the Terms of Use.
Disclaimer
The information and publications are not meant to be, and do not constitute, financial, investment, trading, or other types of advice or recommendations supplied or endorsed by TradingView. Read more in the Terms of Use.