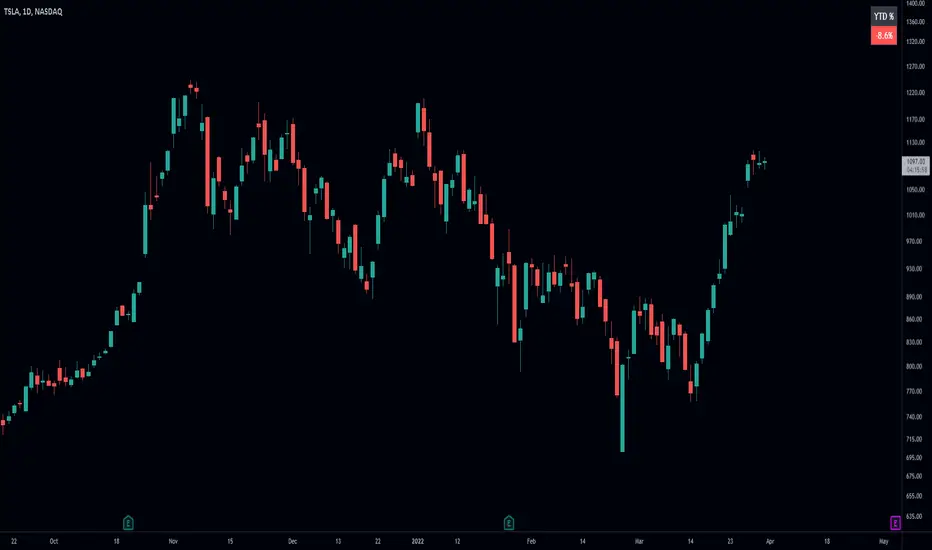
Annual Performance Table with Average PeformanceAn indicator that displays annual performance in a table format, providing a quick overview of yearly returns with historical context.
It calculates the performance based on the first and last monthly close prices of each year. It displays returns chronologically from left to right, concluding with an average performance column.
Features :
Works exclusively on monthly timeframes
Customizable number of years to display (1-50 years)
Shows year-by-year performance percentages
Color-coded returns (green for positive, red for negative)
Includes average performance across displayed years
Semi-transparent overlay design for better chart visibility
Performance calculation method:
Performance = ((December Close - January Close) / January Close) × 100%
Usage :
Apply to any chart on monthly timeframe
Adjust the "Number of Years to Display" parameter as needed
Table appears as an overlay with years, individual performances, and average
Note: The indicator will display an error message if applied to any timeframe other than monthly.
Return

All Candlestick Patterns on Backtest [By MUQWISHI]▋ INTRODUCTION :
The “All Candlestick Patterns on Backtest” indicator generates a table that offers a clear visualization of the historical return percentages for each candlestick pattern strategy over a specified time period. This table serves as an organized resource, serving as a launching point for in-depth research into candle formations. It may help to rectify any misconceptions surrounding candlestick patterns, refine trading approaches, and it could be foundation to make informed decisions in trading journey.
_______________________
▋ OVERVIEW:
_______________________
▋ CREDIT:
Credit to public technical “*All Candlestick Patterns*” indicator.
_______________________
▋ TABLE:
_______________________
▋ CHART:
_______________________
▋ INDICATOR SETTINGS:
#Section One: Table Setting
#Section Two: Backtest Setting
(1) Backtest Starting Period.
Note: If the datetime of the first candle on the chart is after the entreated datetime, the calculation will start from the first candle on the chart.
(2) Initial Equity ($).
(3) Leverage: Current Equity x Leverage Value.
(4) Entry Mode:
- “At Close”: Execute entry order as soon as the candle confirmed.
- “Breakout High (Low for Short)”: Stop limit buy order, entry order will be executed as soon as the next candle breakout the high of last pattern’s candle (low for short)
(5) Cancel Entry Within Bars: This option is applicable with {Entry Mode = Breakout High (Low for Short)}, to cancel the Entry Order if it's not executed within certain selected number of bars.
(6) Stoploss Range: the range refers to high of pattern - low of pattern.
(7) Risk:Reward: the calculation of risk:reward range start from entry price level. For example: A pattern triggered with range 10 points, and entry price is 100.
- For 1:1~risk:reward would the stoploss at 90 and takeprofit at 110.
- For 1:3~risk:reward would the stoploss at 90 and takeprofit at 130.
#Section Three: Technical & Candle Patterns
_______________________
▋ Comments:
This table was developed for research and educational purposes.
Candlestick patterns are almost similar as seen in “*All Candlestick Patterns*” indicator.
The table results should not be taken as a major concept to build a trading decision.
Personally, I see candlestick patterns as a means to comprehend the psychology of the market, and help to follow the price action.
Please let me know if you have any questions.
Thank you.


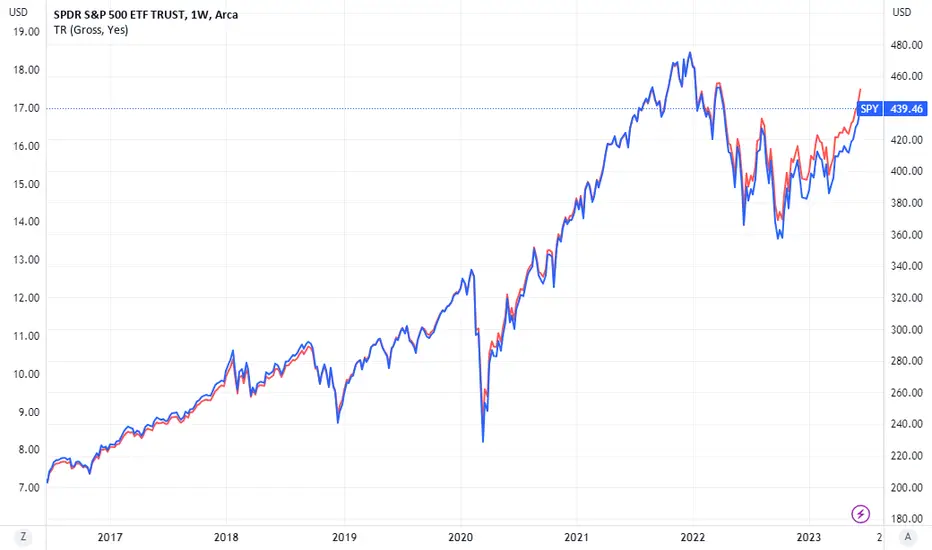
Total ReturnThis script calculates a Total Return index for stocks that shows the total performance of a stock, incorporating returns from both the share price and dividends.
To understand this, consider the situation where you invest in a 5% div stock and hold the position for 10 years. Assume at the end of 10 years, the price has gone up by 50%. A price chart will then show a 50% return, but in reality the investor has also received 50% of the initial investment in dividends, making his total return substantially more. Exactly how much more depends on whether the investor reinvested the dividends in the stock, or just held them as cash. If the former, his total return will be well over 100%; in the latter, his total return will be 100% exactly.
There are 2 input options:
- Dividend type: allows the user to choose "gross" or "net". Note that most stocks will have a "gross" data series whereas many will not have a "net" series.
- Reinvestment: allows the user to choose whether dividends should be reinvested in the stock ("Yes") or held in cash ("No").
Total return formula:
- With reinvestment: log((today's closing price + dividends paid today) / (yesterday's closing price))
- Without reinvestment: log(today's closing price / yesterday's closing price) + log (dividends paid thus far / first closing price)
Return & Drawdown
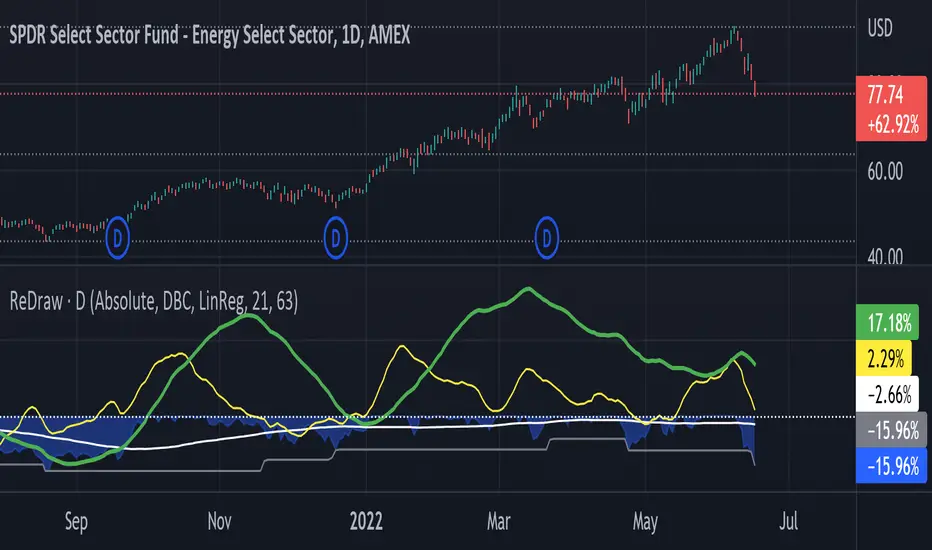
ReDraw script calculates the historical returns and drawdown for the given periods.
By default, the return of the linear regression trends is displayed (can be turned off in settings). In this mode, two linear regression trends are being computed for both long and short periods, and the percent value indicates the "return of the trend" for the corresponding period. Observing the dynamic of the linear regression trends can give a great hint if the trend is slowing down.
When the smoothing method is set to "none" or WMA3/5, the real asset return is shown for both periods, using the formula (LastPrice-FirstPrice)/FirstPrice
The script calculates the maximum drawdown for the long period using the formula (max(Price) - LastPrice) / max(Price).
The white line under the zero is the average maximum drawdown over the long period.
When the mode is set to Compare, ReDraw will display the difference in metrics between the current and selected symbol (SPY by default).
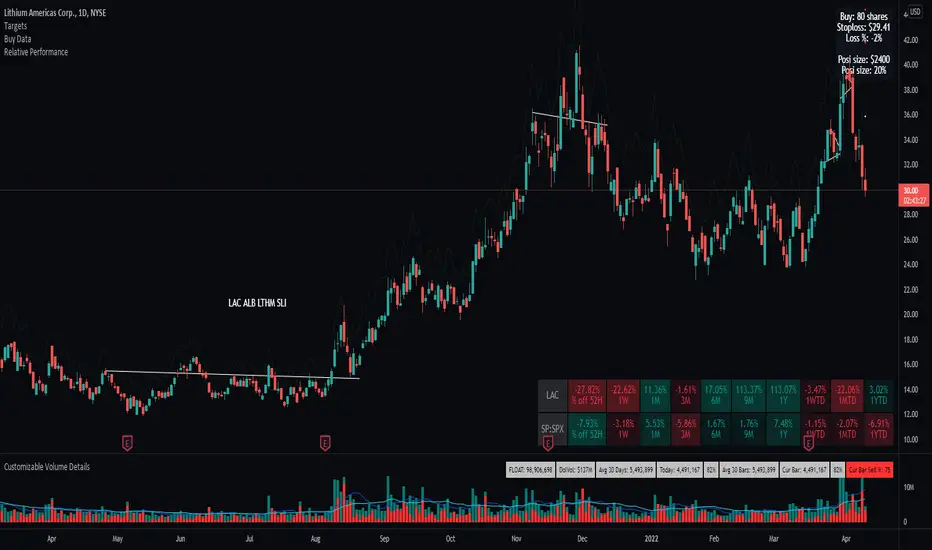
Relative Performance TableThis indicator is based on the Performance section in the TradingView's sidebar and uses new Pine tables functionality, originally coded by @Beeholder. It compares the current price of the symbol to its past price and calculates the rate of return to make it easier to track the performance of the symbol. Note that the Performance sidebar is not updated in real-time, while this indicator is, so on real-time charts the values between the two can differ (the indicator's values are more recent). Made a number of enhancement from Bee's script including relative performance of a selected ticker, dynamic table columns, and other options.
The formula of the calculation is (Current value - Past value) * 100 / Past value, where Past value is:
1W
1M
3M
6M
9M
52W (1 Year)
WTD (Week to Date)
MTD (Month to Date)
YTD (Year to Date
--Future development will include the ability to transpose the table columns/rows
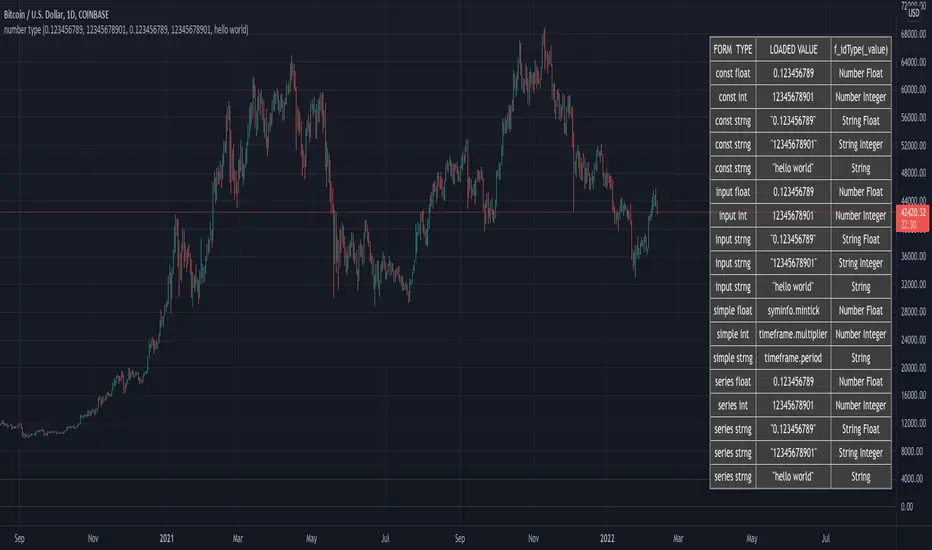
How To Identify Type Of NumberExample function accepts loading of _value for types float, int, or string, then identifies whether the loaded _value is a string number, string, or number.
Rolling ReturnsWhat does this indicator show?
This indicator shows the rolling return of a set lookback period.
The default indicator value is 20 which will show the rolling 20-day return because 20 trading days is 1 month.

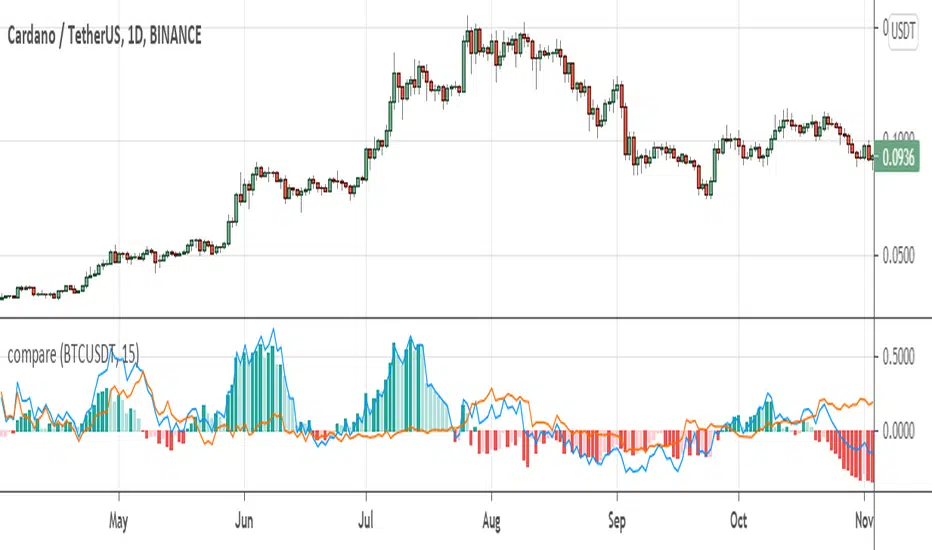
compare returnsIt could be very useful to analyze market with events in the market instead of only looking at the isolated chart. This indicator helps you to compare returns of chart symbol with any other symbol in the same timeframe.
For example, in crypto market coins move with the Bitcoin and BTC is driver of the market, so it could be useful to compare returns of a coin with the Bitcoin. There is a compare feature in tradingview, but it only compare from the beginning of the chart, not showing historical difference between returns which can reveals statistical opportunities or money flow in the market or between markets.
This indicator take two parameters including base symbol and period:
base symbol is the one which you need comparison with and period sets the period of comparison.
For instance, with base symbol: BTCUSDT and period: 15, return of BTCUSDT from 15 previous candles is compared with the chart in 15 previous candles (on same timeframe).
It could be helpful if you use this indicator to compare these pairs:
- altcoins return with BTCUSDT return
- stocks with their market index or industry index.
- market indices: crypto total market cap with SP500 and GOLD
please leave comment for me and this indicator to share your idea with me.
thanks,
hadi jamshidi
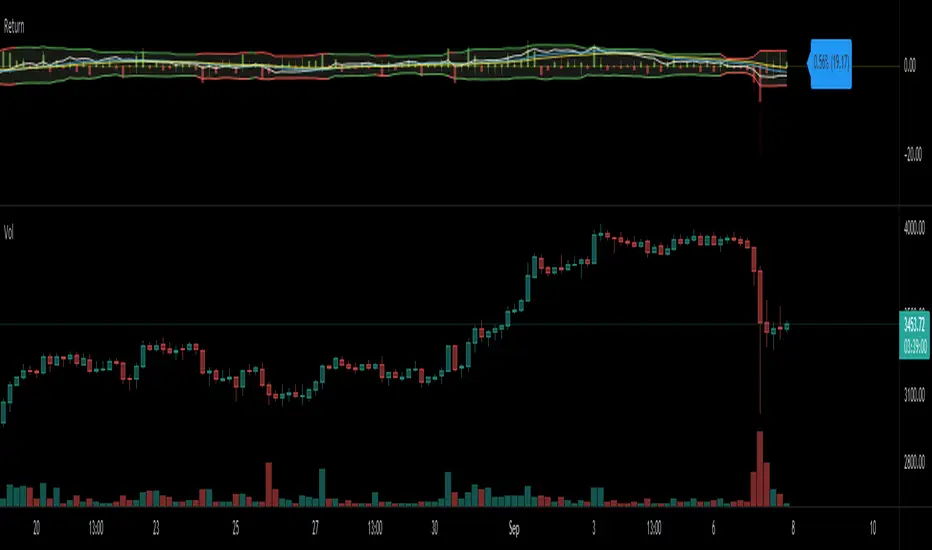
Return (Percent Change)This Script displays Regular or Log Returns as either a line or histogram and labels the current bar.
If something other than price is selected as the source, the result is percent change with a positive or negative slope.
If a moving average of price is used as the source, the result is analogous to a strength index
Other options include a look-back period adjustment (the default is 1),
smoothing results by converting to an EMA, and
Bollinger Bands with Length and Standard Deviation inputs.
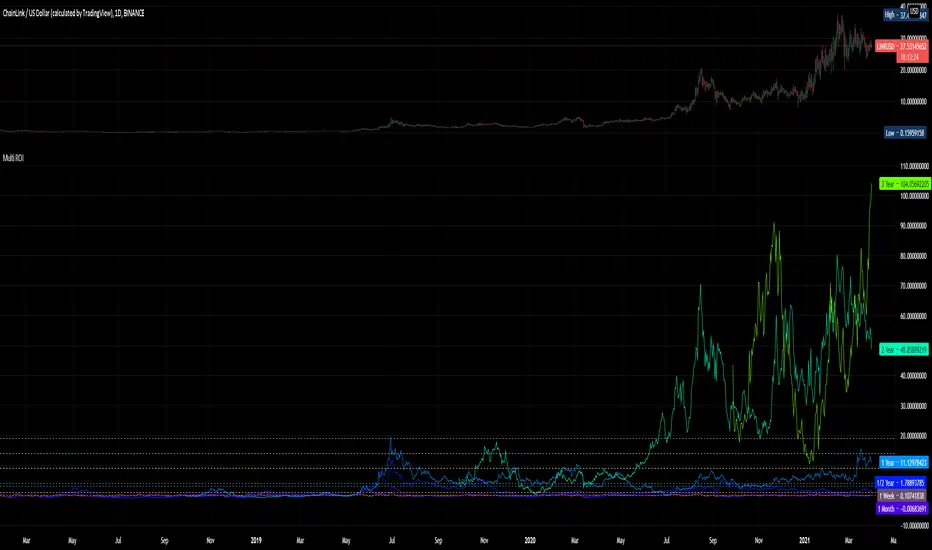
Multi ROIThis is really, really, really basic.
Its just 10 ROIs - Return On Investment- plots for the following periods:
1 week
1 month
1/2 year
1 year
2 year
3 year
4 year
5 year
6 year
7 year
It is meant for 1 day bars. Of course it will work anywhere and you can change the settings to fit your purposes but I thought these were the most useful periods.
Return Error With Reference & Constant Value Enforcer FunctionsI found MichelT 's work thanks to LucF . One of its cool concepts that touched me was his error's function. Whenever something unexpected takes place, it returns an error's message right on the chart, one nobody can't say they can't see lol. I told him it would be cool if we could get specific messages related to specific cases, he said "there is a task for such feature". On the meantime I wanted to enrich his feature by making the function printing any number the user wants.
Another really cool thing I have been in love with are "Pine Coding Conventions", I can't express enough how thankful I am to the amazing team behind it. Just recently they introduced me to a new rule, one seeming very popular across the board, using all capital letters to define a constant value.
On this script I combined both error's printing message with a constant check functions that enforce the value must remain unchanged ever. I hope you like this work, I really enjoy seeing brilliant people coming up with some awesome ideas. Let's together make "Pine" a more cooler language.

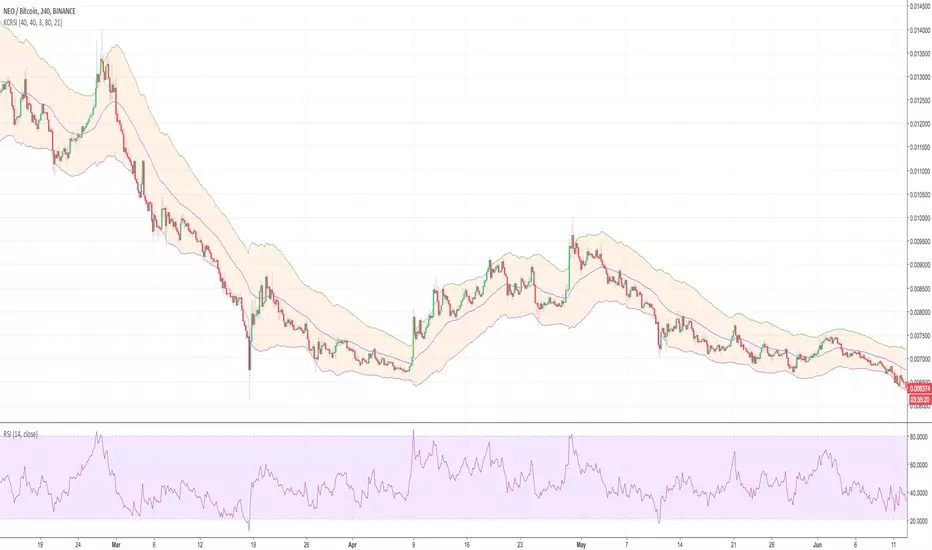
Keltner Channel + RSIKeltner Channel and RSI use together. They tell us when the trend will turn.
Fave fun!!