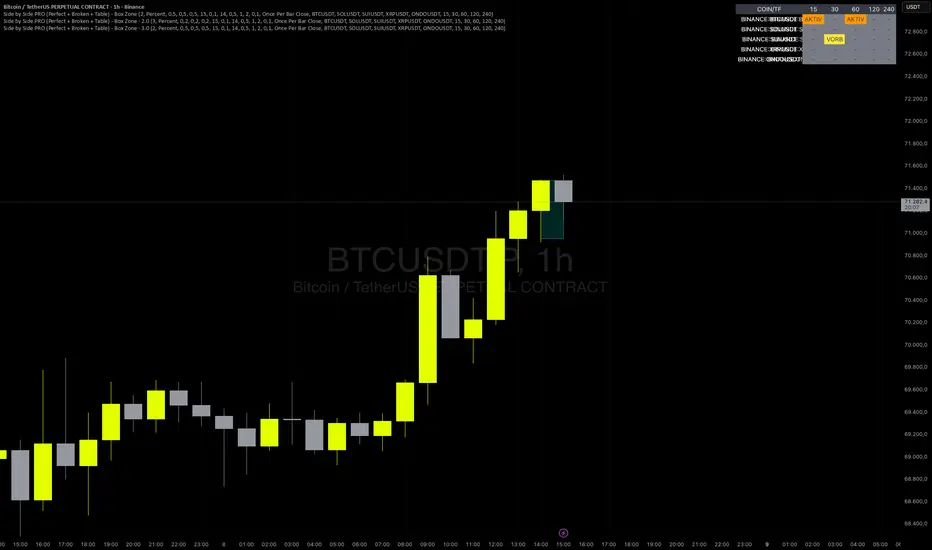
Institutional Sessions Overlay (Asia/London/NY)Institutional Sessions Overlay is a professional TradingView indicator that visually highlights the main trading sessions (Asia, London, and New York) directly on your chart.
Customizable: Easily adjust session start and end times (including minutes) for each market.
Timezone Alignment: Shift session boxes using the timezone offset parameter so sessions match your chart’s timezone exactly.
Clear Visuals: Colored boxes and optional labels display session opens and closes for fast institutional market structure reference.
Toggle Labels: Show or hide session open/close labels with a single click for a clean or detailed look.
Intuitive UI: User-friendly grouped settings for efficient configuration.
This tool is designed for day traders, institutional traders, and anyone who wants to instantly recognize global session timing and ranges for SMC, ICT, and other session-based strategies.
How to use:
Set your chart to your local timezone.
Use the "Session timezone offset" setting if session boxes do not match actual session opens on your chart.
Adjust the hours and minutes for each session as needed.
Enable or disable labels in the “Display” settings group.
Tip: Use the overlay to spot session highs and lows, volatility windows, and institutional liquidity sweeps.
Chart patterns
Slope Based Divergences Multi-Block (Dual Price)This Pine Script® indicator, titled "Slope Based Divergences Multi-Block (Dual Price)," is engineered to identify high-conviction trading signals by detecting divergences across multiple look-back lengths simultaneously. It uses a unique method of calculating momentum through average slopes rather than traditional price points, applying this logic to two different price sources and an oscillator for a comprehensive market view.
Core Concept: Average Slope Analysis
Instead of just looking at price or oscillator values, the indicator's foundation is built on measuring the rate-of-change, or slope, of the market. It goes a step further by calculating an average slope over a specified range of lengths. This provides a much more stable and robust measure of momentum compared to a single-length calculation, effectively smoothing out noise and focusing on the true underlying trend.
The Multi-Block System
The indicator's main strength comes from its "multi-block" design, which concurrently analyzes the market from three distinct perspectives:
Block 1 (Short-Term): Focuses on recent price action.
Block 2 (Mid-Term): Looks at the intermediate trend.
Block 3 (Long-Term): Analyzes the broader, underlying market structure.
For each of these blocks, the indicator calculates the average slope for two separate price sources (e.g., high and low) and one oscillator source (e.g., RSI, Stochastics).
Normalization and Thresholds
To make the slope values from different look back lengths comparable, the indicator converts each calculated average slope into a percentile rank. This rank, from 0 to 100, shows how extreme the current slope is compared to its historical values. Each of the three blocks has its own customizable high and low thresholds, allowing you to define precisely what constitutes a significant upward or downward momentum for that specific timeframe.
High-Confluence Divergence Signals
A divergence is flagged when there's a clear disagreement between the direction of price and the direction of the oscillator. For example, a bullish divergence occurs when the price sources are showing significant downward momentum (low percentile rank slopes) while the oscillator is showing significant upward momentum (high percentile rank slope).
The final signal is intentionally very selective. A "BULL" or "BEAR" signal is only generated when a rare moment of consensus occurs: all three blocks must detect a divergence simultaneously, and an additional short-term price movement must confirm this potential shift in momentum. This strict, multi-layered confirmation process is designed to filter out weak signals and highlight only the most promising opportunities.
The indicator plots clear labels on the chart and can trigger alerts, making it easy to spot these high-conviction setups when they occur
Adaptive Trend & Whale Vol + POCAdaptive Trend & Whale Vol + POC — powerful multi-tool indicator combining adaptive trend, whale volume spikes, RSI divergences, and volume-based POC to enhance trade entries and exits with clear signals and alerts.
Supply/Demand Zones with Midline (No Overlap Logic)Supply and demand formations based on inside bar breakouts. Automatically plots zones to buy and sell from. MTF analysis available.
QEMO: Quantum Electromagnetic Oscillator (Safe Adjusted)This is a highly conceptual and oscillator and It attempts to model market dynamics by borrowing concepts from quantum physics and electromagnetism to create a unique oscillator. It does not represent any real physical phenomena but uses these concepts as metaphors for market forces.
Here is a breakdown of its core components:
1. Quantum Price Wavefunction (The Core Price Engine)
This is the most abstract part of the script. It tries to model price not as a single point, but as a "wavefunction" representing a distribution of probable future prices.
Volatility & Price Grid: It first calculates recent market volatility. Based on this volatility, it creates a dynamic grid of possible price levels (price_bins) around the current price.
Probability Density: It assigns a probability to each price level in the grid.
"Energy" Operators:
Kinetic Energy: Metaphorically represents the "momentum" or rate of change of the price probabilities.
Potential Energy: A force field that influences the probabilities, derived from a combination of volatility and trading volume.
Expected Price: After evolving these probabilities, it calculates a single "expected price" which is the weighted average of all prices in the grid, based on their final probabilities.
2. Electromagnetic Fields (Buying vs. Selling Pressure)
This section models the battle between buyers and sellers in a more familiar way:
E-Field (Electric/Buying): Represents buying pressure, calculated from upward price moves (close - open) multiplied by volume.
B-Field (Magnetic/Selling): Represents selling pressure, calculated from downward price moves (open - close) multiplied by volume.
Lorentz Force (F_net): This is the net force (E - B), representing the overall directional pressure in the market. A positive value means buyers are in control; a negative value means sellers are.
3. Entanglement Entropy (Systemic Risk/Stability)
This component aims to measure the market's stability or "systemic risk."
It calculates a form of auto-correlation on recent price returns.
A high degree of instability in this correlation results in a high "Entropy" (S) value.
Essentially, a high S suggests the market is chaotic and unpredictable (low stability), while a low S suggests it is more stable and trending.
4. Final QEMO Calculation & Plotting
All the components are combined to create the final oscillator value:
Final Value: The qemo value is a product of the expected_price, the amplified net force, and the market stability (1 - S).
Smoothing: This raw qemo value is then smoothed with an Adaptive Moving Average (AMA) to produce the final line that gets plotted on the chart.
Visualization:
The main oscillator line is plotted below the chart. Its color changes based on its value (e.g., blue for positive, red for negative).
The background color of the indicator pane changes based on the Entropy (S), providing an immediate visual cue of market stability (e.g., black for stable, white for chaotic).
The script also plots 99th and 1st percentile bands to help identify statistically extreme readings in the oscillator's value.
BT Bar - 1.0BTBar – Real-Time Volume and Momentum Insight
BTBar is a custom indicator that highlights candles with abnormal volume spikes and directional movement. It helps identify key institutional activity zones, strong impulses, and potential exhaustion areas. Perfect for traders who rely on context and flow reading rather than fixed patterns.
Enhanced Neowave Wave 1 Finder with ZigZagThis script is an advanced technical analysis indicator for the TradingView platform, written in Pine Script version 5. Its primary goal is to identify potential Elliott Wave "Wave 1" patterns, enhanced with principles from Neowave theory and a custom ZigZag indicator for more accurate pivot detection. The script is designed to be overlaid on the main price chart.
Core Functionality: Blending ZigZag and Neowave
The indicator's methodology is a two-part process. First, it identifies significant price swings using a robust ZigZag indicator. Then, it analyzes these swings based on a set of rules derived from Neowave and classic technical analysis to validate them as potential Wave 1 patterns.
Part 1: ZigZag Integration
The first major component is a comprehensive ZigZag indicator that forms the foundation for all subsequent analysis.
Pivot Detection: The pivots() function is the engine of the ZigZag. It scans the historical price data for significant high and low points (pivots) over a user-defined Length.
Segment Drawing: Once pivots are identified, the script draws lines connecting them, creating the classic ZigZag pattern on the chart.
Extended Direction & Ratios: This is an enhanced feature. The script doesn't just identify highs and lows; it categorizes them as:
Higher High (HH) or Lower High (LH)
Lower Low (LL) or Higher Low (HL)
This classification is crucial for understanding the market structure. It also calculates the price ratio of the most recent ZigZag leg relative to the previous one, which is used later for pattern validation.
Dynamic Updates: The ZigZag is not static. On each new bar, it can update its most recent pivot point if a new, more extreme price (a higher high or a lower low) is printed before the direction officially changes. This ensures the ZigZag is always reflecting the most current and significant price action.
Part 2: Neowave Wave 1 Finder
With the market structure defined by the ZigZag, the second part of the script applies a rigorous set of rules to identify potential Wave 1 patterns. A Wave 1 is the initial move of a new trend in Elliott Wave theory.
Key Validation Criteria
For a price move between two ZigZag pivots to be considered a valid Wave 1, it must pass a series of checks:
Significance: The move must have a minimum percentage change (Minimum Wave Length) and last for a minimum number of bars, filtering out insignificant noise.
Volume Confirmation: A genuine impulse wave is typically supported by increasing volume. The script checks if the volume during the potential Wave 1 is significantly higher than the recent average (Volume Increase Threshold).
Momentum Alignment: The direction of the wave must be confirmed by momentum indicators.
For a bullish (upward) Wave 1, the Relative Strength Index (RSI) must be in a bullish regime (above 50) and the MACD line must be above its signal line.
For a bearish (downward) Wave 1, the RSI must be below 50 and the MACD line must be below its signal line.
Structural Analysis (Impulse vs. Diagonal): The script attempts to differentiate between two types of Wave 1:
Impulse Wave: A strong, clean, and direct move.
Diagonal Wave: A more complex, overlapping, and often wedge-shaped pattern. This is identified by analyzing the time and price complexity of the move, along with the ZigZag leg ratios.
Wave 2 Retracement Check: A critical Neowave rule is that a valid Wave 1 must be followed by a valid Wave 2 retracement. The script looks at the next ZigZag leg to ensure it doesn't retrace more than 100% of the potential Wave 1. It also uses the ZigZag ratios to confirm the retracement falls within typical Fibonacci levels (e.g., 38.2% to 78.6%).
Display and User Interface
The script provides a rich visual experience to aid the trader in their analysis.
Wave Labels and Boxes: When a valid Wave 1 is detected, it is highlighted with a colored line (green for bullish, red for bearish) and a shaded background box. A label clearly marks it as "Wave 1 IMPULSE" or "Wave 1 DIAGONAL".
Fibonacci Retracement Levels: Upon detection of a Wave 1, the script automatically draws key Fibonacci retracement levels (38.2%, 50%, 61.8%, 78.6%). These levels are potential targets for the end of the subsequent Wave 2, offering potential entry points for a Wave 3 trade.
Information Labels: Additional labels provide at-a-glance confirmation of the conditions, showing whether volume and momentum criteria were met.
Customizable Inputs: Users have extensive control over the indicator's parameters, including the ZigZag length, volume thresholds, RSI levels, and the colors of all visual elements.
Alerts: The indicator can be configured to generate an alert whenever a new bullish or bearish Wave 1 pattern is confirmed, allowing traders to be notified of potential opportunities in real-time.
Dynamic Symmetry Levels [TeamCash]Dynamic Symmetry Levels
The Dynamic Symmetry Levels (DSL) indicator plots key price levels to guide your trading decisions. It uses the daily opening price as a reference, drawing a purple dashed line, and calculates symmetrical support and resistance levels above and below it, shown as white lines with price labels.
How It Works: DSL identifies potential reversal zones where price may react. If the price stays above the daily open, it leans bullish, targeting upper levels; if below, it leans bearish, aiming for lower levels. Levels reset daily for fresh analysis.
Why Use DSL?
Pinpoints high-probability reversal zones for entries and exits.
Enhances any strategy by aligning with your key areas of interest.
Offers clear, labeled visuals for quick and confident trading decisions.
Ideal for traders seeking a simple, effective tool to complement their technical analysis.
OKX:BTCUSD BITSTAMP:ETHUSD
Universal Trade Levels & Signal Classifierscript has been enhanced and generalized for all instruments — not just ES or SPX.
You now get the following classifications:
💎 Perfect Trade – trend confirmed, strong signal, ATR + VWAP + volume aligned
🚀 Sure Shot Trade – very high volume + ATR breakout + directional bias
⚡ Quick Call/Put – fast actionable setups
❌ No Trade – avoid/no confirmation
The logic works across any timeframe and any ticker.
You can now test this live on any instrument in TradingView. Let me know if you’d like to add things like:
Multi-timeframe confirmation
Re-entry logic
Heatmap table of confidence levels
Signal filtering based on RSI, OBV, etc.
CRT + PO3 Range Theory Hey everyone, I’ve put together a little script for TradingView that tries to show the classic CRT + PO3 (Power of Three) pattern. It’s still a work in progress, so please use it on a demo account and let me know what you think!
What It Does
Accumulation Phase: On each higher‐timeframe bar (e.g. 2-hour), it draws a shaded zone where price is hanging out. That’s when we assume “big players” are quietly building positions.
Manipulation Phase: If price briefly pokes above or below that zone but then slips back inside, it marks that wick as a shake-out.
Distribution Phase: When price finally closes cleanly outside the zone, it draws another shaded area and drops a “Distribution” label plus a big LONG or SHORT arrow on that bar.
You can tweak it so it only shows signals when a bar closes (no more weird flashing mid-bar), or even allow “direct” Distribution on a clean breakout without waiting for a fake wick first.
How to Set It Up
Add the script from your Indicators list.
Pick your HTF (I like 2-hour or 4-hour).
Turn “Show Zone Labels” on or off—these are the little “Accumulation/Manipulation/Distribution” tags.
Turn “Show Entry Signals” on to get the big LONG/SHORT arrows.
If you hate flicker, check “Show signals only at bar close.”
If you want to catch a swift breakout (no fake-out needed), check “Allow direct Distribution on clean breakout.”
There are also sliders for zone colors, transparency, label size, and how far above/below the bars the labels sit.
Why It’s Still a Beta
I’m not a CRT/PO3 guru—this is more of a hobby project and a little facination for this strategy.
There might be edge cases where it misses a shake-out or flags a Distribution too early.
I take no responsibility for your trades—please only run it on a demo account until we’ve worked out the quirks.
Feedback Wanted!
If you try it out, I’d love to hear:
Did the Manipulation wicks line up where you expected?
Were the Distribution arrows on the right bars?
Any ideas for easier settings or extra alerts?
Thanks for testing and helping me turn this into something solid!
20/40/6020/40/60 candle separator. Three lines only on all timeframes. Range length and height included. Doesn't mess up the scaling. Togglable elements and movable lines.
DCA by Vuong Thai v2 %verview of "DCA by Vuong Thai %" – Upgraded Version
Main Function:
This script automatically detects optimal DCA (Dollar-Cost Averaging) buy points and smart profit-taking zones based on a combination of technical signals: EMA, candlestick patterns, volume, RSI, and price distance from EMA.
It helps you optimize capital allocation using a structured averaging-down strategy and exit trades when a target price range is reached.
✅ Buy Logic (Buy Signal)
A buy signal is triggered when all of the following conditions are met:
Strong bullish candlestick: Green candle with a longer lower wick than upper wick
Price is below the EMA → indicating a downtrend
Volume is above the moving average (if volume filtering is enabled)
Price is at least a certain percentage below the EMA (e.g., ≥ 1%)
RSI is below 30 → indicating an oversold condition
No repeat buys unless price makes a new low → helps avoid premature entries
👉 When a buy signal appears:
A DCA Zone (buy region) is drawn on the chart
A label with the corresponding DCA percentage is displayed automatically (e.g., "DCA 5%", "DCA 10%")
Universal 10 MA be @cryptoingenerUniversal Multi MA (10 Moving Averages, Dynamic Colors, Multi-TF, By @CryptoIngener
Short Description (Краткое описание):
Indicator for plotting up to 10 moving averages of any type (SMA, EMA, WMA, HMA, RMA, DEMA, KAMA) on any timeframe, with dynamic coloring and customizable line thickness. Includes a subtle green watermark for copyright.
“This script is provided for educational and informational purposes only.”
Silver Bull Flag Breakout AlertDescription:
This script detects a bullish breakout in Silver (XAGUSD) above $37.60, confirming a bull flag continuation pattern on the daily chart. It optionally plots a 21 EMA as a trailing stop and includes a customizable alert condition for trade execution or monitoring.
Features:
• Alerts on daily close above $37.60
• Optional trailing stop (21 EMA)
• Visual breakout marker
• Ideal for swing trades targeting $41–$45
RNDMandar_RND This indicator give buy sell signal. Mandar_RND This indicator give buy sell signal Mandar_RND This indicator give buy sell signal Mandar_RND This indicator give buy sell signal Mandar_RND This indicator give buy sell signal Mandar_RND This indicator give buy sell signal Mandar_RND This indicator give buy sell signal Mandar_RND This indicator give buy sell signal Mandar_RND This indicator give buy sell signal Mandar_RND This indicator give buy sell signal Mandar_RND This indicator give buy sell signal
Fibonacci Optimal Entry Zone [OTE] (Zeiierman)Bitcoin is breaking out of the symmetrical triangle and showing major signs of strength, so we can expect to hit a new all-time high in the short term! Bitcoin was struggling in the past weeks compared to the stock market, but this should end!
Why do I think that the alt season is starting? To answer this question, we need to look at the BTC.D (Bitcoin dominance chart). if BTC.D goes up, that means money is flowing out of altcoins to Bitcoin, and when BTC.D goes down, that means money is flowing from Bitcoin to altcoins. And we want BTC.D to go up! So what is the chart telling us?
Candle Range Theory (CRT) indicator📌 Indicator Name: Candle Range Theory (CRT) indicator
This indicator detects potential bullish and bearish reversal setups based on specific candlestick price action behavior. It is designed to highlight moments when the market may be rejecting extremes and preparing to reverse direction — but only after confirmation with the closing price.
🔍 How It Works:
Bullish Setup (Long Signal):
The previous candle is bearish (closes lower than it opens).
The current candle makes a lower low than the previous one.
The current candle closes above the previous candle’s close.
Bearish Setup (Short Signal):
The previous candle is bullish (closes higher than it opens).
The current candle makes a higher high than the previous one.
The current candle closes below the previous candle’s close.
Signals are only triggered after the bar is fully closed, to avoid premature entries.
🔔 The script includes alert conditions for both long and short setups so you can receive notifications instantly.
🎥 Inspiration:
The idea for this indicator came from the excellent educational content presented in this video:
"How to Read Candlesticks Like a Pro"
We highly recommend watching it to better understand the price action principles behind this signal.
CPR with MAs, Super Trend & VWAP by Manoj Kumar Patidar JiIt's a best way to trading to one simple indicator
HTF Candle Extremes Zigzag (Drawn on LTF)HTF Candle Extremes Zigzag (Drawn on LTF)
This indicator plots zigzag lines connecting the extremes (highs and lows) of Higher Timeframe (HTF) candles directly on your lower timeframe (LTF) chart. It visually highlights trend changes and HTF candle structure by drawing colored lines representing uptrends and downtrends based on HTF candle extremes.
"Key Features"
Higher Timeframe Tracking: Select any HTF to track candle extremes using the built-in security function.
Zigzag Lines: Connects HTF candle lows to highs in an intuitive zigzag pattern.
Trend Indication: Uptrend lines are green, downtrend lines are red (customizable colors).
Customizable Line Width: Adjust the thickness of the zigzag lines for better visibility.
Drawn on Lower Timeframe: All lines appear on your active lower timeframe chart, allowing easy visual correlation.
"How It Works"
The script fetches the open, high, low, close, and time data of the specified HTF candle. It detects new HTF bars and identifies trend direction changes by comparing the highs and lows of consecutive HTF candles.
- When an uptrend is detected, vertical lines are drawn from low to high of the HTF candle, connected to the previous extreme low.
- When a downtrend is detected, vertical lines are drawn from high to low, connected to the previous extreme high.
- Transitions between trends are highlighted by connecting the last extreme of the previous trend to the current extreme, creating a clean zigzag pattern.
Usage Notes:
Ideal for traders who want to visualize HTF market structure and trend changes while analyzing price action on lower timeframes.
---
© The_Forex_Steward
(mozilla.org)
Fair Value Gap & Liquidity Zones [Combined]mixed FVG and buyside and sellside liquidity
xxxxxxxxxxxxxxxxxxxxxxxxxxxxxxxxxxxxxxxxxxxxxxxxxxxxxxxxxxxxxxxxxxxxxxxxxxxxxxxxxx
DP_ORB Entry & Exit IndicatorDisclaimer:
This indicator is for educational purposes only. It does not constitute financial advice. Always do your own research and manage your risk. Also, I cannot take full credit for 'ORB' as its a well known strategy amongst many traders, but I do need to give a special shout out to @TheBigDaddyMax for putting me on to this.
DP_ORB Entry & Exit Indicator
Description:
The DP_ORB Entry & Exit Indicator is a powerful tool designed for traders who utilize the Opening Range Breakout (ORB) strategy on the NYSE session. This indicator visually identifies the initial volatility window of the trading day, by marking the 15m High, and 15m Low into a ORB Box, & then tracks breakout opportunities, and provides clear, dynamic trade management levels—all directly on your chart.
Key Features:
Automatic Opening Range (ORB) Box:
Identifies and plots the high and low of the user-defined opening range (default 9:30–9:45 NYSE) for visual reference and strategy foundation.
Breakout Entry Signals:
Automatically detects and marks long or short breakout entries when price closes above or below the ORB range, with additional momentum confirmation.
Dynamic Stop Loss:
Stop loss is intelligently set to the previous bar’s low for long trades (or high for shorts), adapting to market structure at entry.
Take Profit Targets:
Up to three fully adjustable take-profit levels are plotted, calculated as percentages from entry, supporting progressive trade management.
Visual Trade Management:
Entry, stop loss, and take profit levels are displayed as extending dashed lines from entry point to the current bar, with labels always shown just to the right of price for clarity on all timeframes.
Automatic Reset and Cleanup:
Visuals and logic reset daily and upon exit, ensuring a clean, uncluttered chart experience.
How to Use:
Set your preferred opening range time and take profit levels in the settings.
Wait for a breakout and confirmation during the NYSE session.
Use the on-chart lines and labels to manage your trade according to your risk and strategy plan.
Best For:
Day traders and scalpers seeking a disciplined, visual, and fully-automated approach to opening range breakout trading.
Renko Alerts📢 Renko Alerts – by Marcelo Ulisses Sobreiro Ribeiro
🧱 Detection of Bricks and Hammers on Renko Charts with Alerts
This indicator was designed for traders who use Renko charts and want to receive automated alerts when bricks and hammer-like patterns are formed, helping with price action reading and quick, objective decision-making.
✅ Indicator Function
Renko Alerts automatically identifies:
Bullish Brick: A clean bullish brick (no wicks), indicating potential trend continuation to the upside.
Bearish Brick: A clean bearish brick (no wicks), indicating potential trend continuation to the downside.
Bullish Hammer: A bullish brick with a lower wick.
Bearish Hammer: A bearish brick with an upper wick.
ℹ️ Important:
Hammer patterns are widely used as entry triggers, both for reversal and trend continuation — it all depends on the market context in which they appear (e.g., support/resistance, pullback zones, indicator confluence).
⚙️ Inputs & Settings
🔹 Box Size (points)
Description: Defines the Renko brick size in points.
Default value: 3.0
Why it matters: This setting is essential for the script to accurately detect brick formations. It calculates the body size and distinguishes between clean bricks and those with wicks (hammers).
Technical Note: A small tolerance is applied automatically to prevent floating-point comparison errors.
🔔 Available Alerts
The indicator provides four ready-to-use alert conditions for use within TradingView:
Alert Name Technical Condition Message
Bullish Brick Bullish brick with body equal to Box Size New Bullish Brick
Bearish Brick Bearish brick with body equal to Box Size New Bearish Brick
Bullish Hammer Bullish brick with a lower wick New Bullish Hammer
Bearish Hammer Bearish brick with an upper wick New Bearish Hammer
These alerts are ideal for automating chart monitoring and receiving real-time notifications about potential trade setups.
📌 Additional Notes
This script is designed to work exclusively with Renko charts using fixed box sizes.
It is not suitable for time-based candlestick charts.
You can use this indicator alongside other tools (moving averages, RSI, stochastics, etc.) to build confluent strategies.
First FVG📘 Indicator Description (English)
First FVG – NY Open is a TradingView indicator designed to automatically identify the first Fair Value Gap (FVG) that appears during the New York session, following the ICT (Inner Circle Trader) methodology.
It highlights institutional inefficiencies in price caused by imbalanced price action and helps traders spot high-probability entry zones, especially after the 9:30 AM EST (New York Open).
⚙️ How It Works
Session time: The indicator scans for FVGs starting at 9:32 AM (allowing 3 candles after the NY Open to form).
FVG Conditions:
Bullish FVG: When the high of 2 candles ago is lower than the low of the current candle and the middle candle is bullish.
Bearish FVG: When the low of 2 candles ago is higher than the high of the current candle and the middle candle is bearish.
Only the first FVG per session is drawn, as taught by ICT for setups like Judas Swing or NY Reversal models.
A colored box is drawn to represent the FVG zone.
A dotted horizontal line (CE) is drawn at the midpoint of the FVG box (Consequent Encroachment), a key level watched by smart money traders.
A dashed vertical line is drawn at 9:30 NY time to mark the open.
🧠 How to Use It
Wait for the NY Open (9:30 AM EST) – the indicator becomes active at 9:32 AM.
Watch for the first FVG box of the day. This is often a high-probability reaction zone.
Use the CE line (center of the FVG) as a reference for entries, rejections, or liquidity grabs.
Combine with market structure, PD Arrays, and liquidity concepts as taught by ICT for confluence.
The FVG box and CE line will extend forward for several candles for visual clarity.
🎛️ Customizable Settings
Session time (default: 09:32–16:00 NY)
FVG box color (up/down)
Text color
Max number of days to keep boxes on chart
Option to show or hide the 9:30 NY Open vertical line