Global Finance Control on Central BanksIntroduction
Central banks are the cornerstone of a nation’s monetary and financial stability. They regulate the money supply, manage interest rates, maintain price stability, and act as lenders of last resort during crises. Examples include the Federal Reserve (U.S.), the European Central Bank (ECB), the Bank of Japan (BoJ), and the Reserve Bank of India (RBI). However, in today’s deeply interconnected global economy, the autonomy of central banks is not absolute. They operate within a global financial system heavily influenced by international capital flows, global trade dynamics, foreign exchange markets, and powerful multinational institutions.
The control of global finance over central banks is a topic of major debate among economists and policymakers. While central banks are officially independent, their actions are shaped by the pressures and movements within global markets. Understanding this interplay is critical to analyzing how global economic policies are formed and how nations maintain financial sovereignty.
1. The Role and Functions of Central Banks
Central banks serve several core functions within national economies:
Monetary Policy Implementation – They regulate interest rates and control money supply to achieve economic stability.
Price Stability and Inflation Control – Ensuring that inflation remains within target levels protects the value of money and public confidence.
Financial Stability and Regulation – Central banks oversee financial institutions to prevent systemic crises.
Foreign Exchange Management – They manage exchange rates, foreign reserves, and currency interventions.
Lender of Last Resort – During financial distress, central banks provide emergency liquidity to banks and financial institutions.
Economic Growth Promotion – By influencing credit availability and investment, central banks indirectly promote growth and employment.
In theory, these functions are carried out independently from political or external influences. However, in the era of globalized finance, maintaining such independence has become increasingly difficult.
2. The Global Financial System and Its Influence
The global financial system is a web of interconnected markets and institutions, including international banks, hedge funds, multinational corporations, and supranational organizations such as the International Monetary Fund (IMF) and World Bank. It is characterized by:
Cross-border capital flows
Global investment funds and currency trading
Interconnected banking networks
International debt and credit markets
Global rating agencies and financial intermediaries
These elements create a financial ecosystem in which no central bank can act in isolation. The decisions made by one major central bank—particularly the U.S. Federal Reserve—can ripple across the globe, influencing exchange rates, asset prices, and borrowing costs in multiple countries.
3. The U.S. Federal Reserve’s Global Dominance
The U.S. dollar is the world’s primary reserve currency, accounting for nearly 60% of global reserves and the majority of international trade settlements. As a result, the Federal Reserve (Fed) exerts substantial indirect control over global financial conditions.
When the Fed changes its interest rates or monetary policy stance, the effects are immediate and widespread:
Emerging markets experience capital inflows or outflows based on the attractiveness of U.S. yields.
Currency values fluctuate as investors shift between the dollar and other currencies.
Global borrowing costs rise or fall depending on U.S. Treasury yields.
For example, the 2013 "Taper Tantrum" occurred when the Fed announced it would reduce its quantitative easing program. This led to a massive outflow of capital from emerging markets, causing currency depreciation and market volatility worldwide. Central banks in countries like India, Brazil, and Indonesia were forced to raise interest rates or intervene in currency markets to stabilize their economies.
Thus, while national central banks manage their domestic economies, their room for maneuver is constrained by decisions made in Washington.
4. The Role of the IMF and World Bank
Institutions such as the International Monetary Fund (IMF) and the World Bank play a central role in influencing the monetary policies of developing and emerging nations. While these institutions provide financial assistance and development loans, their programs often come with policy conditionalities.
For instance, countries seeking IMF loans during balance-of-payment crises are required to implement austerity measures, fiscal discipline, and structural reforms, which often restrict the central bank’s ability to conduct independent monetary policy.
Examples include:
The Asian Financial Crisis (1997–1998), where IMF intervention imposed tight monetary and fiscal controls on countries like Thailand, Indonesia, and South Korea.
Latin American debt crises of the 1980s, where IMF programs demanded strict monetary policies and privatization measures.
Such conditions reflect how global financial institutions can indirectly control the policy framework of central banks, particularly in financially vulnerable nations.
5. Global Capital Flows and Market Pressures
Modern financial markets operate on a 24-hour global cycle, with trillions of dollars moving across borders daily. These massive flows of “hot money” can destabilize currencies and bond markets, forcing central banks to adjust their policies even if they conflict with domestic economic needs.
For instance:
A sudden capital outflow can devalue a country’s currency, raise import costs, and fuel inflation.
To counter this, the central bank may need to raise interest rates, which can slow economic growth.
Conversely, large capital inflows can create asset bubbles and inflationary pressures, requiring monetary tightening.
In this sense, global financial markets act as a disciplinary mechanism, rewarding or punishing central banks based on their policies. Nations with high fiscal deficits or loose monetary policies often face downward pressure on their currency or increased borrowing costs in global bond markets.
6. Exchange Rate Systems and Dependence
Exchange rate management is another area where global finance limits central bank independence. Most countries today operate under floating exchange rates, meaning their currency value is determined by market forces. However, even floating currencies are vulnerable to speculative attacks and global shocks.
Countries that peg their currency to the dollar or euro must align their monetary policies with the anchor currency’s central bank, effectively surrendering policy control.
For example, countries in the Eurozone have ceded national control to the European Central Bank (ECB), which sets a unified monetary policy for 20 diverse economies.
Similarly, economies with dollar pegs, like Hong Kong or Saudi Arabia, must follow U.S. interest rate trends to maintain currency stability.
Thus, through exchange rate mechanisms, global finance exerts control over domestic policy decisions.
7. The Power of Global Financial Institutions and Rating Agencies
Global credit rating agencies such as Moody’s, Standard & Poor’s, and Fitch Ratings have significant influence on national monetary conditions. A downgrade in a country’s sovereign rating can lead to higher borrowing costs, reduced investor confidence, and currency depreciation.
Central banks must often take preemptive actions—such as tightening monetary policy or maintaining high reserves—to maintain favorable credit ratings. This dependence on external validation further diminishes true policy autonomy.
Similarly, international investment banks and hedge funds influence global liquidity conditions. Their collective actions can amplify or counteract central bank policies, shaping market expectations and financial stability.
8. The Challenge of Central Bank Independence
Central bank independence is designed to prevent political interference and maintain policy credibility. However, true independence is a relative concept. Central banks must balance domestic economic objectives with global realities, including:
Exchange rate volatility
Global interest rate movements
Commodity price fluctuations
Investor sentiment and risk appetite
For smaller or developing economies, these external pressures can severely constrain policy options. Even advanced economies are not immune—consider the European Central Bank, which must balance the interests of both strong economies like Germany and weaker ones like Greece or Italy.
9. Global Crises and Central Bank Coordination
During periods of global crisis, such as the 2008 Global Financial Crisis or the COVID-19 pandemic, central banks often act in coordination. The Federal Reserve, ECB, Bank of Japan, and others engaged in synchronized interest rate cuts and quantitative easing programs to inject liquidity into global markets.
While such cooperation stabilized financial systems, it also highlighted the growing interdependence of global central banks. The Fed’s swap lines—temporary currency exchanges with other central banks—became essential tools to ensure global dollar liquidity, reinforcing U.S. dominance over international finance.
This global coordination is beneficial during crises but underscores the reality that national policies are now part of a global financial ecosystem dominated by major economies and institutions.
10. The Digital Era and Future of Central Banking
The rise of digital currencies, blockchain technology, and decentralized finance (DeFi) introduces new challenges to central banks’ control. Central Bank Digital Currencies (CBDCs) are being developed to maintain monetary sovereignty in an era of financial globalization.
However, even with digital innovation, global finance remains interconnected. A digital dollar or euro could enhance the global influence of their respective central banks, while smaller nations could find their financial systems further marginalized.
11. Implications for Developing Economies
For developing nations, dependence on foreign investment, external debt, and imported inflation makes them particularly vulnerable to global financial forces. When major central banks tighten policy, capital flows reverse, currencies weaken, and debt servicing costs rise.
This “financial dependency” limits the ability of central banks in emerging markets to pursue independent monetary policy. The solution often lies in:
Strengthening domestic financial markets
Diversifying reserves
Promoting local currency settlements
Building policy credibility and transparency
Such measures can help shield national economies from excessive global influence.
Conclusion
Central banks were originally established to safeguard national monetary stability, but in the 21st century, their independence is constrained by the immense power of global finance. International capital flows, financial institutions, rating agencies, and dominant currencies—especially the U.S. dollar—shape the policy space available to even the most powerful central banks.
Global financial control is not always direct or conspiratorial—it operates through market mechanisms, investor sentiment, and institutional interdependence. The challenge for modern central banks is to balance national economic priorities with global financial realities.
In an increasingly integrated world, complete autonomy is impossible. Yet, by fostering transparency, coordination, and prudent macroeconomic management, central banks can navigate these global pressures effectively. The key lies not in resisting globalization but in managing interdependence wisely, ensuring that the pursuit of global stability does not come at the expense of national sovereignty and economic justice.
Wave Analysis

Global IPO trends and SME listings1. Macro picture: why IPOs dipped and why they’re coming back
From the 2021 frenzy to the 2022–2024 slowdown, three macro forces depressed IPO supply: rising interest rates, equity market volatility, and geopolitical policy shocks (trade/tariff announcements, sanctions, etc.). Those same variables determine the timing and size of any recovery: when volatility eases and public valuations become predictable, IPO windows reopen. By H1–Q3 2025 many markets recorded year-on-year increases in IPO counts and proceeds compared with 2024, signalling a cautious but visible rebound in investor risk appetite and issuer confidence. Major advisory firms reported a stronger pipeline and bigger average deal sizes in 2025 versus the trough.
Key takeaways:
Market sentiment and index performance remain the gating factor. When broader indices are stable or rising, companies and underwriters are more willing to price primary offerings.
Policy shocks (tariffs, regulation) can cause abrupt freezes—as seen in mid-2025 in some reporting—so recovery is patchy and regionally uneven.
2. Regional patterns — Americas, Europe, Asia
Americas (US/Canada): The U.S. market led global deals by proceeds in 2025’s first half, helped by both traditional IPOs and a revival of SPACs. Institutional appetite for high-quality growth names returned gradually; Nasdaq and NYSE regained traction for tech and fintech issuers. PwC and market banks flagged strong H1 2025 proceeds in the Americas, albeit with SPACs making up a significant portion.
Europe: Activity recovered more slowly but steadily. European exchanges and advisors pointed to unused capacity—investor demand exists but issuers and banks are selective about timing and valuation. Several jurisdictions enhanced SME support programs and pre-IPO education to stimulate listings.
Asia-Pacific: The region showed resilience and, in parts, growth—China and Japan saw notable listings and larger offerings. India’s domestic platforms recorded strong SME listing activity (see below). Overall, regulatory facilitation and local investor depth helped Asia outperform other regions in some periods.
3. The SPAC story: back — but different
After the 2020–2021 SPAC boom and the 2022–2024 cooling (regulatory scrutiny and poor post-deSPAC performance), 2025 brought a measured SPAC reappearance. Sponsors and investors are more disciplined: fewer overly ambitious valuations, more sponsor skin in the game, and clearer disclosure/earnout structures. SPACs accounted for a materially higher share of listings in early-to-mid 2025 versus 2024, but they are operating with tighter governance and (in many cases) better alignment with private equity and institutional exit strategies. Analysts expect SPACs to feature as one option among many for sponsor exits rather than the overwhelmingly dominant vehicle they once were.
4. SME listings — scale, purpose and platforms
SME listing platforms have evolved from niche curiosities into mainstream capital-raising mechanisms for smaller growth companies. Exchanges tailor admission rules, disclosure requirements, and investor education for SMEs to balance access to capital with investor protection.
Why SMEs list? Access to growth capital, brand visibility, liquidity for founders, and the ability to use publicly traded equity for M&A and employee incentives.
Popular SME venues: Euronext Growth (continental Europe), London AIM (though AIM’s structure is different), NSE Emerge and BSE SME (India), TSX Venture (Canada) and various regional growth boards. Exchanges increasingly offer pre-IPO programs and index inclusion to attract issuers. Euronext explicitly markets tailored listing journeys and investor pools for SMEs.
India as a case study: India’s SME markets (BSE SME, NSE Emerge) saw large volumes of small listings and notable capital raised historically; BSE’s SME crossing 600 listings and significant funds raised shows the scale and appetite for this route. Local retail and HNI investors play a disproportionate role in IPO allocations on SME boards, and many SMEs use these markets as stepping stones to main exchanges. However, regulators and exchanges warn about uneven due diligence standards and the need for investor education.
5. Structural features and investor behaviour in SME markets
Lower entry thresholds and lighter continuing obligations make SME boards attractive, but they also increase information asymmetry.
Investor mix: Retail and domestic institutional investors dominate many SME markets; that makes them sensitive to local sentiment and sometimes less correlated with global capital flows.
Price volatility & illiquidity: Many SME listings experience high initial pops or post-listing declines; long-term liquidity and governance can be variable. This means SME investing requires more focused research and risk tolerance.
Graduation pathway: Exchanges promote “graduation” from SME boards to the main market—this pathway creates an investment narrative (list, scale, graduate) that attracts some growth companies.
6. Regulatory & policy shifts affecting listing dynamics
Regulators in multiple regions have been balancing two objectives: broaden access to public capital for growth firms while protecting retail and unsophisticated investors. Typical policy moves include:
Strengthening disclosure and minimum corporate governance standards for SME boards.
Running pre-IPO education programs for management teams and investors (exchanges like Euronext emphasize educational support).
Closer monitoring of sponsor and promoter actions (especially after SPAC turbulence).
Incentives—tax or listing cost reductions—to encourage listings or relistings in domestic markets.
7. Challenges and risks (global & SME-specific)
Macro sensitivity: IPO pipelines can re-freeze quickly if interest rates or geopolitical tensions spike. (Mid-2025 tariff headlines illustrated this risk.)
Valuation gap: Private markets still sometimes price growth more richly than public markets will tolerate, delaying exits.
Post-IPO performance: A significant portion of IPO underperformance stems from immature governance, overly optimistic forecasting, or market rotation away from growth.
SME risk profile: SME boards have higher issuer-specific risk (concentration of promoter ownership, limited operating history). Robust disclosure and investor due diligence are essential.
8. Practical implications for stakeholders
For issuers (SMEs & midcaps): A public listing remains a credible route to scale. Plan the listing only when financials and governance can withstand scrutiny; consider whether an SME venue or direct main-board listing better serves long-term strategy. Use pre-IPO education services exchanges provide.
For investors: Diversify between established listed companies and a select set of SMEs—apply active due diligence on SME financials, promoter track record, and liquidity. Treat SME allocations as higher risk/high return.
For exchanges/regulators: Continue improving surveillance, standardise disclosure across SME platforms where possible, and invest in investor education campaigns to reduce information asymmetry.
9. Outlook (near term)
Most major advisory houses and banks saw a cautiously improving pipeline through H1–Q3 2025: more issuers willing to test the market, SPACs returning in a curated way, and regional variability (Americas and parts of Asia leading proceeds while Europe rebuilds). SME listings are likely to remain active where local investor demand and exchange support are strong (e.g., India, parts of Europe). However, a sustained recovery requires macro stability—lower volatility, clearer global trade policy, and accommodative capital markets. If those conditions hold, expect opportunistic pockets of high-quality IPOs and continued maturation of SME listing ecosystems.
10. Short recommendations (one-line each)
Issuers: prepare governance and communications early; choose the listing venue that fits growth stage.
Investors: treat SME allocations as active, research-intensive bets.
Exchanges/regulators: keep improving disclosure, investor education, and mechanisms to promote liquidity.
Advisors/underwriters: price conservatively, stress-test deals against volatility scenarios.

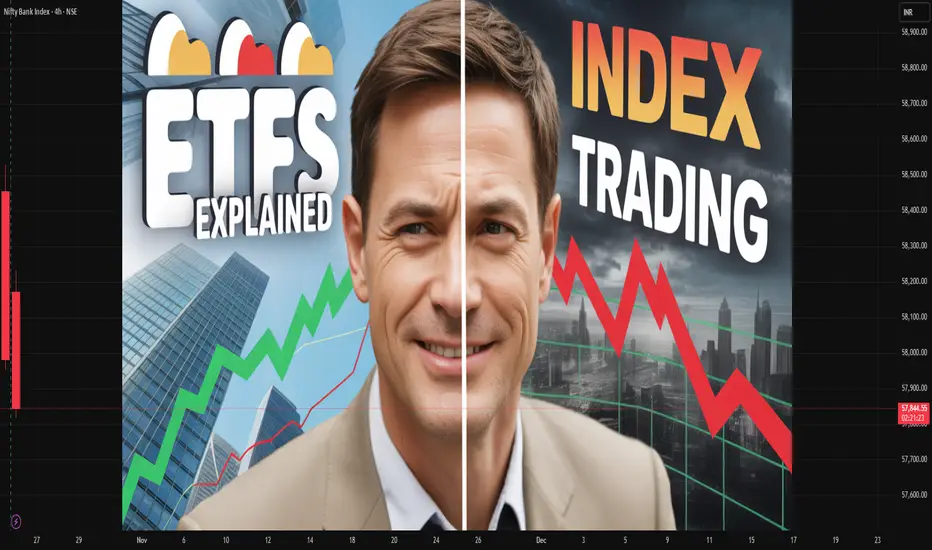
ETFs vs Index TradingIntroduction
The financial markets offer a wide range of instruments that cater to investors of varying risk appetites, time horizons, and objectives. Among these, Exchange-Traded Funds (ETFs) and Index Trading stand out as two of the most popular methods for gaining diversified exposure to markets. While both allow investors to benefit from broad market movements rather than focusing on individual stocks, they differ in structure, flexibility, trading mechanism, cost, and strategic use. Understanding the distinctions between ETFs and index trading is essential for investors aiming to optimize returns while managing risk efficiently.
1. Understanding ETFs
Definition and Structure
An Exchange-Traded Fund (ETF) is a type of pooled investment vehicle that holds a basket of securities — such as stocks, bonds, commodities, or currencies — and is traded on an exchange like a stock. ETFs are designed to track the performance of an underlying index, such as the S&P 500, Nifty 50, or NASDAQ-100, but can also be actively managed in some cases.
Each ETF is composed of shares that represent proportional ownership in the underlying assets. Investors buy and sell ETF shares throughout the trading day at market prices, similar to how they trade stocks. The creation and redemption mechanism, involving authorized participants, helps maintain the ETF’s price close to its Net Asset Value (NAV).
Types of ETFs
Index ETFs – Track a specific market index (e.g., SPDR S&P 500 ETF).
Sector ETFs – Focus on specific industries (e.g., technology, healthcare, energy).
Bond ETFs – Invest in government, corporate, or municipal bonds.
Commodity ETFs – Provide exposure to commodities like gold, silver, or oil.
International ETFs – Offer access to global markets or specific regions.
Thematic ETFs – Focus on trends like renewable energy or artificial intelligence.
Leveraged & Inverse ETFs – Designed for short-term traders seeking amplified or inverse returns.
How ETFs Work
ETFs are managed by fund companies that assemble the basket of assets mirroring an index. When large institutions (authorized participants) buy or redeem ETF shares, they exchange them for the underlying basket of securities. This creation/redemption process ensures liquidity and price alignment with the index.
Investors can hold ETFs in brokerage accounts and trade them intraday. The price fluctuates throughout the day based on supply and demand, unlike mutual funds, which can only be traded at end-of-day NAV.
2. Understanding Index Trading
Definition and Concept
Index trading involves speculating on the price movements of a stock market index such as the Dow Jones Industrial Average (DJIA), S&P 500, FTSE 100, or Nifty 50. Investors do not own the individual stocks within the index but trade based on the overall direction of the index’s value.
Unlike ETFs, which represent ownership in a basket of assets, index trading is generally executed through derivatives such as futures, options, contracts for difference (CFDs), or index funds. The main objective is to profit from market movements — either upward or downward — without holding the physical assets.
Forms of Index Trading
Index Futures – Standardized contracts to buy or sell an index at a predetermined price on a future date.
Index Options – Provide the right (but not obligation) to trade the index at a specific strike price.
CFDs (Contracts for Difference) – Enable traders to speculate on index price changes without owning the underlying assets.
Index Funds – Mutual funds designed to replicate the performance of a specific index (though less flexible than ETFs).
Mechanics of Index Trading
Index traders focus on price charts, technical indicators, and macroeconomic data to forecast market direction. Because indices aggregate the performance of many companies, they offer a snapshot of overall market health. Traders use leverage in futures or CFDs to magnify potential gains — but also risk.
For example, when trading Nifty 50 Futures, a trader is betting on whether the Nifty index will rise or fall by the expiry date. This allows both hedging and speculative strategies.
3. Advantages of ETFs
1. Diversification
ETFs provide instant diversification across a large number of securities. For example, an S&P 500 ETF gives exposure to 500 of the largest U.S. companies, reducing single-stock risk.
2. Cost Efficiency
Most ETFs have low expense ratios compared to mutual funds, as they are passively managed.
3. Liquidity and Flexibility
ETFs can be bought or sold at any time during market hours, offering real-time trading flexibility.
4. Transparency
Holdings are disclosed daily, unlike mutual funds, which reveal their portfolios quarterly.
5. Dividend Income
Equity ETFs often pay dividends from the underlying stocks, which can be reinvested.
6. Tax Efficiency
Because ETFs use an in-kind creation/redemption process, they generally generate fewer taxable events than mutual funds.
4. Advantages of Index Trading
1. High Leverage
Traders can control large positions with small capital outlay, increasing potential returns.
2. Short-Selling Capability
Index derivatives allow traders to profit from falling markets — a feature not typically available with ETFs unless inverse ETFs are used.
3. Hedging Opportunities
Institutional investors use index futures and options to hedge portfolios against market risk.
4. 24-Hour Market Access
Major index futures (like S&P 500, NASDAQ, or FTSE) trade almost round the clock, allowing participation across global time zones.
5. Quick Market Exposure
Traders can gain exposure to the entire market efficiently without buying individual stocks.
5. Risks Involved
ETFs:
Tracking Error – ETF performance may slightly deviate from the underlying index due to fees or imperfect replication.
Liquidity Risk – Niche or thinly traded ETFs may experience wider spreads.
Market Risk – ETFs still carry the same risk as their underlying assets.
Currency Risk – For global ETFs, exchange rate fluctuations can affect returns.
Management Risk – Active ETFs depend on manager skill for performance.
Index Trading:
Leverage Risk – Amplifies both gains and losses.
Market Volatility – Indices can fluctuate rapidly due to macroeconomic or geopolitical events.
Margin Calls – Traders must maintain margin levels; otherwise, positions may be liquidated.
Timing Risk – Short-term trades can be affected by sudden market reversals.
Complexity – Requires understanding of derivatives, rollovers, and expiration dates.
6. Strategic Use Cases
When to Choose ETFs
Long-term investors seeking diversified exposure to markets.
Passive investors focused on wealth building.
Those preferring simplicity and low costs.
Investors who want dividend income.
Retirement portfolios and systematic investment plans (SIPs).
When to Choose Index Trading
Short-term or swing traders seeking profit from volatility.
Institutions looking to hedge market risk.
Traders comfortable with technical analysis and leverage.
Professionals managing derivatives portfolios.
Speculators expecting directional market moves.
7. Cost and Tax Comparison
ETFs:
Costs: Management fees (expense ratios), brokerage commission, and bid-ask spread.
Taxation: In India, equity ETFs held for over a year attract long-term capital gains tax (LTCG) at 10% above ₹1 lakh; short-term gains are taxed at 15%.
Index Trading:
Costs: Margin requirement, overnight rollover charges (for CFDs), exchange fees, and broker commissions.
Taxation: Profits from futures and options are treated as business income and taxed at slab rates. Losses can be carried forward for set-off.
8. Performance and Historical Context
Historically, ETFs have enabled retail investors to participate in market growth efficiently. For instance, the SPDR S&P 500 ETF (SPY), launched in 1993, has become one of the largest funds globally, offering consistent performance in line with the U.S. equity market.
On the other hand, index trading through derivatives has empowered traders to hedge risk and exploit volatility. The launch of index futures, such as Nifty Futures in India, significantly improved market depth and price discovery.
Both instruments have played critical roles in enhancing market efficiency and liquidity.
9. Global and Indian Market Perspective
Global Context
In developed markets like the U.S. and Europe, ETFs dominate retail and institutional portfolios due to low fees and easy access. Global ETF assets surpassed $10 trillion in 2023, driven by the rise of passive investing.
Indian Context
In India, ETFs have gained popularity through platforms like Nippon India ETF Nifty BeES, ICICI Prudential Nifty Next 50 ETF, and SBI ETF Sensex. Meanwhile, index trading through Nifty and Bank Nifty futures and options remains the backbone of India’s derivatives market, attracting massive daily volumes.
10. Future Trends
Thematic ETFs – Growing interest in innovation, AI, green energy, and digital assets.
Smart Beta ETFs – Combining passive and active strategies using factors like value or momentum.
ESG Indexes – Environmentally and socially conscious index products.
Algorithmic Index Trading – Automated strategies enhancing efficiency and reducing emotional bias.
Global Integration – Increasing cross-border ETF listings and index-linked products.
Conclusion
Both ETFs and index trading represent powerful tools for market participation — yet they serve different investor profiles.
ETFs suit long-term, passive investors who value diversification, stability, and simplicity.
Index trading, on the other hand, caters to active traders and professionals aiming to profit from short-term volatility or hedge risk using leverage.
The choice between ETFs and index trading depends on investment goals, time horizon, risk tolerance, and expertise. When used wisely, both can play complementary roles — ETFs for building wealth steadily, and index trading for tactical opportunities and portfolio protection.
In an evolving global financial ecosystem, understanding the nuances between these two approaches empowers investors to navigate markets more effectively, balance risk, and pursue consistent returns in both bullish and bearish environments.
Global Market Insights1. Introduction
The global market represents the vast, interconnected system through which goods, services, capital, and information flow across international borders. It encompasses multiple sectors—finance, manufacturing, technology, energy, commodities, and consumer markets—all interwoven through trade, investment, and policy networks. Global markets serve as the backbone of the modern economy, reflecting shifts in geopolitical influence, technological innovation, and consumer behavior. Understanding global market insights requires an in-depth view of these interconnections, examining how trends in one region or industry can ripple throughout the entire world economy.
The 21st century has witnessed dramatic globalization driven by digital transformation, liberalization of trade, and the rise of emerging economies. Yet, the landscape remains volatile due to political tensions, climate challenges, pandemics, and rapid technological disruption. Thus, global market insights today involve balancing opportunity with risk, short-term speculation with long-term sustainability.
2. The Structure of the Global Market
The global market is not a single unified entity but a network of interdependent systems. Its structure is defined by several core components:
a. Financial Markets
These include global exchanges for stocks, bonds, currencies, and derivatives. The major financial centers—New York, London, Tokyo, Hong Kong, and Singapore—drive liquidity and capital allocation worldwide. Financial markets influence investment decisions, currency valuations, and risk sentiment, often serving as early indicators of economic health.
b. Commodity Markets
These markets handle the trading of raw materials such as oil, gold, agricultural goods, and metals. Commodity prices are vital indicators of global supply-demand balance and economic activity. For instance, oil price fluctuations impact energy costs, inflation, and geopolitical stability.
c. Trade Networks
International trade forms the lifeblood of the global economy. Institutions such as the World Trade Organization (WTO) and regional trade agreements (e.g., USMCA, EU Single Market, ASEAN) shape cross-border exchange rules. Global supply chains connect producers and consumers across continents, emphasizing efficiency but also exposing vulnerabilities during crises.
d. Labor and Human Capital
A globally mobile workforce enables talent optimization, outsourcing, and competitive labor markets. Countries like India, the Philippines, and Vietnam have emerged as service and manufacturing hubs due to skilled labor and cost advantages.
e. Technological Ecosystems
Digital platforms, AI, and automation redefine how markets function. Technology companies now dominate global capitalization rankings, with firms such as Apple, Microsoft, and Tencent leading innovation-driven growth.
3. Key Drivers of Global Market Dynamics
Several forces collectively shape the global market environment. Understanding these drivers provides insight into long-term investment and policy trends.
a. Globalization and Trade Liberalization
Trade liberalization has historically propelled global economic growth by reducing tariffs and barriers. However, recent trends of protectionism and “friend-shoring” (relocating supply chains to allied nations) have created new trade dynamics. Countries are balancing globalization benefits with domestic economic security.
b. Technological Innovation
Artificial intelligence, blockchain, green energy, and biotechnology are revolutionizing productivity and business models. Fintech innovations democratize finance, while automation enhances manufacturing efficiency but also disrupts traditional labor markets.
c. Monetary Policy and Interest Rates
Central banks, particularly the U.S. Federal Reserve, European Central Bank, and Bank of Japan, influence global liquidity through interest rate policies. Low-rate environments stimulate investment, while tightening cycles tend to slow growth and shift capital flows.
d. Geopolitical Tensions
Conflicts, trade wars, and sanctions significantly affect global stability. For instance, U.S.-China rivalry shapes global technology access, supply chains, and foreign investment patterns. Similarly, regional conflicts like those in Eastern Europe and the Middle East disrupt energy supplies and commodity prices.
e. Environmental and Climate Considerations
Climate change has emerged as both a risk and an opportunity for global markets. Green energy investments, carbon pricing, and sustainable finance are transforming industries. Companies increasingly adopt ESG (Environmental, Social, Governance) frameworks to align profitability with sustainability.
4. Regional Market Insights
a. North America
The United States remains the world’s largest economy, driven by innovation, consumer spending, and strong financial markets. Canada complements this with robust energy and resource exports. North American markets are characterized by technological dominance, resilient consumption, and deep capital markets, though debt levels and political polarization pose risks.
b. Europe
Europe’s markets are defined by regulatory strength and industrial diversity. The European Union (EU) remains a global trade powerhouse, but it faces challenges such as slow growth, aging populations, and energy dependency. The post-Brexit landscape continues to redefine trade and financial dynamics.
c. Asia-Pacific
Asia is the epicenter of global growth. China’s transition from manufacturing to consumption-driven growth, India’s digital and service-led expansion, and Southeast Asia’s emerging consumer economies drive demand and innovation. Japan and South Korea continue to lead in technology and advanced manufacturing.
d. Latin America
Rich in natural resources, Latin America’s growth is often tied to commodity cycles. Political instability and inflation challenges persist, yet nations like Brazil, Chile, and Mexico are modernizing their industries and integrating more deeply into global value chains.
e. Africa and the Middle East
Africa’s markets offer high growth potential due to demographics and natural resources. However, infrastructure deficits and governance issues limit progress. The Middle East remains energy-centric, but nations like Saudi Arabia and the UAE are diversifying into tourism, technology, and renewable energy.
5. Global Market Trends and Transformations
a. Digitalization and E-Commerce
E-commerce, digital payments, and data-driven marketing have reshaped consumer behavior. Platforms such as Amazon, Alibaba, and Shopify integrate technology with logistics, enabling borderless retail markets.
b. Shift to Green Economies
Sustainable finance and renewable energy investments are accelerating. Electric vehicles, solar energy, and carbon credit markets exemplify the shift from fossil fuels toward decarbonized economies.
c. Rise of Emerging Markets
Emerging economies contribute over 60% of global GDP growth. Rapid urbanization, expanding middle classes, and technological adoption make these regions central to future global demand.
d. Supply Chain Realignment
COVID-19 exposed vulnerabilities in global supply chains. Companies now diversify sourcing through “China+1” strategies, reshoring, or nearshoring to enhance resilience.
e. Financial Digitalization
The global financial system is undergoing a technological revolution—cryptocurrencies, central bank digital currencies (CBDCs), and decentralized finance (DeFi) redefine how value is exchanged and stored.
6. Challenges in the Global Market
a. Economic Inequality
Globalization has lifted millions out of poverty but also widened income gaps. Developed nations face stagnating wages, while emerging markets grapple with uneven wealth distribution.
b. Inflation and Debt Pressures
Post-pandemic stimulus and geopolitical disruptions have driven inflationary pressures. High public and private debt levels threaten fiscal stability in several economies.
c. Geopolitical Fragmentation
Rising nationalism, trade barriers, and regional conflicts threaten global cooperation. The move toward multipolarity—where power is distributed across multiple regions—complicates policy coordination.
d. Technological Disruption
While innovation fuels growth, it also causes displacement. Automation, AI, and robotics could replace millions of jobs, demanding urgent skill development and policy adaptation.
e. Environmental Risks
Climate change, resource depletion, and extreme weather events increasingly disrupt markets. Sustainable investment and risk mitigation are becoming essential components of global economic strategy.
7. Opportunities in the Global Market
a. Green and Renewable Technologies
Investing in renewable energy, electric vehicles, and sustainable infrastructure offers massive long-term potential. Global climate policies encourage public-private collaboration in this sector.
b. Digital Transformation
AI, IoT (Internet of Things), 5G, and cloud computing provide opportunities for companies to enhance efficiency and innovation. Digitalization also opens new frontiers in fintech, healthcare, and education.
c. Emerging Market Expansion
Asia, Africa, and Latin America present enormous consumer and investment opportunities. Infrastructure development, mobile banking, and digital entrepreneurship are rapidly scaling.
d. Healthcare and Biotechnology
The pandemic accelerated innovation in healthcare, telemedicine, and biotechnology. Aging populations and increased health awareness drive continued global demand.
e. Financial Inclusion and Fintech
Fintech startups are democratizing access to financial services. Mobile payments, digital lending, and blockchain solutions bridge the gap for unbanked populations.
8. The Role of Policy and Global Institutions
Global markets depend on policy coordination and institutional support. Organizations such as the IMF (International Monetary Fund), World Bank, WTO, and OECD provide frameworks for trade, investment, and development. Meanwhile, regional alliances—like the EU, ASEAN, and BRICS—enhance collective bargaining power.
Monetary policies from leading central banks influence global liquidity. Regulatory bodies now emphasize transparency, cybersecurity, and ESG standards to safeguard global market stability. Effective governance remains essential to mitigate systemic risks and foster inclusive growth.
9. The Future Outlook
The future of global markets will be defined by adaptation—economic, technological, and environmental. We are entering a multipolar world, where economic influence is shared among the U.S., China, the EU, and emerging economies. Technology will continue to integrate markets, but digital sovereignty and cybersecurity will emerge as major battlegrounds.
Artificial intelligence and automation will revolutionize industries, while green transitions redefine energy and transportation systems. However, sustained global growth depends on balancing profit with sustainability, and innovation with inclusivity.
Global markets are likely to remain volatile in the short term due to inflation cycles, geopolitical uncertainty, and climate challenges. Yet, long-term prospects remain positive, driven by human ingenuity, digital innovation, and cross-border collaboration.
10. Conclusion
Global market insights reveal a dynamic, interconnected, and ever-evolving system that mirrors humanity’s economic ambitions and collective challenges. The interplay of technology, policy, and capital continues to transform industries and societies. While globalization has delivered prosperity and innovation, it also presents new risks—economic inequality, environmental degradation, and political fragmentation.
The key to thriving in the global market lies in adaptability, diversification, and sustainable strategy. Businesses, investors, and governments must embrace change, leverage digital transformation, and commit to ethical and resilient growth models. In this intricate web of interdependence, understanding global market insights is not just an academic pursuit—it is a strategic necessity for the future of global prosperity.

Trading Crude Oil and the Geopolitical Impact on PricesIntroduction
Crude oil is one of the most strategically significant commodities in the global economy. It fuels transportation, powers industries, and serves as a critical input for countless products ranging from plastics to fertilizers. Because of its universal importance, crude oil trading is not just a financial endeavor—it is a reflection of global political stability, economic growth, and international relations. The price of crude oil is highly sensitive to geopolitical events, including wars, sanctions, alliances, and policy changes. Understanding how geopolitical dynamics affect oil trading and pricing is vital for traders, investors, and policymakers.
1. The Fundamentals of Crude Oil Trading
Crude oil trading involves the buying and selling of oil in various markets, primarily through futures contracts on exchanges such as the New York Mercantile Exchange (NYMEX), Intercontinental Exchange (ICE), and Dubai Mercantile Exchange (DME). These contracts allow traders to speculate on the future price of oil, hedge against risks, or facilitate physical delivery. Two main benchmark grades dominate the market: West Texas Intermediate (WTI) and Brent Crude.
WTI Crude Oil is primarily sourced from the U.S. and traded in dollars per barrel.
Brent Crude Oil is produced in the North Sea and serves as the global benchmark for pricing.
Oil prices are influenced by multiple factors, including supply and demand fundamentals, global economic growth, production levels, inventory data, transportation costs, and geopolitical events. Among these, geopolitical tensions often have the most immediate and dramatic impact.
2. Geopolitics as a Determinant of Oil Prices
The global oil market is uniquely vulnerable to geopolitical developments because a significant portion of reserves and production is concentrated in politically sensitive regions such as the Middle East, North Africa, and Russia. Around 60% of proven oil reserves lie in OPEC (Organization of Petroleum Exporting Countries) member nations, many of which have experienced conflict, sanctions, or regime instability.
Geopolitical risk refers to the potential disruption in oil supply or transportation routes due to international conflicts, political upheaval, or policy decisions. When such risks escalate, traders often bid up oil prices in anticipation of supply shortages—even before any actual disruption occurs.
3. Historical Perspective: Major Geopolitical Events and Oil Prices
a. The 1973 Arab Oil Embargo
One of the earliest and most significant examples of geopolitically driven oil price shocks occurred in 1973 when Arab OPEC members imposed an oil embargo against the United States and other nations supporting Israel during the Yom Kippur War. Oil prices quadrupled within months, leading to inflation, recession, and a global energy crisis. The embargo demonstrated the power of oil as a political weapon and the vulnerability of consumer nations.
b. The Iranian Revolution (1979)
The overthrow of the Shah of Iran and the subsequent decline in Iranian oil production reduced global supply by nearly 5%. This shortage, coupled with the Iran-Iraq War (1980–1988), sent prices soaring again. The resulting volatility highlighted how political instability in a single oil-producing nation could ripple through the entire global economy.
c. The Gulf War (1990–1991)
Iraq’s invasion of Kuwait disrupted nearly 5 million barrels per day of oil production. The U.S.-led coalition’s response and the ensuing war created massive uncertainty in the Middle East, briefly pushing oil prices above $40 per barrel—a significant level for that time.
d. The Iraq War (2003)
The U.S. invasion of Iraq reignited geopolitical fears about supply disruptions. Although global production eventually stabilized, the war contributed to sustained higher oil prices in the early 2000s, further compounded by rapid industrialization in China and India.
e. The Arab Spring (2010–2011)
The wave of protests across the Middle East and North Africa led to regime changes and unrest in key producers such as Libya and Egypt. The civil war in Libya, in particular, cut oil output by over one million barrels per day, causing Brent crude prices to exceed $120 per barrel.
f. Russia-Ukraine Conflict (2014 and 2022)
Russia’s annexation of Crimea in 2014 and its full-scale invasion of Ukraine in 2022 significantly disrupted global energy markets. As one of the world’s largest oil and gas exporters, Russia faced Western sanctions that restricted exports, insurance, and financing. In early 2022, Brent crude spiked above $130 per barrel, reflecting fears of prolonged supply shortages and energy insecurity across Europe.
4. Channels Through Which Geopolitics Impacts Oil Prices
Geopolitical events influence oil prices through several interconnected channels:
a. Supply Disruptions
Conflicts or sanctions can directly reduce oil supply by damaging infrastructure, limiting production, or restricting exports. For example, sanctions on Iran in 2012 and again in 2018 led to significant declines in its oil exports, tightening global supply.
b. Transportation and Shipping Risks
Chokepoints such as the Strait of Hormuz, Suez Canal, and Bab el-Mandeb Strait are vital for global oil transportation. Any military conflict or threat in these areas immediately raises concerns about shipping disruptions, leading to higher prices. Nearly 20% of global oil passes through the Strait of Hormuz daily.
c. Speculative Reactions
Traders and hedge funds respond quickly to geopolitical news, often amplifying price movements. Futures markets price in expected risks, causing volatility even when actual supply remains unaffected.
d. Strategic Reserves and Policy Responses
Nations often release oil from strategic reserves or negotiate production increases through OPEC to stabilize markets. For example, the U.S. and IEA (International Energy Agency) coordinated strategic reserve releases in 2022 to offset supply disruptions caused by the Russia-Ukraine conflict.
e. Currency Movements
Since oil is traded in U.S. dollars, geopolitical tensions that weaken the dollar or create global uncertainty can influence oil prices. A weaker dollar often makes oil cheaper for non-U.S. buyers, boosting demand and raising prices.
5. OPEC and Geopolitical Strategy
The Organization of Petroleum Exporting Countries (OPEC), formed in 1960, and its extended alliance OPEC+, which includes Russia, play a pivotal role in determining oil supply and prices. The organization uses coordinated production quotas to manage global prices, often aligning decisions with geopolitical interests.
For instance:
In 2020, during the COVID-19 pandemic, OPEC+ cut production by nearly 10 million barrels per day to support collapsing prices.
In 2023, Saudi Arabia and Russia announced voluntary cuts to maintain price stability amid slowing demand and Western sanctions.
OPEC’s policies are inherently geopolitical, balancing the economic needs of producers with the political relationships among member states and major consumer nations.
6. Energy Transition and the New Geopolitics of Oil
The growing global emphasis on renewable energy and decarbonization is reshaping the geopolitical landscape of oil trading. As nations transition to cleaner energy, oil-producing countries face the challenge of maintaining revenue while managing political stability.
However, this transition also introduces new geopolitical dependencies—for example, on lithium, cobalt, and rare earth metals used in electric vehicle batteries. While demand for oil may gradually plateau, geopolitical risks remain as nations compete over new energy supply chains.
Additionally, U.S. shale production has transformed the country from a net importer to a major exporter, reducing its vulnerability to Middle Eastern geopolitics but also introducing new market dynamics. Shale producers can ramp up or scale down production relatively quickly, acting as a “shock absorber” to global price swings.
7. The Role of Technology and Market Transparency
Technological advancements in trading—especially algorithmic and data-driven models—have increased market liquidity but also heightened sensitivity to news. Real-time tracking of geopolitical developments via satellites, social media, and analytics platforms allows traders to react instantly.
For example, satellite data showing tanker movements or refinery fires can trigger immediate price adjustments. The intersection of AI, big data, and geopolitics now defines modern oil trading strategies, with traders assessing both quantitative signals and qualitative geopolitical intelligence.
8. Managing Geopolitical Risk in Oil Trading
Professional oil traders and corporations employ various strategies to manage geopolitical risks:
Diversification: Sourcing oil from multiple regions to minimize reliance on unstable producers.
Hedging: Using futures, options, and swaps to lock in prices and reduce exposure to volatility.
Scenario Analysis: Running stress tests based on potential geopolitical outcomes (e.g., war, sanctions, embargoes).
Political Risk Insurance: Protecting investments against losses due to government actions or conflict.
Strategic Reserves: Governments maintain emergency stockpiles to stabilize supply during crises.
In addition, diplomatic engagement and international cooperation—such as IEA coordination or U.N.-mediated negotiations—can help mitigate disruptions and maintain market balance.
9. The Future Outlook: Geopolitics and the Oil Market
As of the mid-2020s, the global oil market faces a new era of geopolitical uncertainty. Key issues shaping the future include:
The U.S.-China rivalry, which may influence energy trade routes and technological access.
Middle Eastern realignments, including normalization of relations between former rivals and shifting alliances.
Climate policy conflicts, as nations balance carbon reduction commitments with economic growth needs.
Sanctions regimes on Russia, Iran, and Venezuela, which continue to restrict global supply flexibility.
The digitalization of trading, which increases speed and transparency but also amplifies volatility.
Although long-term demand growth may slow due to renewable energy adoption, oil will remain a central geopolitical and economic asset for decades. The world’s dependence on energy ensures that geopolitics will continue to shape price trends, investment decisions, and market psychology.
Conclusion
Crude oil trading is not merely a reflection of supply and demand; it is a barometer of global stability and geopolitical tension. From the 1973 oil embargo to the ongoing Russia-Ukraine conflict, political decisions have repeatedly proven capable of reshaping energy markets. For traders and policymakers alike, understanding the geopolitical dimensions of oil is crucial for navigating price volatility and maintaining economic resilience.
As the energy transition accelerates, the nature of geopolitical risk will evolve—but it will not disappear. The intersection of oil, politics, and global economics will continue to define international relations and financial markets, ensuring that crude oil remains one of the world’s most geopolitically sensitive and closely watched commodities.

Exchange Rate Strategies in the Global Trading MarketIntroduction
Exchange rates—the prices of one country’s currency in terms of another—are at the heart of the global trading system. They play a decisive role in determining international competitiveness, investment flows, and macroeconomic stability. As globalization intensifies, managing exchange rates effectively has become a strategic priority for governments, central banks, and multinational corporations. The strategies adopted to manage exchange rates are known as exchange rate strategies or exchange rate regimes. These strategies influence trade balances, inflation, foreign investment, and the overall growth trajectory of nations. Understanding how these strategies operate and interact within the global trading market is essential to grasping modern international economics.
1. Understanding Exchange Rates
An exchange rate is the value of one currency relative to another. For example, if 1 U.S. dollar equals 83 Indian rupees, the exchange rate is 1 USD = ₹83. Exchange rates fluctuate constantly due to various factors such as interest rates, inflation, trade balances, capital flows, and market speculation.
There are two primary types of exchange rates:
Nominal Exchange Rate – the rate at which one currency can be exchanged for another.
Real Exchange Rate – adjusted for inflation differences between countries, reflecting the true purchasing power of currencies.
Exchange rates affect all major areas of the global economy—from trade and tourism to investment and government policy. Hence, countries design exchange rate strategies to align currency values with economic goals.
2. Types of Exchange Rate Strategies
Exchange rate strategies can broadly be divided into three major regimes: fixed, floating, and hybrid (managed float) systems. Each comes with its own advantages, challenges, and implications for the global market.
A. Fixed Exchange Rate Strategy
A fixed exchange rate system—also called a pegged system—is one in which a country’s currency value is tied to another major currency (such as the U.S. dollar or euro) or to a basket of currencies. Under this strategy, the central bank commits to maintaining the exchange rate at a predetermined level.
Examples:
The Saudi Arabian riyal is pegged to the U.S. dollar.
The Hong Kong dollar has been pegged to the U.S. dollar since 1983.
Advantages:
Promotes stability and predictability in international trade.
Reduces exchange rate risk for exporters and importers.
Helps control inflation by linking the domestic currency to a stable foreign currency.
Disadvantages:
Limits a country’s monetary policy independence.
May lead to currency overvaluation or undervaluation, distorting trade balances.
Requires large foreign exchange reserves to maintain the peg.
A fixed exchange rate is often adopted by countries seeking to build investor confidence or stabilize a volatile economy.
B. Floating Exchange Rate Strategy
In a floating exchange rate system, the value of the currency is determined entirely by market forces—supply and demand in the foreign exchange (forex) market. Governments and central banks may intervene occasionally, but they do not set a specific target rate.
Examples:
The U.S. dollar, euro, British pound, and Japanese yen are floating currencies.
Advantages:
Provides monetary policy flexibility; central banks can adjust interest rates freely.
Automatically adjusts to economic shocks and trade imbalances.
Reduces the need for massive foreign reserves.
Disadvantages:
Creates volatility and uncertainty in exchange rates.
May lead to short-term speculation and rapid currency movements.
Can increase risks for exporters and importers.
Floating exchange rates are best suited for large, diversified, and financially mature economies that can absorb currency fluctuations.
C. Managed Float or Hybrid Exchange Rate Strategy
Most countries today follow a managed float or hybrid strategy, combining elements of both fixed and floating systems. Here, the exchange rate is primarily determined by the market, but the central bank intervenes occasionally to stabilize the currency or guide it toward a preferred level.
Examples:
India follows a managed float system where the Reserve Bank of India (RBI) intervenes to curb excessive volatility.
China manages the yuan’s value within a controlled band around a reference rate.
Advantages:
Offers a balance between stability and flexibility.
Enables selective intervention during volatility.
Protects against speculative attacks.
Disadvantages:
May lead to uncertainty if market participants do not understand the central bank’s policies.
Requires effective management and transparent communication to build credibility.
3. Determinants of Exchange Rate Movements
Exchange rates are influenced by a combination of economic fundamentals and market psychology. The major determinants include:
Interest Rate Differentials – Higher interest rates attract foreign capital, strengthening the currency.
Inflation Rates – Low inflation boosts currency value; high inflation weakens it.
Trade Balances – Countries with trade surpluses usually have stronger currencies.
Political Stability – Stable governments attract foreign investment, enhancing currency strength.
Market Expectations – Traders’ perceptions about future policies and performance drive short-term fluctuations.
Speculation and Capital Flows – Large capital inflows or outflows can cause sharp currency movements.
Understanding these determinants helps policymakers and businesses craft appropriate exchange rate strategies.
4. Role of Central Banks and Monetary Authorities
Central banks are the key architects and executors of exchange rate strategies. Their responsibilities include:
Intervention in Forex Markets: Buying or selling foreign currency to influence the domestic currency’s value.
Setting Interest Rates: Adjusting rates to attract or repel foreign investment.
Maintaining Foreign Reserves: Ensuring adequate reserves for interventions.
Communicating Policy Stance: Providing guidance to stabilize market expectations.
For instance, the U.S. Federal Reserve, European Central Bank (ECB), and Bank of Japan manage their exchange rate impacts indirectly through monetary policy, while emerging markets like India or Brazil often intervene directly.
5. Exchange Rate Strategies and Global Trade
Exchange rate policies profoundly affect global trade patterns:
Export Competitiveness: A weaker currency makes exports cheaper and more competitive, stimulating demand.
Import Costs: A stronger currency reduces import prices, benefiting consumers and lowering inflation.
Trade Balances: Persistent misalignments can lead to deficits or surpluses.
Foreign Investment: Stable and predictable exchange rate systems attract long-term foreign direct investment (FDI).
For example, China’s managed currency policy during its early growth phase kept exports competitively priced, driving its manufacturing boom. Conversely, countries with overvalued currencies often experience declining exports and rising imports, widening trade deficits.
6. Exchange Rate Strategies and Economic Stability
The exchange rate regime influences not just trade, but also economic stability:
Fixed regimes provide stability but may collapse under speculative pressure if reserves are inadequate.
Floating regimes absorb shocks automatically but can amplify volatility.
Hybrid regimes offer flexibility but require strong institutional capacity to manage interventions.
During the Asian Financial Crisis (1997), several economies with semi-fixed systems (like Thailand and Indonesia) faced collapse after speculative attacks, illustrating the risks of maintaining unsustainable pegs. Conversely, countries with flexible systems (like Australia) weathered the crisis better.
7. Exchange Rate Strategies and Global Capital Flows
Global investors constantly evaluate currency risks when making cross-border investments. Exchange rate strategies therefore influence capital flows:
Fixed systems often attract short-term speculative flows, seeking stability.
Floating systems attract long-term investments, offering transparency.
Managed systems strike a balance but must maintain credibility to prevent capital flight.
For instance, when the U.S. Federal Reserve raises interest rates, capital flows out of emerging markets, causing currency depreciation and policy challenges. Managing such spillovers requires coherent exchange rate and monetary coordination.
8. Exchange Rate Strategies and International Cooperation
In today’s interconnected world, exchange rate strategies are not purely domestic choices. They affect trading partners and global markets, necessitating international cooperation through institutions like the International Monetary Fund (IMF), World Bank, and World Trade Organization (WTO).
The IMF monitors global currency movements, advises on sustainable policies, and provides financial assistance during crises. The G20 also coordinates policies to prevent “currency wars,” where nations competitively devalue currencies to boost exports.
9. Challenges in Modern Exchange Rate Management
Despite technological advances and policy coordination, several challenges persist:
Globalization of Finance: Rapid capital flows make exchange rates volatile.
Speculative Attacks: Investors can quickly move billions, pressuring currencies.
Geopolitical Uncertainty: Wars, sanctions, and political events cause abrupt shifts.
Digital Currencies: The rise of cryptocurrencies and central bank digital currencies (CBDCs) complicates traditional currency management.
Balancing Growth and Stability: Policymakers often face trade-offs between stimulating growth and maintaining currency stability.
10. Future of Exchange Rate Strategies
The future of exchange rate management will be shaped by technological, geopolitical, and environmental changes:
Digital Transformation: Blockchain-based payment systems and CBDCs may reduce dependency on the U.S. dollar and alter traditional exchange mechanisms.
Regional Currency Integration: Efforts like the Eurozone or proposed Asian Currency Unit may promote regional stability.
Sustainable Finance: As economies transition to green energy, exchange rate policies will adapt to new trade dynamics.
Data-Driven Policy: Artificial intelligence and real-time analytics will enhance central banks’ ability to predict and manage currency movements.
Overall, the future points toward greater flexibility, digital integration, and international cooperation.
Conclusion
Exchange rate strategies form the backbone of the global trading market. Whether fixed, floating, or managed, these strategies determine how nations engage in trade, manage capital flows, and maintain economic stability. Each approach carries distinct trade-offs—between stability and flexibility, autonomy and discipline. In a world increasingly connected by finance and technology, the effectiveness of an exchange rate strategy depends not merely on policy design but on institutional credibility, international coordination, and adaptive management. As global trade evolves, so too must the strategies that govern the value of money itself—ensuring that currencies continue to facilitate, rather than hinder, the smooth functioning of the global economy.
Global Market Crises, Emerging Market, and Systemic InvisibilityIntroduction
The global financial landscape is an intricate web of interdependence, where economies—both developed and emerging—are bound together through trade, capital flows, and investment channels. When a crisis erupts in one segment of this system, the ripple effects can destabilize the entire network. Global market crises, therefore, are not isolated events but collective shocks that reveal deep structural vulnerabilities in international finance. Emerging markets, which often serve as both beneficiaries and victims of globalization, find themselves particularly exposed to such turmoil. An underlying aspect of these crises is systemic invisibility—the inability to perceive, predict, or regulate risks that accumulate beneath the surface of financial and economic systems.
This essay explores the nature of global market crises, the role and vulnerability of emerging markets, and the concept of systemic invisibility that exacerbates instability. It discusses historical precedents, theoretical insights, and modern implications for a world driven by financial integration.
1. Understanding Global Market Crises
A global market crisis refers to a widespread and synchronized downturn in financial markets that transcends national boundaries. These crises typically involve severe declines in asset prices, widespread credit contractions, capital flight, and loss of investor confidence. The interconnectedness of global finance—through trade, investment, and technology—means that localized shocks can escalate into systemic failures.
Causes of Global Market Crises
Financial Deregulation and Excessive Leverage:
The liberalization of financial markets since the 1980s encouraged speculative investments and excessive risk-taking. When leverage ratios increase beyond sustainable levels, minor market corrections can lead to massive defaults.
Asset Bubbles and Speculative Behavior:
Asset bubbles—such as those seen in housing or stock markets—form when asset prices deviate significantly from their intrinsic value. The bursting of these bubbles often triggers market collapses, as witnessed during the 2008 Global Financial Crisis.
Monetary Policy and Liquidity Traps:
Loose monetary policies can flood markets with cheap credit, inflating bubbles in emerging economies. Conversely, abrupt tightening of monetary conditions, as seen during the U.S. Federal Reserve’s rate hikes, can lead to capital outflows from developing nations.
Technological and Algorithmic Amplification:
High-frequency trading, algorithmic systems, and digital currencies have introduced new layers of complexity. While enhancing efficiency, they also amplify volatility, making markets more prone to sudden crashes.
Geopolitical Risks and Global Shocks:
Conflicts, pandemics, and trade wars—such as the COVID-19 pandemic and Russia-Ukraine conflict—exert profound impacts on commodity markets, supply chains, and investor sentiment, triggering widespread economic disruptions.
2. The Role and Vulnerability of Emerging Markets
Emerging markets (EMs) are countries transitioning from developing to developed status, characterized by rapid industrialization, growing financial systems, and expanding middle classes. While they present attractive investment opportunities due to high growth potential, they are also more susceptible to global volatility.
Economic and Financial Linkages
Emerging markets are deeply integrated into the global economy through trade, foreign direct investment (FDI), and portfolio flows. They rely heavily on exports, often of commodities, and on foreign capital to finance infrastructure and industrial growth. This dependency makes them sensitive to global demand shifts and interest rate changes in advanced economies.
Types of Vulnerabilities
Currency Instability:
When global investors retreat from riskier assets, EM currencies often depreciate sharply, increasing the cost of foreign-denominated debt. The Asian Financial Crisis (1997–98) is a classic example, where speculative attacks on currencies led to economic collapses across Southeast Asia.
Debt Dependency:
Many emerging economies accumulate external debt to fund development projects. When global liquidity tightens, servicing this debt becomes difficult, leading to sovereign defaults—seen in countries like Argentina, Sri Lanka, and Zambia.
Commodity Dependence:
Export revenues in countries like Brazil, South Africa, and Indonesia are tied to commodity prices. Global crises that reduce demand or disrupt trade channels directly hit fiscal stability.
Capital Flight and Investor Panic:
In times of global uncertainty, investors withdraw funds from emerging markets and move to “safe havens” like U.S. Treasury bonds or gold. This sudden stop in capital inflows can paralyze domestic economies.
Weak Regulatory Frameworks:
Emerging markets often lack robust financial oversight and institutional capacity, making them more exposed to systemic risks and contagion effects.
3. Systemic Invisibility: The Hidden Dimension of Global Crises
“Systemic invisibility” refers to the hidden accumulation of risks and imbalances within the global financial system that remain unnoticed until they culminate in a crisis. It represents the gap between perceived stability and underlying fragility.
Dimensions of Systemic Invisibility
Hidden Leverage and Shadow Banking:
The rise of non-bank financial institutions (NBFIs), such as hedge funds, private equity, and shadow lenders, has created a vast web of credit intermediation outside traditional regulatory frameworks. Risks hidden in these opaque structures can destabilize markets without warning.
Data Blind Spots and Complexity:
The scale and complexity of global finance make it nearly impossible to capture real-time systemic exposures. Cross-border derivatives and off-balance-sheet transactions obscure the true level of financial risk.
Policy Illusion and Delayed Recognition:
Policymakers often fail to detect systemic risks due to political incentives, limited data transparency, or overreliance on outdated models. For example, before 2008, regulators believed that financial innovation had made markets more efficient and stable—until the crisis revealed the opposite.
Market Psychology and Herd Behavior:
Investor sentiment can create a collective illusion of stability. When confidence erodes, the same herd behavior amplifies panic, leading to cascading collapses.
Technological Obscurity:
The digitalization of finance through cryptocurrencies, decentralized finance (DeFi), and AI-driven trading has introduced new forms of invisibility. Risks embedded in decentralized systems can spread rapidly across borders without regulatory control.
Consequences of Systemic Invisibility
Systemic invisibility contributes to delayed crisis response, ineffective regulation, and disproportionate impacts on vulnerable economies. It erodes trust in financial institutions, amplifies inequality, and undermines global governance mechanisms. Most critically, it blinds both policymakers and investors to the real nature of interconnected risks.
4. Historical Lessons: Crisis Patterns and Emerging Markets
A historical overview demonstrates how global crises repeatedly expose systemic invisibility and emerging market vulnerabilities:
The Latin American Debt Crisis (1980s):
Fueled by cheap credit from Western banks, Latin American nations borrowed heavily in the 1970s. When U.S. interest rates rose, debt-servicing costs exploded, leading to widespread defaults. The crisis revealed the hidden fragility of debt-driven growth models.
The Asian Financial Crisis (1997–98):
Overleveraged banking systems, fixed exchange rates, and speculative capital inflows created a bubble of false stability. Once investor confidence evaporated, currencies and stock markets collapsed, illustrating how systemic invisibility masked risks until it was too late.
The Global Financial Crisis (2008):
The collapse of the U.S. subprime mortgage market exposed interconnected risks in global finance. Complex derivatives (like CDOs) spread hidden exposures worldwide. Emerging markets initially seemed insulated but soon faced capital reversals and export contractions.
The COVID-19 Pandemic (2020):
The pandemic triggered an unprecedented global market shock, highlighting how health crises can morph into financial ones. Liquidity freezes and capital flight hit emerging economies, while global supply chain dependencies revealed systemic blind spots.
5. Interconnectedness and Contagion Dynamics
In the modern financial ecosystem, crises spread through contagion—the transmission of shocks across markets and borders. Emerging markets, often at the periphery of global capital networks, become the first casualties when systemic stress arises.
Channels of Contagion
Financial Channel:
Global investors adjust portfolios simultaneously, leading to asset selloffs and currency depreciation in EMs.
Trade Channel:
A slowdown in global demand reduces exports, weakening current accounts and employment.
Confidence Channel:
Perceived risk in one region can lead to capital withdrawals elsewhere, regardless of fundamentals.
Policy Channel:
Central banks in emerging economies often follow global monetary trends. When the U.S. Federal Reserve raises rates, EMs face inflationary pressures and capital flight, limiting policy autonomy.
6. Addressing Systemic Invisibility and Strengthening Resilience
Building resilience against global market crises requires addressing the hidden vulnerabilities that perpetuate systemic invisibility. Key strategies include:
Enhanced Financial Transparency:
Global institutions like the IMF, World Bank, and Financial Stability Board (FSB) must strengthen surveillance of cross-border capital flows, derivatives, and shadow banking activities.
Macroprudential Regulation:
Countries should adopt countercyclical capital buffers, debt limits, and liquidity requirements to contain leverage buildup.
Diversified Economic Structures:
Emerging markets should diversify exports and reduce dependency on commodity cycles and external financing.
Digital Risk Oversight:
Regulators must develop frameworks to monitor fintech, crypto assets, and algorithmic trading systems that contribute to hidden risks.
Regional Safety Nets:
Mechanisms such as swap lines, contingent reserve arrangements, and regional development banks can provide liquidity support during crises.
Global Cooperation:
Crises are inherently transnational; therefore, coordination among central banks, international institutions, and governments is essential for pre-emptive action.
7. The Future of Emerging Markets in a Fragmented World
As the global economy becomes increasingly multipolar—with power shifting toward Asia, Africa, and Latin America—emerging markets will play a greater role in shaping financial stability. However, systemic invisibility will continue to pose risks, especially in a world characterized by digital finance, geopolitical fragmentation, and climate-related shocks.
The future will depend on how effectively emerging economies balance openness with resilience. The ability to identify and manage hidden systemic risks will determine whether globalization continues to be a driver of shared prosperity or a source of recurring crises.
Conclusion
Global market crises reveal the inherent fragility of an interconnected financial system. Emerging markets, though engines of growth, remain vulnerable to external shocks due to structural dependencies and limited regulatory capacity. The concept of systemic invisibility captures the unseen dimensions of modern finance—the risks buried beneath data opacity, technological complexity, and institutional inertia.
To prevent future crises, the world must embrace transparency, cooperation, and adaptive regulation. Only by making the invisible visible can policymakers, investors, and societies navigate the uncertainties of a globalized financial order. The stability of emerging markets—and indeed, the global economy—depends on illuminating the hidden forces that shape systemic risk.
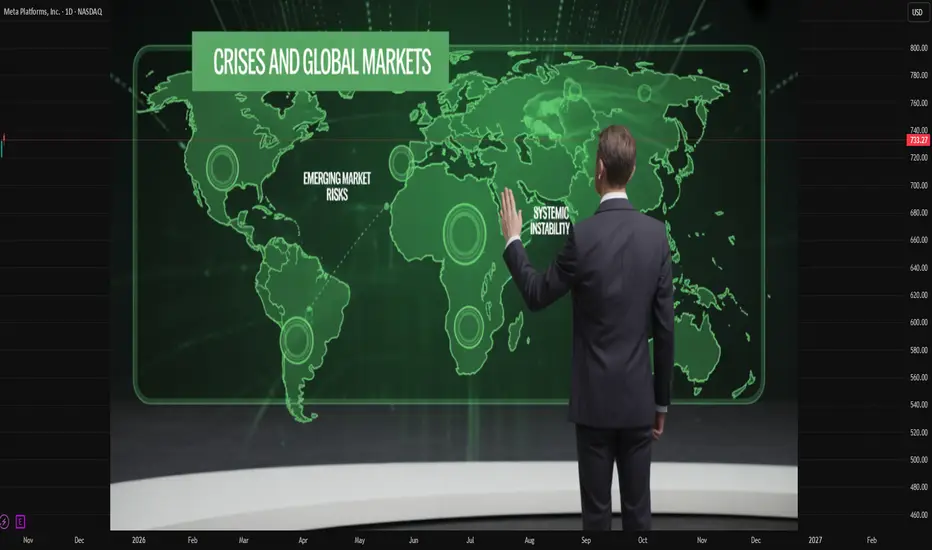
Global Trade ImbalanceIntroduction
Global trade imbalance refers to the persistent and significant differences between the value of goods and services a country exports and the value it imports. In simpler terms, when a nation consistently sells more to the world than it buys, it runs a trade surplus; when it buys more than it sells, it runs a trade deficit. These imbalances, while normal in the short term, can become problematic when they persist for long periods, leading to financial strain, currency distortions, and geopolitical tensions. The global economy thrives on trade interdependence, but when trade becomes unbalanced, it can trigger systemic vulnerabilities affecting growth, employment, and global financial stability.
The issue of global trade imbalance has been a central concern for economists and policymakers, especially since the late 20th century when globalization accelerated. Imbalances between major economies—such as the United States, China, Germany, and Japan—have influenced exchange rates, monetary policy, and even global political relationships. Understanding the roots, consequences, and possible solutions to global trade imbalance is essential for ensuring a more equitable and sustainable international economic system.
Concept of Global Trade Imbalance
Trade imbalance occurs when a nation’s imports and exports of goods and services are not equal. This is reflected in a country’s current account balance, a key component of the balance of payments.
A trade surplus means the country exports more than it imports, indicating that it earns foreign currency and increases reserves.
A trade deficit means the country imports more than it exports, leading to borrowing or depletion of reserves to pay for the difference.
In theory, trade imbalances are not inherently harmful. They can arise from differences in saving and investment behaviors, production capabilities, or consumption preferences. However, when these imbalances are large and persistent, they can lead to unsustainable debt levels or distortions in global demand and supply patterns. For example, if one country continually accumulates surpluses while another accumulates deficits, the result can be a dangerous buildup of global financial risk.
Historical Background
Trade imbalances have existed since the early days of international commerce. During the mercantilist period (16th–18th centuries), European powers sought to achieve trade surpluses to accumulate precious metals, which were viewed as the source of national wealth. This philosophy led to colonization, trade monopolies, and conflicts among nations.
In the post–World War II era, under the Bretton Woods system, global trade imbalances were moderated by fixed exchange rates and international coordination. However, after the collapse of Bretton Woods in the early 1970s, flexible exchange rates led to renewed volatility and imbalances.
The late 20th century witnessed the rise of the U.S. trade deficit and China’s trade surplus. As globalization deepened, manufacturing shifted to Asia, while consumption and financial markets concentrated in the United States and Europe. This created a pattern where developing countries became exporters of goods and savings, while developed nations became consumers and debtors.
Causes of Global Trade Imbalance
Global trade imbalances arise from a complex interaction of structural, economic, and policy factors. Some of the most important causes include:
1. Differences in Savings and Investment Rates
A fundamental driver of trade imbalance is the difference between national savings and investment. Economies that save more than they invest (like China and Germany) tend to run trade surpluses, while those that invest more than they save (like the United States) run trade deficits. The U.S., with its consumption-driven economy, borrows from global markets to finance its deficit, while surplus countries lend to it through foreign investments.
2. Exchange Rate Policies
Exchange rate manipulation or misalignment is another major factor. Some countries, particularly export-driven economies, maintain undervalued currencies to make their exports cheaper and imports more expensive, thereby ensuring persistent surpluses. For example, China was often accused of keeping the yuan artificially low during the 2000s to boost its exports.
3. Globalization and Production Shifts
The global redistribution of manufacturing due to globalization has widened trade gaps. As multinational corporations relocated production to low-cost countries, developing nations became export hubs, while advanced economies turned into consumption centers. This structural shift contributed to chronic trade surpluses in Asia and deficits in the West.
4. Oil Prices and Resource Dependence
Oil-exporting countries often run large surpluses when oil prices are high, while oil-importing nations face widening deficits. The cyclical nature of commodity prices thus influences the global trade balance and contributes to imbalances between resource-rich and resource-poor economies.
5. Fiscal and Monetary Policies
Expansionary fiscal policies, such as government spending and tax cuts, tend to increase domestic consumption and imports, thereby worsening the trade balance. Similarly, loose monetary policies that lower interest rates can weaken a country’s currency, stimulating exports but increasing inflationary pressure. In contrast, tight fiscal policies can generate surpluses by reducing domestic demand.
6. Structural Economic Differences
Countries at different stages of development naturally exhibit trade imbalances. Developing economies often import capital goods and technology for industrialization, leading to temporary deficits, while mature economies export high-value goods and services.
7. Protectionism and Trade Barriers
Tariffs, subsidies, and non-tariff barriers can distort the natural flow of trade. For instance, when a nation imposes tariffs on imports, it reduces demand for foreign goods, potentially leading to retaliatory measures and global imbalances.
Major Examples of Global Trade Imbalance
1. United States
The U.S. has run persistent trade deficits since the 1980s. Its economy depends heavily on imported consumer goods, energy, and technology, while the dollar’s reserve currency status allows it to finance deficits easily. The deficit peaked at over $900 billion in recent years, with China, Mexico, and the European Union being its largest trading partners. The U.S. deficit reflects both domestic overconsumption and global confidence in the dollar.
2. China
China’s rapid industrialization and export-led growth model have resulted in massive trade surpluses. From the early 2000s onward, China became the “factory of the world,” exporting manufactured goods globally. Although its surplus has moderated in recent years due to rising domestic demand, it remains a key contributor to global imbalance.
3. Germany and Eurozone
Germany’s strong industrial base and restrained domestic consumption have led to sustained surpluses. Within the Eurozone, southern economies like Greece, Italy, and Spain have faced chronic deficits, creating intra-European trade imbalances that contributed to the Eurozone debt crisis.
4. Oil Exporting Countries
Middle Eastern nations such as Saudi Arabia and the UAE often enjoy large trade surpluses during periods of high oil prices. However, when oil prices decline, these surpluses can rapidly turn into deficits, revealing the volatility of resource-dependent economies.
Consequences of Global Trade Imbalance
1. Financial Instability
Large and persistent trade imbalances can trigger global financial crises. For example, the 2008 Global Financial Crisis was partly fueled by excessive capital inflows from surplus countries to deficit economies, creating asset bubbles and unsustainable debt.
2. Currency Volatility
Trade imbalances exert pressure on exchange rates. Deficit countries often see their currencies depreciate, increasing import costs and inflation, while surplus nations face appreciation pressures, which may reduce export competitiveness.
3. Employment and Industrial Shifts
Trade deficits can lead to deindustrialization and job losses in manufacturing sectors, as witnessed in the U.S. and parts of Europe. Conversely, surplus countries experience industrial expansion but may suffer from domestic demand stagnation.
4. Geopolitical Tensions
Persistent trade imbalances can escalate into political conflicts. The U.S.-China trade war, initiated in 2018, was largely driven by America’s frustration with its widening deficit and perceived unfair trade practices by China.
5. Global Inequality
Trade imbalances often reflect and reinforce economic inequalities. Surplus nations accumulate wealth and foreign reserves, while deficit countries face debt accumulation and slower growth. This asymmetry undermines global economic stability and fairness.
Efforts to Correct Trade Imbalances
Addressing global trade imbalances requires coordinated international action and sound domestic policies. Several strategies have been attempted or proposed:
1. Exchange Rate Adjustments
Allowing currencies to adjust freely can help correct imbalances naturally. A stronger currency in surplus countries makes their exports more expensive and imports cheaper, reducing surpluses, while a weaker currency in deficit countries can boost exports.
2. Structural Reforms
Rebalancing domestic economies is crucial. Surplus nations like China and Germany need to boost domestic consumption and reduce dependence on exports, while deficit countries like the U.S. should promote savings and production.
3. Fiscal and Monetary Discipline
Responsible fiscal management can help reduce deficits. Limiting excessive government borrowing, encouraging investment in productive sectors, and maintaining moderate interest rates can support a healthier trade balance.
4. Trade Agreements and Cooperation
International organizations such as the World Trade Organization (WTO), IMF, and G20 play vital roles in promoting balanced trade. Through cooperation, they aim to reduce protectionism, ensure fair competition, and facilitate dispute resolution.
5. Promoting Innovation and Competitiveness
Enhancing technological capabilities, infrastructure, and human capital can help deficit countries produce higher-value goods and reduce reliance on imports.
The Future of Global Trade Imbalances
The global trade landscape is rapidly changing due to digitalization, automation, and shifting supply chains. The COVID-19 pandemic and geopolitical realignments have prompted many nations to rethink dependence on global trade. Decoupling trends between the U.S. and China, regional trade agreements, and nearshoring strategies may alter traditional imbalance patterns.
Moreover, green transitions and the shift toward renewable energy will reduce oil-related trade surpluses while creating new ones in critical minerals and clean technologies. As global financial systems evolve, addressing imbalances will require integrating sustainability, digital finance, and inclusive growth into trade policy.
Conclusion
Global trade imbalance remains one of the most pressing economic challenges of the 21st century. While some degree of imbalance is natural and reflects comparative advantage, persistent and extreme disparities can threaten economic stability, fuel political tensions, and distort global growth. Addressing these issues demands a coordinated international response focused on fairness, transparency, and sustainability.
A balanced global trade system not only promotes shared prosperity but also strengthens the resilience of the international economy against future crises. Ultimately, achieving equilibrium in global trade is not merely about balancing numbers—it is about building a more stable, equitable, and cooperative world economy.

Global Market Shifting: Changing Dynamics of the World EconomyIntroduction
The global market is not static—it is an ever-evolving ecosystem influenced by a combination of economic, technological, political, and environmental factors. Over the past few decades, globalization, digital transformation, trade liberalization, and geopolitical realignments have drastically reshaped how countries, corporations, and consumers interact. However, recent developments—ranging from supply chain disruptions to shifts in trade alliances—indicate that the global market is undergoing one of the most significant transformations in modern history.
The term “global market shifting” refers to these dynamic changes in global trade patterns, production structures, capital flows, and investment priorities. These shifts redefine global competitiveness, redistribute economic power, and create new winners and losers on the world stage. Understanding these trends is crucial for policymakers, investors, and businesses aiming to adapt to this new economic landscape.
1. The Evolution of the Global Market
The global market has gone through several distinct phases of transformation:
Post-World War II Era (1945–1970s):
This period was dominated by Western economies—particularly the United States—and characterized by industrial expansion, reconstruction in Europe and Japan, and the creation of global institutions like the International Monetary Fund (IMF), the World Bank, and the General Agreement on Tariffs and Trade (GATT), which later evolved into the World Trade Organization (WTO).
Globalization Era (1980s–2000s):
The fall of the Soviet Union, China’s economic opening, and the spread of neoliberal policies marked the rise of global capitalism. Supply chains became international, capital flowed freely, and developing nations began integrating into global markets.
Digital and Knowledge Economy Era (2000s–2010s):
The rise of the internet and digital technology transformed production and consumption patterns. E-commerce, automation, and data-driven decision-making became central to market growth.
Current Transformation Era (2020s–present):
The world is now experiencing a shift from globalization to “regionalization” and “strategic competition.” Global trade is being redefined by geopolitics, sustainability, and technological sovereignty.
2. Drivers of Global Market Shifts
The global market does not shift randomly. It evolves in response to powerful structural forces. The major drivers include:
a. Technological Disruption
Artificial intelligence, automation, blockchain, and advanced manufacturing are revolutionizing industries. These technologies are not just improving productivity—they are redefining competitive advantage.
AI and machine learning have automated decision-making in finance, logistics, and marketing.
Robotics and 3D printing are reshoring production back to developed economies, reducing dependence on low-cost labor markets.
Blockchain is enhancing transparency in supply chains and global trade settlements.
The result is a shift from labor-intensive globalization to technology-intensive globalization.
b. Geopolitical Realignments
Rising tensions between major powers—especially between the United States and China—are fragmenting global markets. Trade wars, sanctions, and the race for technological dominance have led to “decoupling” in critical sectors like semiconductors, energy, and telecommunications.
Countries are now diversifying supply chains to reduce dependency on single regions. For example, the “China+1” strategy encourages manufacturers to expand into India, Vietnam, and Indonesia.
c. Supply Chain Reconfiguration
The COVID-19 pandemic exposed vulnerabilities in global supply chains. Lockdowns, border closures, and shipping delays revealed the risks of overreliance on centralized manufacturing hubs.
Post-pandemic, many companies are moving towards “nearshoring” (bringing production closer to home) and “friend-shoring” (partnering with politically aligned countries). This marks a departure from the hyper-globalized supply chain model of the 1990s and 2000s.
d. Energy Transition and Climate Policy
The global push for green energy and decarbonization is reshaping investment priorities. Fossil fuel industries are declining, while renewable energy, electric vehicles, and carbon markets are expanding rapidly.
Countries rich in rare earth elements and critical minerals—such as lithium, cobalt, and nickel—are gaining new economic importance. This transition is not just about environmental policy; it represents a structural reorientation of global capital.
e. Shifting Consumer Demographics and Preferences
Emerging markets, particularly in Asia and Africa, are becoming major consumer bases. The global middle class is expected to exceed 5 billion people by 2030, most of whom will live in developing countries.
At the same time, consumers in advanced economies are prioritizing sustainability, digital convenience, and ethical production, forcing companies to adapt their strategies accordingly.
3. Regional Dynamics of the Shift
a. The Rise of Asia
Asia has become the epicenter of global economic growth.
China remains a manufacturing powerhouse but is now transitioning toward innovation-driven and service-oriented industries.
India is emerging as a global hub for digital services, clean energy, and manufacturing diversification.
Southeast Asia benefits from investment diversification, especially as companies move supply chains out of China.
Collectively, Asian economies are projected to contribute over 60% of global GDP growth by 2030.
b. North America’s Resurgence
The United States, Canada, and Mexico are revitalizing regional trade through agreements like the USMCA. The U.S. is also investing heavily in semiconductor manufacturing, renewable energy, and AI technologies to maintain its leadership.
Reshoring and nearshoring initiatives are restoring industrial capacity in North America, particularly in strategic sectors like defense, energy, and technology.
c. Europe’s Green and Digital Transition
Europe is leading the world in sustainable policy frameworks such as the European Green Deal and Carbon Border Adjustment Mechanism (CBAM). However, Europe faces challenges from energy dependence and slow economic growth.
To stay competitive, the EU is focusing on digital sovereignty, reducing reliance on U.S. and Chinese tech giants, and investing in green infrastructure.
d. Africa and Latin America: Emerging Frontiers
Africa and Latin America are gaining attention as new centers of growth. Africa’s population boom, natural resource wealth, and improving digital connectivity position it as a future manufacturing and consumer hub.
Latin America, with countries like Brazil and Chile leading in renewable energy and agriculture, is becoming vital in global sustainability chains.
4. The Role of Digitalization
Digitalization is at the core of market transformation.
E-commerce, fintech, digital currencies, and remote work have globalized economic participation in unprecedented ways. Platforms such as Amazon, Alibaba, and MercadoLibre have reshaped retail, while financial technology has expanded access to credit and payment systems.
Moreover, the data economy is now a key source of value creation. Nations are competing for control over data infrastructure, cybersecurity, and cloud computing. The emergence of digital currencies, including central bank digital currencies (CBDCs), may redefine how global payments and trade settlements operate.
5. Shifting Trade and Investment Patterns
Trade flows are no longer dominated by the same old players. Several trends are noteworthy:
Regional trade blocs are becoming stronger. For instance, the Regional Comprehensive Economic Partnership (RCEP) and the African Continental Free Trade Area (AfCFTA) are integrating regional economies.
South-South trade—commerce among developing countries—is expanding rapidly, reducing dependence on Western markets.
Foreign Direct Investment (FDI) is moving toward technology, renewable energy, and infrastructure sectors, away from traditional manufacturing.
Investors are also focusing on Environmental, Social, and Governance (ESG) factors, influencing how capital is allocated globally.
6. Challenges in the Global Market Shift
The transformation of the global market is not without challenges:
Economic Inequality:
The benefits of globalization have not been evenly distributed. Advanced economies have reaped most technological gains, while developing countries struggle with skill gaps and infrastructure deficits.
Protectionism and Trade Barriers:
Many countries are adopting protectionist measures to safeguard domestic industries, potentially fragmenting the global economy.
Technological Divide:
Access to digital infrastructure varies widely, especially between developed and developing countries, creating a new kind of inequality.
Geopolitical Risks:
Conflicts, sanctions, and trade wars can destabilize international cooperation, increasing uncertainty for businesses and investors.
Environmental Constraints:
As climate change accelerates, resource scarcity and extreme weather events may disrupt supply chains and threaten food and energy security.
7. Opportunities Emerging from the Shift
Despite the challenges, the global market shift presents vast opportunities:
Innovation in Technology:
AI, green tech, and biotechnology are creating entirely new industries and employment opportunities.
Regional Collaboration:
Regional trade blocs allow smaller economies to enhance their competitiveness and reduce vulnerability to global shocks.
Sustainable Finance:
Investments in renewable energy and ESG initiatives are expected to exceed trillions of dollars in the coming decade.
Digital Inclusion:
Expanding internet access in developing regions is creating new consumer markets and entrepreneurial opportunities.
8. The Future of the Global Market
Looking ahead, the global market will likely be defined by multipolarity—a system where no single country dominates. Instead, regional power centers like the U.S., China, the EU, India, and ASEAN will coexist, each with distinct economic models and technological strengths.
Trade will become more regional and digital, with sustainability and resilience as guiding principles. Automation and AI will continue to drive productivity, but governments will need to manage their social impacts through education and inclusive policies.
Furthermore, the green transition will become the new engine of growth. The competition for clean energy leadership—especially in hydrogen, solar, and electric vehicles—will shape the economic hierarchy of the 21st century.
Conclusion
The shifting global market marks the beginning of a new economic era—one defined by technological innovation, environmental consciousness, and geopolitical complexity. While globalization is not ending, it is being redefined. The new paradigm emphasizes resilience over efficiency, regional balance over concentration, and sustainability over short-term profit.
Adapting to these shifts requires foresight, flexibility, and collaboration among governments, businesses, and individuals. Those who understand and anticipate these global changes will not only survive but thrive in the evolving marketplace.
In essence, the global market shift is not merely a challenge—it is a transformative opportunity to rebuild a more inclusive, sustainable, and technologically advanced world economy.
Globalization and DeglobalizationIntroduction
Globalization has been one of the most defining forces of the modern era. It refers to the process by which businesses, cultures, technologies, and governments across the world become interconnected and interdependent. From the late 20th century onwards, globalization accelerated rapidly due to advances in communication, transportation, and digital technologies. This process transformed the global economy into an integrated system, allowing for free trade, capital flows, and cultural exchange on an unprecedented scale.
However, the 21st century has also witnessed the emergence of an opposite trend — deglobalization. This refers to the gradual slowing down, reversal, or reconfiguration of globalization. Rising nationalism, trade wars, pandemics like COVID-19, and geopolitical tensions have encouraged countries to reconsider global interdependence. Understanding both globalization and deglobalization is crucial to comprehend how today’s world economy and politics are evolving.
Concept of Globalization
Globalization can be defined as the increasing integration and interdependence of national economies and societies through the cross-border flow of goods, services, technology, capital, and information. It breaks down barriers between countries, fostering economic cooperation and cultural exchange.
The phenomenon of globalization is not new — it began centuries ago with trade routes such as the Silk Road, connecting Asia and Europe. However, the modern wave of globalization began in the late 20th century, following the end of World War II, the creation of international institutions like the IMF, World Bank, and WTO, and the liberalization of markets worldwide.
Drivers of Globalization
Technological Advancements
Innovations in communication (like the internet, smartphones, and social media) and transportation (such as air travel and container shipping) have dramatically reduced costs and time barriers, making the world more connected.
Trade Liberalization
Free trade agreements (FTAs), the reduction of tariffs, and the establishment of the World Trade Organization (WTO) have encouraged global trade, allowing goods and services to move freely across borders.
Foreign Direct Investment (FDI)
Multinational corporations (MNCs) have expanded operations across countries, investing in developing nations and creating global production chains.
Outsourcing and Offshoring
Companies increasingly locate production in countries with cheaper labor or better resources. For example, manufacturing moved to China and India became a hub for IT services.
Financial Integration
Capital markets have become interconnected, enabling investments and capital to move globally with ease.
Cultural Exchange
The spread of media, tourism, and migration has led to a blending of cultures, making the world more cosmopolitan.
Dimensions of Globalization
Globalization has multiple dimensions:
Economic Globalization – Integration of national economies through trade, investment, and capital flow.
Political Globalization – Growing influence of international organizations and global governance structures such as the UN, WTO, IMF, and World Bank.
Cultural Globalization – The spread of ideas, languages, and lifestyles, often leading to cultural homogenization.
Technological Globalization – Rapid global diffusion of technologies, especially in communication and automation.
Environmental Globalization – Global cooperation in addressing issues like climate change and sustainability.
Positive Impacts of Globalization
Economic Growth
Globalization has led to rapid growth in many developing countries. By opening markets, nations like China, India, and Vietnam have lifted millions out of poverty.
Access to Technology and Knowledge
It allows developing nations to access advanced technologies and global expertise.
Employment Opportunities
New industries and global supply chains create millions of jobs, especially in emerging markets.
Cultural Exchange and Diversity
Globalization promotes multiculturalism, allowing people to experience different cuisines, fashions, and entertainment.
Global Cooperation
It enhances international cooperation in tackling global issues like pandemics, climate change, and terrorism.
Negative Impacts of Globalization
Economic Inequality
While globalization increases wealth, it often benefits the rich more than the poor, widening the gap between developed and developing nations.
Exploitation of Labor and Resources
Multinational companies may exploit cheap labor in developing countries, leading to poor working conditions and environmental degradation.
Cultural Homogenization
Local cultures and traditions are overshadowed by Western consumer culture.
Job Losses in Developed Nations
Outsourcing and relocation of industries to low-cost regions lead to unemployment in advanced economies.
Environmental Challenges
Increased industrial activity and global transportation contribute to pollution and climate change.
The Emergence of Deglobalization
After decades of rapid integration, the world is now witnessing a phase of deglobalization. Deglobalization refers to the process of reducing interdependence and integration between nations. It does not mean the end of globalization but rather a reconfiguration or slowdown of global integration.
The early 21st century saw signs of this shift, with trade tensions, supply chain disruptions, and rising nationalism. Events like the 2008 global financial crisis, Brexit, the U.S.-China trade war, and the COVID-19 pandemic intensified the trend.
Causes of Deglobalization
Geopolitical Tensions
Rivalries between major powers like the United States and China have disrupted global trade and technology partnerships.
Economic Protectionism
Many countries are adopting protectionist measures to safeguard domestic industries, reversing decades of trade liberalization.
Pandemic Disruptions
COVID-19 exposed vulnerabilities in global supply chains, prompting companies to adopt “localization” or “nearshoring” strategies.
Technological Nationalism
Nations are increasingly prioritizing self-sufficiency in critical technologies like semiconductors, defense, and energy.
Environmental Concerns
Global supply chains are criticized for their carbon footprint, leading to policies encouraging local production.
Populist and Nationalist Movements
Political leaders in several countries emphasize nationalism, sovereignty, and “self-reliance,” often at the expense of global cooperation.
Characteristics of Deglobalization
Shift from global to regional supply chains.
Rising tariffs and trade barriers.
Greater emphasis on domestic manufacturing (e.g., “Make in India,” “America First,” “China’s Dual Circulation”).
Increased scrutiny of foreign investments for national security reasons.
Slower global trade growth compared to GDP growth.
Reassessment of global dependencies, especially in energy, food, and pharmaceuticals.
Impact of Deglobalization
Economic Impact
Deglobalization may slow global growth and reduce trade efficiency. However, it can strengthen domestic industries and reduce external vulnerabilities.
Supply Chain Restructuring
Companies are diversifying or relocating supply chains to minimize risks — a shift from “just-in-time” to “just-in-case” production models.
Shift in Investment Patterns
FDI flows are becoming more regional, and investment in strategic sectors is prioritized over global expansion.
Technological Decoupling
The U.S. and China are developing separate ecosystems in technology, telecommunications, and AI, creating a fragmented digital world.
Social and Political Impact
Rising nationalism can lead to social polarization, xenophobia, and less international cooperation.
Environmental Outcomes
While local production reduces transport emissions, duplication of industries globally may increase overall resource consumption.
Globalization vs. Deglobalization
Aspect Globalization Deglobalization
Economic Focus Free trade, open markets Protectionism, self-reliance
Supply Chain Global, interconnected Regional, localized
Cultural Impact Cultural exchange, hybridization Preservation of local culture
Political Approach Global cooperation National sovereignty
Growth Model Efficiency-driven Resilience-driven
Technology Flow Shared innovations Restricted technology access
Examples from Around the World
United States
The U.S. has shifted toward protectionism with policies like “America First” and reshoring manufacturing from China.
China
China’s “Dual Circulation Strategy” emphasizes domestic consumption while reducing reliance on exports.
European Union
The EU promotes “strategic autonomy,” aiming to be less dependent on external suppliers for energy and defense.
India
India’s “Atmanirbhar Bharat” (self-reliant India) initiative encourages local manufacturing and innovation while maintaining global engagement.
Global South
Many developing nations are balancing between globalization’s benefits and the need for self-sufficiency in food, energy, and technology.
Future of Globalization and Deglobalization
The world is unlikely to witness a complete end to globalization. Instead, the future will likely involve “selective globalization” — a hybrid model that balances global efficiency with local resilience.
Digital globalization will continue to grow through online services, data flows, and virtual collaboration.
Regional trade blocs (like RCEP, ASEAN, and EU) may replace full-scale global integration.
Nations will cooperate in areas like climate change, health, and technology, while competing in strategic sectors.
This evolving structure may lead to a multipolar world — with multiple centers of power and influence instead of a single dominant global order.
Conclusion
Globalization has been a transformative force shaping the modern world, driving economic growth, technological innovation, and cultural exchange. Yet, it has also produced inequalities, environmental stress, and geopolitical vulnerabilities. Deglobalization, in contrast, represents a corrective phase — a rethinking of excessive interdependence and a move toward resilience and regionalism.
The challenge for the future is to strike a balance between the efficiency of globalization and the security of deglobalization. The goal should not be to isolate nations but to build a sustainable, inclusive, and resilient global order that benefits all. In the decades to come, the world’s prosperity will depend not on retreating from globalization but on redefining it to serve humanity in a fairer, more balanced way.
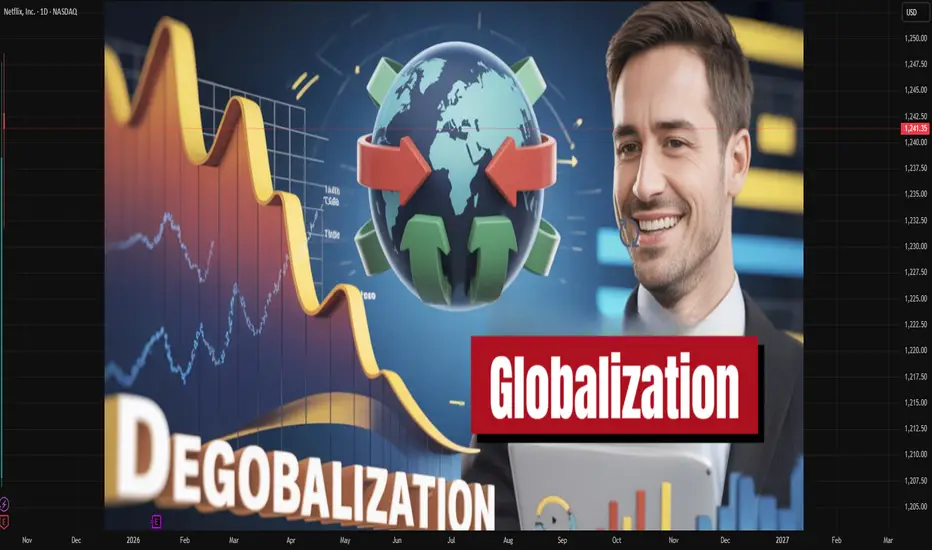
WTO’s Role in Global TradeIntroduction
The World Trade Organization (WTO) is one of the most important institutions in the global economic order. It serves as the cornerstone of international trade governance, regulating trade rules among nations and ensuring that global commerce flows as smoothly, predictably, and freely as possible. Since its establishment in 1995, the WTO has played a crucial role in fostering globalization, promoting trade liberalization, and resolving trade disputes among member countries. By providing a structured framework for negotiations and dispute resolution, it helps reduce uncertainty and build trust in international economic relations.
Global trade is essential for economic growth, development, and innovation. However, without a common set of rules, trade can easily become chaotic and dominated by protectionism. The WTO prevents such disorder by setting binding trade rules and providing mechanisms for countries to discuss trade issues cooperatively. It functions not just as a rule-setter but as a mediator, facilitator, and promoter of fair global trade.
Historical Background
The WTO emerged as a result of post-World War II efforts to create a stable and open global economic system. The foundation was laid in 1947 with the General Agreement on Tariffs and Trade (GATT), which aimed to reduce tariffs and eliminate trade barriers. GATT was initially intended as a temporary framework until a full-fledged International Trade Organization (ITO) could be established. However, the ITO never materialized due to political resistance, especially from the U.S. Congress.
Over the next five decades, GATT guided international trade through multiple “rounds” of negotiations that progressively lowered trade barriers. The most notable of these was the Uruguay Round (1986–1994), which led to the formation of the WTO on January 1, 1995. The WTO absorbed GATT’s legal structure but expanded its scope to include trade in services, intellectual property rights, and agricultural goods, marking a major evolution in global trade governance.
Structure and Membership
The WTO currently has 164 member countries, representing over 98% of global trade. Its structure is hierarchical and inclusive, with decisions made collectively by members.
Ministerial Conference: The top decision-making body that meets every two years to set broad trade policy directions.
General Council: Handles daily operations and acts on behalf of the Ministerial Conference between sessions.
Dispute Settlement Body (DSB): Oversees the resolution of trade disputes.
Secretariat: Based in Geneva, Switzerland, it provides administrative and technical support to members.
Each country, regardless of its economic size, has one vote, ensuring equality in decision-making — though in practice, negotiations often reflect the relative power of major economies.
Core Principles of the WTO
The WTO is guided by several foundational principles designed to make international trade fair and efficient:
Non-Discrimination
Most-Favored Nation (MFN) Principle: A country must treat all trading partners equally. If a member offers a benefit (like a tariff cut) to one country, it must extend the same to all others.
National Treatment Principle: Imported goods must be treated the same as domestically produced goods once they enter the market.
Free Trade through Negotiation
The WTO promotes gradual trade liberalization through negotiations, reducing tariffs and other barriers.
Predictability and Transparency
Trade policies must be stable and transparent, ensuring that businesses and investors can make informed decisions.
Fair Competition
The WTO discourages practices like dumping and subsidies that distort market competition.
Development and Economic Reform
Special provisions allow developing and least-developed countries (LDCs) more time and flexibility to implement trade agreements.
Functions of the WTO
The WTO performs multiple interrelated functions that shape the global trading system:
1. Administering Trade Agreements
The WTO oversees the implementation of its many agreements covering goods, services, and intellectual property. These include:
GATT (for goods),
GATS (General Agreement on Trade in Services),
TRIPS (Trade-Related Aspects of Intellectual Property Rights).
Each agreement lays out specific rights and obligations for members, ensuring consistency in global trade practices.
2. Trade Negotiations
The WTO serves as a platform for member countries to negotiate new trade rules and further liberalize markets. The Doha Development Round, launched in 2001, aimed to address the concerns of developing countries, though progress has been slow due to disagreements over agricultural subsidies and market access.
3. Dispute Settlement
The Dispute Settlement Mechanism (DSM) is one of the WTO’s most significant achievements. It provides a structured and legal way to resolve conflicts between member countries. When a member believes another has violated trade rules, it can file a complaint. If consultations fail, the case is reviewed by a panel, and the decision can be appealed. The process is legally binding, making the WTO one of the few international organizations with enforcement power.
4. Monitoring and Transparency
The WTO conducts periodic reviews of members’ trade policies through the Trade Policy Review Mechanism (TPRM). This ensures transparency and allows members to assess each other’s adherence to WTO rules.
5. Technical Assistance and Training
For developing countries, the WTO provides capacity-building programs to help them understand and implement trade rules effectively. This promotes inclusiveness and ensures smaller economies can participate in global trade on fair terms.
6. Cooperation with Other International Institutions
The WTO collaborates with the International Monetary Fund (IMF) and World Bank to ensure coherence in global economic policymaking, particularly regarding trade finance and development aid.
WTO’s Impact on Global Trade
Since its inception, the WTO has had a profound impact on the global economy:
1. Expansion of Global Trade
The WTO’s rule-based system has significantly boosted trade volumes. World merchandise trade has grown exponentially since 1995, with developing nations becoming more integrated into the global market.
2. Encouragement of Economic Growth
By reducing trade barriers, the WTO has facilitated economic growth, improved efficiency, and allowed countries to specialize in sectors where they have a comparative advantage.
3. Integration of Developing Countries
Many developing nations, especially in Asia and Latin America, have benefited from WTO membership. Access to global markets has encouraged investment, industrialization, and employment.
4. Promotion of Fair Competition
The WTO’s dispute resolution system has curtailed unfair practices such as dumping and protectionism, promoting fairer competition among nations.
5. Stability and Predictability
With a common set of rules and enforcement mechanisms, the WTO provides predictability, which attracts global investment and fosters business confidence.
Challenges and Criticisms
Despite its achievements, the WTO faces numerous criticisms and challenges in the 21st century:
1. Stalled Negotiations
The Doha Round has faced deadlock due to differences between developed and developing countries over issues like agricultural subsidies, industrial tariffs, and services liberalization.
2. Dominance of Developed Nations
Critics argue that the WTO disproportionately serves the interests of wealthy nations and multinational corporations, sidelining poorer countries.
3. Dispute Settlement Crisis
Since 2019, the Appellate Body, a critical part of the dispute mechanism, has been paralyzed due to the U.S. blocking new appointments. This has weakened the enforcement of trade rules.
4. Global Inequality
While the WTO has helped expand trade, it has not evenly distributed the benefits. Many developing countries remain dependent on low-value exports and vulnerable to external shocks.
5. Environmental and Labor Concerns
The WTO’s emphasis on free trade has been criticized for ignoring environmental sustainability and labor rights. Trade liberalization can sometimes encourage practices harmful to the environment or exploit workers in developing nations.
6. Rise of Protectionism and Trade Wars
Recent years have seen a resurgence of protectionist policies, particularly between major economies like the U.S. and China, challenging the WTO’s authority.
7. Digital Trade and E-Commerce
The WTO has been slow to adapt to emerging issues such as digital trade, e-commerce, and data sovereignty — key areas in the modern global economy.
WTO and the Future of Global Trade
The global trade landscape is evolving rapidly, and the WTO must adapt to remain relevant. Several areas define its future trajectory:
1. Reform of the Dispute Settlement System
Restoring the functionality of the Appellate Body is critical. Without effective enforcement, WTO rules risk losing credibility.
2. Incorporation of Digital Trade Rules
As global commerce increasingly shifts online, the WTO must establish clear rules governing e-commerce, data flows, and digital taxation.
3. Sustainability and Climate Change
The WTO is expected to integrate sustainable trade practices, including carbon border taxes, green subsidies, and eco-friendly production standards, aligning trade with climate goals.
4. Empowering Developing Nations
Reforms should focus on enhancing the participation of developing countries in decision-making and ensuring fair access to markets and technologies.
5. Dealing with Geopolitical Fragmentation
Amid rising economic nationalism, the WTO must rebuild trust and promote multilateral cooperation to prevent fragmentation into regional or bilateral trade blocs.
Conclusion
The World Trade Organization stands as a pillar of the global economic system. Its creation marked a turning point in international relations, institutionalizing the principles of open, fair, and rules-based trade. Over the past three decades, it has facilitated unprecedented growth in global trade, lifted millions out of poverty, and reduced trade-related conflicts.
However, the WTO faces mounting challenges in a rapidly changing world marked by digital transformation, climate change, and geopolitical rivalry. To remain effective, it must undergo meaningful reforms — strengthening its dispute settlement system, addressing digital and environmental trade issues, and ensuring inclusivity for developing nations.
In essence, the WTO’s continued relevance depends on its ability to evolve. If it can adapt to the complexities of modern globalization, it will continue to serve as a guardian of global economic cooperation, ensuring that trade remains a force for prosperity, stability, and peace in the 21st century.

Hedge Fund Secrets: Unveiling the Hidden World of High-FinanceIntroduction
Hedge funds represent one of the most mysterious and influential corners of global finance. Often surrounded by secrecy and elite status, they attract both admiration and controversy. While mutual funds are accessible to the average investor, hedge funds are designed for the wealthy—institutions, corporations, and high-net-worth individuals—who seek aggressive growth and diversification. The “secrets” of hedge funds lie not only in their strategies but also in their flexibility, risk-taking ability, and sophisticated financial engineering.
This essay explores the structure, functioning, strategies, and inner workings of hedge funds—uncovering the tactics and philosophies that make them powerful engines in the financial markets.
1. What Is a Hedge Fund?
A hedge fund is a private investment partnership that pools money from investors and employs a range of strategies to earn high returns, often regardless of market direction. Unlike mutual funds, hedge funds are lightly regulated and have more freedom in how they invest. They can use leverage (borrowed money), short selling, derivatives, and alternative assets such as real estate, commodities, cryptocurrencies, or private equity.
The term “hedge” comes from the original goal—to “hedge” against market risk by taking offsetting positions. However, modern hedge funds have evolved into aggressive return-seeking vehicles, willing to take large, calculated risks for potentially outsized profits.
2. The Secret Structure: Limited Partnership Model
Most hedge funds operate under a limited partnership (LP) structure:
The general partner (GP) manages the fund, makes investment decisions, and assumes full liability.
The limited partners (LPs) are the investors who provide the capital but have limited liability.
This structure allows hedge fund managers to maintain flexibility and control while protecting investors from excessive risk exposure. The GP typically earns a management fee (2%) of total assets and a performance fee (20%) of profits—known as the “2 and 20 rule.” This incentivizes managers to maximize returns.
This performance-based compensation is one of the fund’s “secrets to motivation.” It aligns the manager’s goals with the investors’—both profit when performance is strong. However, it also encourages risk-taking, as the rewards can be massive.
3. The Secret Ingredient: Flexibility and Freedom
Unlike mutual funds or pension funds, hedge funds have minimal investment restrictions. This flexibility is their biggest advantage. Hedge funds can:
Short sell stocks (bet on price decline)
Use leverage to amplify returns
Trade derivatives like options, futures, and swaps
Invest globally across asset classes
Move in and out of positions rapidly
This freedom allows hedge funds to profit in bull or bear markets. For instance, during the 2008 financial crisis, some hedge funds—like John Paulson’s—made billions by betting against the U.S. housing market using credit default swaps.
4. Hedge Fund Strategies: The Real Secrets
Hedge funds are not a single strategy—they are a collection of sophisticated investment techniques. Some of the most powerful and “secretive” strategies include:
A. Long/Short Equity
The classic hedge fund strategy. Managers buy undervalued stocks (long) and short overvalued ones (short). The goal is to profit from relative performance rather than overall market direction.
Example: If a manager expects Apple to outperform Samsung, they go long Apple and short Samsung, profiting from the spread regardless of whether the tech sector rises or falls.
B. Global Macro
This strategy exploits global economic trends—interest rates, currencies, commodities, and geopolitical events. Legendary investor George Soros famously used this approach when he “broke the Bank of England” in 1992, betting against the British pound and earning over $1 billion.
C. Event-Driven
Event-driven funds profit from corporate events such as mergers, bankruptcies, or restructurings. Merger arbitrage is common: buying shares of a company being acquired and shorting the acquirer to profit from the deal’s price spread.
D. Quantitative (Quant) Strategies
Quant funds use advanced algorithms, machine learning, and statistical models to find patterns in massive data sets. These funds rely on technology and mathematics rather than human judgment.
Firms like Renaissance Technologies (founded by Jim Simons) have built mathematical models that consistently outperform markets—a true “black box” secret of modern finance.
E. Distressed Securities
These funds buy the debt of companies in financial trouble, betting that they will recover or that assets can be sold for more than their current market value. This strategy requires deep expertise in corporate law, restructuring, and valuation.
F. Multi-Strategy
Large funds diversify across multiple strategies to balance risk and return. These “all-weather” funds can adapt quickly to changing market conditions.
5. Leverage: The Power and the Danger
One of the most closely guarded secrets of hedge funds is how they use leverage to amplify returns. By borrowing money, a hedge fund can increase its exposure to profitable trades. For instance, a 10% return on a $1 billion position becomes 20% if the fund borrows another $1 billion.
However, leverage also magnifies losses. Many hedge fund collapses—like Long-Term Capital Management (LTCM) in 1998—occurred because excessive leverage turned small losses into disasters. The secret lies in risk management discipline: knowing when to cut losses and when to increase exposure.
6. Risk Management: The Hidden Backbone
While hedge funds are often portrayed as reckless gamblers, successful ones are masters of risk management. They use advanced models to monitor:
Value at Risk (VaR): the maximum expected loss over a given period.
Beta: sensitivity to market movements.
Drawdown limits: maximum allowed decline before positions are cut.
Some hedge funds employ dedicated risk teams independent of portfolio managers. The secret here is not just in taking risks—but in knowing which risks are worth taking.
7. Information Edge: The Secret Weapon
Information is the lifeblood of hedge funds. Successful managers invest heavily in data analytics, market intelligence, and proprietary research. The best funds have access to alternative data—credit card transactions, satellite imagery, social media trends, and supply chain data—that help them detect market trends before others.
In essence, hedge funds compete on information asymmetry. The faster and more accurately they interpret data, the greater their advantage.
However, this “edge” must stay within legal limits. In the past, some hedge funds were caught in insider trading scandals, revealing the fine line between legitimate research and illegal access to non-public information.
8. The Psychology of Hedge Fund Managers
Another hidden secret lies in the psychological resilience of hedge fund managers. The job involves high pressure, rapid decision-making, and emotional control. Successful managers often possess:
Contrarian thinking: Going against market consensus.
Risk tolerance: Comfort with uncertainty and volatility.
Discipline: Following the model or thesis even under stress.
Adaptability: Changing strategies when markets shift.
In many ways, hedge fund management is as much an art as a science—combining intellect, intuition, and emotional stability.
9. Technology: The New Frontier
Modern hedge funds are deeply intertwined with technology and artificial intelligence. High-frequency trading (HFT), machine learning algorithms, and predictive analytics now dominate the industry. Algorithms can execute trades in microseconds, identifying inefficiencies humans cannot detect.
The secret advantage of top-tier funds like Two Sigma or Citadel lies in their data infrastructure—massive computing power, real-time analytics, and AI-driven prediction models. These technological tools enable them to extract tiny profits millions of times per day.
10. Secrecy and Regulation
Hedge funds are notoriously secretive about their strategies. Their competitive advantage depends on keeping algorithms, models, and data confidential. Unlike mutual funds, they are not required to disclose holdings publicly. Investors receive quarterly or annual reports, but details remain hidden to protect intellectual property.
However, after major scandals and financial crises, regulators have increased oversight. The U.S. Securities and Exchange Commission (SEC) now requires large hedge funds to register and disclose basic information about risk and leverage. Yet, compared to other financial institutions, they still enjoy considerable privacy.
11. Hedge Funds and Market Influence
Though they represent a small portion of total global assets, hedge funds have an outsized impact on financial markets due to their leverage and trading volume. They can:
Move markets through large positions.
Provide liquidity during volatile times.
Expose overvalued or fraudulent companies (through short selling).
Hedge institutional portfolios against systemic risks.
However, their power can also destabilize markets if excessive leverage or herd behavior occurs—as seen during the 2008 crisis or the GameStop short squeeze of 2021.
12. The Dark Side: Failures and Risks
Not all hedge funds are successful. Many close within a few years due to poor performance, high fees, or changing market conditions. Common causes of failure include:
Over-leverage: excessive borrowing leading to collapse.
Overconfidence: ignoring market signals.
Lack of liquidity: inability to exit positions in time.
Misaligned incentives: managers chasing bonuses over long-term success.
The hedge fund secret to survival is adaptability—those that continuously evolve with technology, regulation, and global trends endure.
13. The Future of Hedge Funds
The hedge fund industry is changing rapidly. Artificial intelligence, blockchain, and decentralized finance (DeFi) are reshaping investment strategies. Investors are demanding lower fees and greater transparency, pushing funds to prove their value.
Sustainability is also becoming important. New hedge funds now explore ESG (Environmental, Social, Governance) strategies, blending profitability with ethical investing.
The next generation of hedge funds will likely combine AI-driven insights, quantitative analytics, and global macro intelligence—a fusion of technology and human expertise.
Conclusion
Hedge funds remain one of the most fascinating institutions in modern finance. Their “secrets” are not mystical tricks but a blend of flexibility, innovation, information, and discipline. They thrive on uncovering inefficiencies in the global financial system, exploiting them with speed, intelligence, and precision.
At their best, hedge funds bring liquidity, innovation, and market efficiency. At their worst, they amplify volatility and risk. The truth lies in their dual nature—both as engines of progress and mirrors of financial ambition.
In the end, the ultimate hedge fund secret is mastery over uncertainty—turning chaos into opportunity through knowledge, technology, and courage.

ESG Investing and Green FinanceIntroduction
In the 21st century, global finance has undergone a profound transformation. Investors, corporations, and governments are increasingly recognizing that economic growth must go hand in hand with environmental protection, social responsibility, and ethical governance. This shift has given rise to two major trends — ESG (Environmental, Social, and Governance) investing and Green Finance. Both concepts aim to align financial decision-making with sustainability goals, addressing global challenges such as climate change, inequality, and responsible corporate behavior. ESG investing and Green Finance are not just moral imperatives; they are strategic approaches that seek long-term value creation, risk management, and the transition to a low-carbon economy.
1. Understanding ESG Investing
ESG investing refers to an investment strategy that incorporates environmental, social, and governance factors into financial analysis and portfolio management. It goes beyond traditional financial metrics by assessing how companies manage sustainability-related risks and opportunities.
Environmental criteria evaluate how a company impacts the planet — through carbon emissions, waste management, water usage, renewable energy adoption, and biodiversity protection.
Social criteria examine how a company treats people — including employees, customers, suppliers, and local communities. It focuses on labor rights, diversity, equality, workplace safety, and human rights.
Governance criteria assess corporate ethics, transparency, board diversity, executive compensation, and shareholder rights.
In essence, ESG investing combines profitability with purpose, allowing investors to generate financial returns while contributing to positive social and environmental outcomes.
2. Evolution and Growth of ESG Investing
The origins of ESG investing can be traced back to socially responsible investing (SRI) movements of the 1960s and 1970s. Activist investors avoided industries such as tobacco, weapons, or apartheid-linked businesses. However, ESG investing evolved beyond exclusionary screening to focus on proactive investment in sustainable and responsible companies.
A significant milestone occurred in 2006, when the United Nations launched the Principles for Responsible Investment (UNPRI), encouraging institutional investors to integrate ESG principles into their investment decisions. Since then, ESG investing has grown exponentially.
By 2025, the global ESG assets under management (AUM) are projected to exceed $50 trillion, representing more than one-third of total global assets. Major asset managers like BlackRock, Vanguard, and Fidelity have incorporated ESG frameworks into their portfolios, while ESG-focused funds have outperformed traditional funds in many market cycles, particularly during crises such as the COVID-19 pandemic.
3. Key Components of ESG
(a) Environmental Factors
Environmental aspects are central to ESG investing. Investors assess a company’s carbon footprint, energy efficiency, waste disposal practices, and compliance with environmental laws. For instance, companies that transition toward renewable energy sources or adopt circular economy principles are considered environmentally sustainable.
Important sub-factors include:
Greenhouse gas (GHG) emissions and carbon neutrality goals
Renewable energy investment
Water conservation and pollution control
Sustainable supply chains
Biodiversity preservation
For example, Tesla and Ørsted attract ESG investors for their leadership in clean energy and low-carbon technologies.
(b) Social Factors
The social dimension emphasizes a company’s treatment of people and communities. This includes fair labor practices, human rights, product safety, customer privacy, and diversity initiatives. A company’s reputation and long-term success often depend on social responsibility and stakeholder trust.
Key areas include:
Employee welfare and workplace safety
Gender and racial diversity in leadership
Consumer protection and ethical marketing
Community development programs
Supply chain ethics
Firms like Unilever and Patagonia are known for integrating social responsibility into their corporate strategy, enhancing both brand loyalty and long-term profitability.
(c) Governance Factors
Governance ensures accountability, transparency, and ethical leadership. It involves assessing how decisions are made within an organization and whether management aligns with shareholders’ and stakeholders’ interests.
Governance evaluation considers:
Board composition and independence
Executive pay and accountability
Anti-corruption policies
Shareholder voting rights
Ethical corporate conduct
Poor governance can lead to scandals and losses, as seen in corporate collapses like Enron or Wirecard, where lack of oversight and transparency destroyed investor confidence.
4. ESG Investing Strategies
Investors use several methods to implement ESG principles:
Negative Screening: Excluding companies involved in harmful industries (e.g., fossil fuels, tobacco, or weapons).
Positive Screening: Selecting companies that perform better on ESG metrics than their peers.
Best-in-Class Approach: Investing in the most sustainable companies within each sector.
Thematic Investing: Focusing on specific sustainability themes such as renewable energy, clean water, or gender equality.
Impact Investing: Targeting measurable social and environmental outcomes alongside financial returns.
ESG Integration: Incorporating ESG data into traditional financial analysis to evaluate overall risk-adjusted returns.
These approaches allow investors to align their portfolios with their values and long-term sustainability goals.
5. Importance and Benefits of ESG Investing
ESG investing offers multiple advantages to investors, businesses, and society.
Risk Mitigation: Companies with strong ESG performance tend to manage risks better, reducing exposure to legal, environmental, and reputational crises.
Financial Performance: Numerous studies show a positive correlation between ESG integration and long-term financial returns. Sustainable firms are often more efficient, innovative, and resilient.
Investor Demand: Younger generations, especially Millennials and Gen Z, increasingly prefer ethical investments that align with their values.
Regulatory Support: Governments and regulators are promoting ESG disclosures, creating an environment where sustainability becomes a necessity rather than a choice.
Corporate Reputation: Strong ESG performance enhances brand image, attracting customers, investors, and top talent.
6. Understanding Green Finance
While ESG investing focuses on evaluating sustainability within investments, Green Finance refers to financial instruments and services that directly support environmentally beneficial projects. It aims to mobilize capital toward green initiatives that promote climate resilience, energy efficiency, and ecological sustainability.
Green Finance includes a wide range of products such as:
Green Bonds – bonds issued to finance renewable energy, clean transportation, and waste management projects.
Green Loans – loans with favorable terms for sustainable projects.
Green Mutual Funds and ETFs – investment funds focusing on companies or projects that meet environmental standards.
Carbon Markets and Credits – mechanisms that incentivize emissions reduction.
Sustainable Insurance and Banking – financial institutions offering eco-friendly products and services.
In essence, Green Finance channels money into projects that contribute to a low-carbon and sustainable future.
7. The Rise of Green Finance Globally
Green finance gained global recognition after the 2015 Paris Agreement, which called for aligning financial systems with climate goals. The agreement encouraged nations to mobilize trillions of dollars in climate finance to limit global warming to below 2°C.
Leading economies such as the European Union, China, and the United States have established green finance frameworks.
The EU Green Deal and EU Taxonomy for Sustainable Activities provide a clear classification system for green investments.
China’s Green Bond Endorsed Project Catalogue guides green bond issuance and has made China one of the largest green bond markets globally.
Multilateral institutions such as the World Bank and Asian Development Bank support developing nations in adopting green finance principles.
According to the Climate Bonds Initiative, global green bond issuance surpassed $600 billion in 2023, signaling the growing importance of sustainability-linked finance.
8. Relationship Between ESG Investing and Green Finance
While both concepts share sustainability as their foundation, they differ in scope and application.
ESG investing focuses on evaluating corporate behavior and integrating sustainability into investment decisions across all industries.
Green Finance specifically directs capital toward projects that have clear environmental benefits.
However, the two are interconnected. ESG investors often allocate capital to green financial instruments, while green finance initiatives rely on ESG metrics to ensure accountability and transparency. Together, they form the backbone of sustainable finance, promoting a more inclusive and climate-conscious global economy.
9. Challenges in ESG Investing and Green Finance
Despite their growth, both ESG investing and green finance face several challenges:
Lack of Standardization: Different countries and rating agencies use varied ESG criteria, leading to inconsistent assessments and “greenwashing.”
Greenwashing Risks: Some companies exaggerate their sustainability claims to attract investors without actual environmental commitment.
Data Availability: Reliable ESG data and performance metrics are limited, especially in developing markets.
Short-Term Investor Mindset: Many investors prioritize short-term gains over long-term sustainability impacts.
Regulatory Barriers: Inconsistent regulations across jurisdictions make it difficult to measure and compare ESG performance globally.
Transition Costs: Shifting to sustainable business models requires upfront investments that may deter smaller firms.
Addressing these challenges requires global cooperation, transparent reporting, and strong regulatory frameworks.
10. The Future of ESG and Green Finance
The future of finance is undeniably green and responsible. Governments, institutions, and individuals are realizing that sustainability is essential for economic resilience and planetary survival. Key future trends include:
Mandatory ESG Disclosure: Regulators in the EU, India, and the US are introducing compulsory ESG reporting standards for corporations.
Technology Integration: Artificial intelligence, blockchain, and big data analytics are improving ESG measurement and transparency.
Sustainable Development Goals (SDGs): ESG investing and green finance will play vital roles in achieving the United Nations’ 17 SDGs by 2030.
Green Central Banking: Central banks are increasingly integrating climate risks into monetary policies and lending frameworks.
Emerging Market Participation: Developing countries are adopting green finance to address energy transitions and attract foreign investment.
Ultimately, ESG and green finance are not temporary trends — they represent a long-term transformation of the global financial system.
Conclusion
ESG investing and Green Finance have redefined how the world views the relationship between money, ethics, and the environment. They demonstrate that profitability and sustainability can coexist, driving innovation, resilience, and inclusive growth. As climate change intensifies and social challenges persist, the role of finance as a catalyst for sustainable development has never been more crucial.
By integrating ESG principles and promoting green financial instruments, investors and policymakers can pave the way toward a more sustainable, equitable, and prosperous global economy. The future belongs to those who not only generate wealth but also protect the planet and uplift society — a vision where finance serves humanity, not just profits.

G7 and G20 in the World Market: A Comprehensive OverviewIntroduction
In the ever-evolving landscape of the global economy, two powerful international groups — the Group of Seven (G7) and the Group of Twenty (G20) — play a pivotal role in shaping global financial policies, trade frameworks, and market stability. These organizations consist of the world’s most influential economies, both advanced and emerging, that come together to coordinate policy responses to global challenges.
Their influence extends across economic growth, climate action, trade regulations, technology, and geopolitical stability — all of which have profound effects on the world market. This essay explores the formation, structure, objectives, and economic impact of the G7 and G20, while also examining their comparative roles in global governance and market coordination.
1. The G7: Origins and Evolution
1.1 Historical Background
The Group of Seven (G7) was formed in 1975 amid the oil crisis and global financial instability of the 1970s. The initial members were the United States, United Kingdom, France, Germany, Italy, and Japan, with Canada joining in 1976, making it seven nations. The European Union (EU) later became a participant in G7 meetings but not a full member.
Initially, the G7 served as an informal forum for leaders of advanced economies to discuss economic coordination and policy responses to inflation, exchange rates, and oil shocks. Over time, the agenda expanded to include trade liberalization, development aid, climate change, digital innovation, and global security.
1.2 Composition and Characteristics
The G7 countries collectively represent:
Around 45% of global GDP (as of 2025),
Approximately 10% of the global population, and
A major share of global trade, technology, and financial capital.
These nations are highly industrialized, democratic, and share values of free-market capitalism, human rights, and rule-based governance.
The G7 does not have a formal secretariat or permanent institution. Instead, it operates through annual summits hosted by member nations on a rotating basis. Decisions are not legally binding but carry immense political and economic weight due to the influence of its members.
1.3 Core Objectives
The main objectives of the G7 are to:
Promote global economic stability and sustainable growth.
Coordinate monetary and fiscal policies among advanced economies.
Support developing nations through aid and debt relief.
Strengthen free trade and oppose protectionism.
Address climate change and energy transitions.
Manage global crises such as pandemics, conflicts, and financial shocks.
1.4 G7’s Role in the Global Market
The G7 shapes the global market primarily through policy influence rather than direct control. Its discussions often set the tone for international financial institutions like the IMF, World Bank, and WTO.
For instance:
Monetary coordination: Central banks of G7 nations often align on interest rate policies and inflation control.
Trade frameworks: The G7 promotes rules-based trade and opposes protectionist barriers.
Climate finance: Members pledge billions to help developing countries transition to clean energy.
Crisis management: The G7 coordinated the global financial response to the 2008 crisis and the 2020 pandemic.
Because these economies dominate global financial systems — with the U.S. dollar, euro, pound, and yen as key reserve currencies — their decisions have direct impacts on currency markets, investment flows, and commodity prices.
2. The G20: Formation and Global Reach
2.1 Background and Formation
While the G7 represents advanced industrial economies, the G20 (Group of Twenty) was created in 1999 to bring emerging and developing economies into global decision-making. The Asian financial crisis of 1997–1998 exposed the need for a broader, more inclusive framework that could address interconnected global risks.
The G20 includes 19 countries plus the European Union, representing both advanced and emerging economies such as China, India, Brazil, South Africa, Mexico, Indonesia, Saudi Arabia, and others. Together, G20 members account for:
Over 85% of global GDP,
Around 75% of global trade, and
About two-thirds of the world’s population.
2.2 Structure and Operation
Like the G7, the G20 has no permanent secretariat. It functions through:
Annual Leaders’ Summits,
Finance Ministers and Central Bank Governors’ Meetings, and
Working groups on topics like climate, digital economy, health, and labor.
The presidency rotates annually, with the host nation setting the year’s agenda. For example:
India (2023) focused on “One Earth, One Family, One Future.”
Brazil (2024) emphasized sustainable growth and inclusive development.
2.3 Objectives of the G20
The G20’s mission is broader and more inclusive than the G7’s. Its key objectives include:
Promoting global economic stability and growth.
Ensuring financial market regulation to prevent crises.
Encouraging international trade and investment.
Addressing climate change and sustainable development.
Reducing global inequality and supporting low-income nations.
Enhancing digitalization and innovation in the global economy.
The G20’s broader membership allows it to address issues that affect both developed and developing nations, making it more representative of global interests.
3. The G7 and G20’s Influence on the World Market
3.1 Monetary and Fiscal Coordination
Both the G7 and G20 play a crucial role in coordinating monetary and fiscal policies. During crises like the 2008 Global Financial Crisis, the G20 facilitated coordinated stimulus packages that prevented a deeper recession. Similarly, during the COVID-19 pandemic, both groups supported liquidity programs and vaccine funding initiatives.
Such coordination stabilizes global capital markets, reduces exchange rate volatility, and boosts investor confidence.
3.2 Trade and Investment
The G20 has become the key platform for promoting open and fair trade. It supports WTO reforms, encourages global value chains, and resists protectionism. Emerging economies like India, China, and Brazil have gained greater influence in shaping international trade rules.
The G7, while smaller, continues to influence trade through strategic alliances, sanctions, and technological cooperation. Their joint efforts shape policies on digital trade, semiconductor supply chains, and energy transition — all of which significantly affect global stock and commodity markets.
3.3 Global Financial Regulation
After the 2008 crisis, the G20 spearheaded reforms in global financial regulation through institutions like the Financial Stability Board (FSB). This helped improve transparency, banking supervision, and systemic risk management.
The G7, meanwhile, remains influential in setting standards for banking supervision, anti-money laundering (AML), and cross-border taxation, affecting multinational corporations and global investors.
3.4 Sustainable Development and Climate Change
Both groups have prioritized sustainable growth.
The G7 commits to achieving net-zero emissions by 2050 and financing climate initiatives in developing nations.
The G20 promotes green finance, renewable energy investment, and the phasing out of fossil fuel subsidies.
As climate-related risks increasingly affect agriculture, manufacturing, and infrastructure, these commitments influence global commodity prices, investment trends, and corporate valuations.
3.5 Technology and Digital Economy
In the digital era, both G7 and G20 discussions address issues like artificial intelligence (AI), cybersecurity, data privacy, and digital taxation. Their cooperation helps create common standards that shape global tech markets and innovation ecosystems.
For example, the G7’s Digital Trade Principles and the G20’s AI frameworks guide how countries regulate cross-border data and digital platforms — crucial in a world where tech firms dominate market capitalization.
3.6 Geopolitical Stability and Market Confidence
Geopolitical tensions — such as the Russia-Ukraine war or U.S.-China rivalry — have significant global market consequences. The G7 often coordinates sanctions, defense support, and diplomatic pressure, while the G20 acts as a broader dialogue platform to prevent fragmentation.
Their coordinated responses help maintain market predictability, protect energy supply chains, and influence investor sentiment.
4. Criticisms and Challenges
Despite their global importance, both G7 and G20 face criticisms:
4.1 Representation Gap
The G7 is criticized for being elitist, representing only advanced nations.
The G20, while more inclusive, still excludes many smaller developing countries.
4.2 Implementation Challenges
Decisions made in summits are not legally binding, making implementation dependent on national will.
4.3 Geopolitical Divisions
Internal divisions — such as tensions between the U.S. and China or Russia’s participation in G20 — can reduce policy effectiveness.
4.4 Climate and Inequality Gaps
Although both groups pledge climate and development aid, actual disbursement often falls short of commitments, leading to credibility issues.
5. The Future of G7 and G20 in Global Governance
As globalization evolves, the G7 and G20 are expected to adapt to new challenges:
Managing the AI-driven economy and digital finance.
Addressing supply chain resilience post-pandemic.
Coordinating on debt restructuring for developing nations.
Ensuring energy security amid green transitions.
Promoting inclusive and equitable growth to reduce inequality.
Their relevance lies in their ability to bridge the gap between advanced and developing economies and create a stable, rule-based global market that fosters sustainable progress.
Conclusion
The G7 and G20 are twin pillars of international economic governance, each with distinct strengths. The G7 provides leadership and stability through the advanced economies’ policy coordination, while the G20 ensures inclusivity and representation of emerging markets in global decision-making.
Together, they form the foundation of global cooperation — influencing trade policies, financial systems, environmental sustainability, and technological standards that shape the world market. As global interdependence deepens, their ability to collaborate and implement forward-looking policies will determine the resilience and prosperity of the international economy in the decades ahead.
Venture Capital’s Global MarketStructure, Trends, and Future Outlook.
Introduction
Venture capital (VC) represents one of the most vital pillars of the global innovation ecosystem. It is a form of private equity financing provided to early-stage, high-potential startups that demonstrate significant growth opportunities. Unlike traditional bank loans or public funding, venture capitalists invest in companies with innovative ideas, disruptive technologies, or scalable business models, taking on high risk in exchange for potentially high returns. Over the past few decades, the global venture capital market has evolved from a niche segment concentrated in Silicon Valley to a worldwide force shaping technology, entrepreneurship, and job creation.
Concept and Characteristics of Venture Capital
Venture capital involves professional investors or investment firms providing funding to startups and small businesses that lack access to capital markets. The typical VC investment model follows several stages of financing:
Seed Stage – The initial capital used for research, product development, or prototype creation.
Early Stage (Series A/B) – Investment to commercialize the product, expand teams, and begin scaling operations.
Growth Stage (Series C and beyond) – Large funding rounds to accelerate market expansion, often preceding IPOs or acquisitions.
Exit Stage – The investor realizes returns through Initial Public Offerings (IPOs), mergers, or acquisitions.
Key Characteristics
High Risk, High Reward: Most startups fail, but the few that succeed can deliver exponential returns.
Equity Participation: Venture capitalists receive ownership shares in the company, aligning their success with the startup’s performance.
Active Involvement: Investors provide not just capital but also mentorship, strategic guidance, and access to networks.
Long-Term Horizon: Investments typically take 5–10 years to mature before exit.
Innovation Focus: VC funding often targets technology, biotechnology, fintech, clean energy, and AI sectors.
Historical Background of Venture Capital
The origins of venture capital can be traced to post–World War II America. The first modern VC firm, American Research and Development Corporation (ARDC), was founded in 1946 by Georges Doriot, who invested in emerging technology companies. The concept gained momentum in the 1970s and 1980s with the growth of Silicon Valley, where early investments in companies like Apple, Intel, and Genentech yielded massive returns.
By the 1990s, the venture capital model had become central to the rise of the dot-com boom, fueling startups such as Amazon, Google, and Yahoo. Despite the 2000 dot-com crash, VC continued to evolve globally, with increased participation from institutional investors, sovereign wealth funds, and corporate venture arms.
In the 2010s and 2020s, VC funding surged across the world due to the digital revolution, mobile technology, cloud computing, and artificial intelligence. Today, venture capital is not just an American phenomenon — it’s a global investment engine, driving innovation from Silicon Valley to Singapore.
Global Market Overview
Market Size and Growth
As of 2025, the global venture capital market is estimated to be worth over USD 450 billion, with annual investments spread across thousands of startups worldwide. The U.S. remains the largest market, followed by China, India, the United Kingdom, Germany, and Israel. Emerging markets such as Southeast Asia, Africa, and Latin America are also gaining traction as venture ecosystems mature.
Regional Breakdown
1. North America
The United States dominates the global VC landscape, accounting for nearly 45–50% of global deal volume. Silicon Valley, New York, and Boston remain the top hubs. U.S. venture capital firms like Sequoia Capital, Andreessen Horowitz, Accel, and Kleiner Perkins have invested in global tech giants such as Meta, Airbnb, and Stripe. The U.S. ecosystem benefits from deep capital markets, strong intellectual property laws, and a culture of entrepreneurship.
2. Europe
Europe’s VC market has grown steadily, particularly in London, Berlin, Paris, and Stockholm. The continent’s focus on sustainability, fintech, and deep tech has attracted large institutional investors. The EU’s supportive regulatory framework and cross-border funding programs like Horizon Europe have accelerated innovation.
3. Asia-Pacific
Asia has emerged as a powerful VC hub, led by China and India.
China boasts a vibrant ecosystem with giants like Tencent, Alibaba, and ByteDance born from VC funding.
India has become one of the world’s fastest-growing VC destinations, with firms like SoftBank, Tiger Global, and Nexus Venture Partners backing unicorns such as Flipkart, Zomato, and Ola.
Southeast Asia, particularly Singapore and Indonesia, has seen rapid digitalization and strong startup activity in fintech and e-commerce.
4. Middle East and Africa
These regions are witnessing rising VC activity due to government initiatives like Saudi Arabia’s Vision 2030 and UAE’s innovation hubs. In Africa, fintech startups such as Flutterwave and Chipper Cash have attracted global investors, signaling the continent’s increasing integration into global venture markets.
5. Latin America
Latin America’s VC market is driven by growth in fintech, e-commerce, and logistics. Countries like Brazil, Mexico, and Colombia are hotspots, with startups like Nubank and Rappi becoming unicorns through strong VC backing.
Major Sectors Attracting Venture Capital
Technology and Software – Cloud computing, cybersecurity, and SaaS models dominate global VC investment.
Fintech – Mobile banking, digital wallets, blockchain, and decentralized finance (DeFi) attract billions in funding annually.
Healthcare and Biotech – The COVID-19 pandemic accelerated investment in telemedicine, genomics, and digital health.
Artificial Intelligence and Machine Learning – AI-driven startups receive major backing for automation, analytics, and robotics solutions.
Clean Energy and Sustainability – Green tech and ESG-focused startups are gaining VC attention amid climate change concerns.
Consumer Internet and E-commerce – Platforms that improve digital lifestyles, logistics, and online retail remain favorites.
EdTech and AgriTech – Education and agriculture technology are expanding rapidly in emerging markets like India and Africa.
Key Players in the Global VC Ecosystem
Venture Capital Firms – Examples include Sequoia Capital, Andreessen Horowitz, Index Ventures, SoftBank Vision Fund, Tiger Global, and Accel.
Corporate Venture Arms – Tech giants like Google (GV), Intel Capital, Salesforce Ventures, and Microsoft Ventures invest strategically in startups aligned with their business goals.
Sovereign Wealth and Pension Funds – Entities such as Temasek, Mubadala, and SoftBank Vision Fund deploy billions in global VC markets.
Angel Investors and Syndicates – Early-stage capital often comes from high-net-worth individuals like Elon Musk or Peter Thiel, and from crowdfunding platforms such as AngelList.
Accelerators and Incubators – Organizations like Y Combinator, Techstars, and 500 Global provide seed funding and mentorship to early-stage startups.
Funding Trends and Investment Strategies
Venture capital investment strategies have evolved from traditional staged financing to more dynamic, data-driven approaches. Modern VC firms use AI-based analytics, market intelligence platforms, and network-based due diligence to identify high-potential startups faster.
Recent Global Trends
Mega-Funding Rounds: Multi-billion-dollar deals are becoming common for late-stage startups, especially in fintech and AI.
Rise of Micro VCs: Small, specialized funds are targeting niche markets such as climate tech or women-led startups.
Corporate Venture Growth: Large corporations are increasingly investing in startups to stay innovative and competitive.
Geographic Diversification: Investors are expanding into emerging markets for higher returns and untapped potential.
Decentralized Finance and Blockchain Startups: Web3 and crypto-based ventures have become new frontiers for VC investment.
ESG Integration: Environmental, social, and governance considerations are now embedded in investment decisions.
Challenges in the Global Venture Capital Market
Despite its dynamism, the VC ecosystem faces several obstacles:
Market Volatility: Global economic slowdowns, high interest rates, and inflation affect startup valuations and funding availability.
High Failure Rate: Over 70% of VC-backed startups fail to provide significant returns.
Exit Constraints: IPO markets fluctuate, and mergers or acquisitions can be delayed, limiting liquidity.
Regulatory Barriers: Varying legal frameworks across countries complicate cross-border investments.
Overvaluation and Speculation: Some markets witness inflated valuations due to excessive competition among investors.
Talent and Resource Constraints: Startups in developing economies often struggle with limited skilled labor and infrastructure.
Geopolitical Risks: Trade tensions, war, and political instability can disrupt global VC flows.
The Role of Technology in Shaping VC
Technology has fundamentally transformed how venture capital operates.
AI and Machine Learning help investors analyze startup potential through predictive modeling.
Blockchain ensures transparency in funding transactions and introduces new financing models like tokenized equity.
Big Data Analytics improves decision-making by tracking industry trends, founder success rates, and market behavior.
Digital Platforms such as Crunchbase, PitchBook, and CB Insights make VC data accessible and efficient.
Moreover, remote investing has become common since the COVID-19 pandemic, allowing global investors to fund startups without geographic barriers.
Economic and Social Impact of Venture Capital
Venture capital has played a crucial role in driving global innovation, creating jobs, and improving quality of life.
VC-backed companies such as Google, Amazon, Tesla, and Airbnb have transformed industries and generated millions of jobs.
Venture funding encourages entrepreneurship and economic diversification.
In emerging markets, VC investment has contributed to digital inclusion and financial accessibility.
According to studies, VC-backed firms contribute significantly more to GDP growth and patent creation than non-VC-backed firms. Thus, venture capital not only drives profit but also social progress and technological evolution.
Future Outlook of Global Venture Capital
Looking ahead to 2030 and beyond, the global venture capital market is expected to expand further, though with increased selectivity and strategic depth.
Emerging Themes
Sustainable and Impact Investing: Funds will prioritize green, socially responsible, and inclusive ventures.
AI-Driven Investment Decisions: Predictive analytics will dominate deal sourcing and portfolio management.
Rise of Decentralized VC (DeVC): Blockchain-based VC models will democratize startup investing.
Cross-Border Collaboration: More funds will co-invest globally to share risk and access diverse innovation hubs.
Focus on Deep Tech: Quantum computing, robotics, space technology, and biotechnology will define the next innovation wave.
Government and Institutional Support: Policies promoting innovation, like tax incentives and startup visas, will expand VC’s reach.
While short-term challenges like valuation corrections and funding slowdowns may persist, the long-term trajectory of venture capital remains positive and transformative.
Conclusion
Venture capital serves as the financial lifeblood of innovation, bridging the gap between entrepreneurial vision and market reality. From its origins in postwar America to its modern global expansion across Asia, Europe, and Africa, VC has become a defining force in shaping the future of industries. Despite inherent risks and cyclical challenges, its impact on technological progress, economic development, and global competitiveness is undeniable.
As new technologies, emerging markets, and sustainability imperatives reshape the investment landscape, the venture capital industry will continue to adapt, innovate, and lead the charge toward a more dynamic, inclusive, and interconnected global economy.

Types of Global Trade WarIntroduction
A global trade war occurs when nations impose tariffs, quotas, or other trade barriers against each other in retaliation for perceived unfair trade practices. These conflicts often stem from disputes over trade imbalances, currency manipulation, intellectual property theft, or protectionist policies. In a world where globalization has tightly interconnected economies, trade wars can have far-reaching consequences—affecting industries, consumers, financial markets, and diplomatic relations.
Trade wars are not new. From the Smoot-Hawley Tariff Act of 1930 in the United States to the U.S.-China trade conflict that began in 2018, the concept has evolved alongside the global economy. Today’s trade wars extend beyond simple tariff disputes to include technology restrictions, digital trade barriers, and strategic economic decoupling. Understanding the types of trade wars helps explain how economic competition shapes global power dynamics.
1. Tariff-Based Trade Wars
Definition
Tariff-based trade wars occur when countries impose import duties (taxes) on foreign goods to protect domestic industries or punish other nations. These tariffs make imported goods more expensive, discouraging their purchase and promoting local alternatives.
Characteristics
Involves direct taxation on goods crossing borders.
Often used as retaliation for another nation’s tariffs.
Creates immediate effects on global prices and supply chains.
Examples
U.S.–China Trade War (2018–2020): The United States imposed tariffs on over $360 billion worth of Chinese imports, while China retaliated with tariffs on U.S. agricultural and industrial products.
EU–U.S. Steel and Aluminum Dispute (2018): The U.S. imposed tariffs of 25% on steel and 10% on aluminum imports, claiming national security reasons. The European Union retaliated with tariffs on American goods like motorcycles and whiskey.
Impact
Tariff-based wars often lead to:
Increased consumer prices.
Disrupted supply chains.
Decreased global trade volumes.
Shifts in investment and manufacturing to non-tariff countries.
2. Non-Tariff Barrier Trade Wars
Definition
A non-tariff trade war uses regulatory restrictions instead of tariffs to limit trade. These may include import quotas, licensing requirements, product standards, or environmental regulations that disadvantage foreign companies.
Characteristics
Harder to identify and measure than tariffs.
Often justified as “safety” or “environmental” measures.
Can be used strategically to block competition.
Examples
Japan vs. U.S. Auto Disputes (1980s): Japan used strict safety and emissions standards to limit American car imports.
European Union’s Agricultural Rules: The EU’s regulations on genetically modified foods and pesticide use often act as barriers against U.S. agricultural exports.
Impact
Creates uncertainty for exporters.
Increases compliance costs.
Favors domestic industries under the guise of regulation.
3. Currency Manipulation and Exchange Rate Wars
Definition
Currency wars, also known as competitive devaluation, occur when countries intentionally devalue their currencies to make exports cheaper and imports more expensive, thus improving their trade balance.
Characteristics
Typically involves central banks or monetary authorities.
May lead to inflation or financial instability.
Can escalate into broader economic and geopolitical conflict.
Examples
China’s Yuan Policy (2000s): The U.S. accused China of keeping its currency artificially low to boost exports.
Global “Currency War” of 2010: Countries like Japan and Brazil intervened in foreign exchange markets to weaken their currencies after the U.S. Federal Reserve launched quantitative easing.
Impact
Encourages retaliatory devaluations.
Destabilizes global currency markets.
Reduces investor confidence.
May trigger capital flight from emerging markets.
4. Technology and Digital Trade Wars
Definition
In the 21st century, technology trade wars have emerged as a new front in global economic competition. These involve restrictions on data, technology exports, intellectual property rights, and the dominance of tech giants.
Characteristics
Focuses on control of strategic technologies like semiconductors, AI, and 5G.
Often framed as national security or data protection issues.
Targets specific companies rather than entire industries.
Examples
U.S.–China Tech Conflict: The U.S. restricted companies like Huawei and ZTE from accessing American technologies, citing security concerns. It also banned chip exports to China for advanced computing.
EU Digital Services Act (DSA): The European Union has imposed strict digital market regulations, often seen as targeting U.S. tech firms such as Google, Meta, and Amazon.
Impact
Fragmentation of global technology supply chains.
Slower innovation due to reduced collaboration.
Strategic decoupling between the U.S. and China in the semiconductor and AI sectors.
5. Resource and Commodity Trade Wars
Definition
These wars focus on critical natural resources—such as oil, gas, rare earth metals, or food—used as economic or political leverage.
Characteristics
Resource-rich nations restrict exports to gain political influence.
Import-dependent countries seek diversification or self-sufficiency.
Often intertwined with geopolitical tensions.
Examples
OPEC Oil Embargo (1973): Arab nations cut oil exports to the U.S. and other Western countries supporting Israel, leading to a global energy crisis.
China’s Rare Earth Export Controls (2010): China restricted exports of rare earth minerals crucial for electronics, targeting Japan after a territorial dispute.
Russia–Europe Gas Conflict (2022): Following the invasion of Ukraine, Russia reduced gas supplies to Europe, triggering an energy crisis and forcing European nations to find alternatives.
Impact
Sharp commodity price fluctuations.
Inflationary pressures globally.
Strategic realignments in energy and resource supply chains.
6. Agricultural and Food Trade Wars
Definition
Agricultural trade wars arise when countries impose restrictions or subsidies on food and farm products to protect domestic farmers or retaliate against other nations’ policies.
Characteristics
Often involves perishable goods like grains, meat, and dairy.
Highly political due to its effect on farmers and food security.
Influenced by health, safety, and environmental standards.
Examples
U.S.–EU Beef Hormone Dispute: The EU banned beef treated with growth hormones, while the U.S. claimed this violated World Trade Organization (WTO) rules.
India’s Rice and Wheat Export Bans (2022–2024): India limited exports to control domestic prices, impacting global food markets.
U.S.–China Agricultural Tariffs: China imposed tariffs on U.S. soybeans during the 2018 trade war, hurting American farmers.
Impact
Global food price volatility.
Disruption of agricultural supply chains.
Rising risk of food insecurity in developing nations.
7. Sanctions and Trade Embargoes
Definition
Trade sanctions and embargoes are political tools where nations restrict trade with specific countries to pressure them into policy changes. These are often unilateral or coalition-based rather than purely economic measures.
Characteristics
Used as instruments of foreign policy.
Target sectors like defense, energy, or finance.
Can be partial (targeted sanctions) or complete (full embargo).
Examples
U.S. Sanctions on Iran: Targeted Iran’s oil exports and financial transactions to curb its nuclear program.
Western Sanctions on Russia (2022): Following the invasion of Ukraine, Western nations imposed sweeping sanctions on Russian banks, oil companies, and oligarchs.
Cuba Embargo: The U.S. trade embargo on Cuba, in place since the 1960s, remains one of the longest-running in history.
Impact
Severe economic damage to targeted countries.
Global supply chain disruptions.
Emergence of black markets and sanction evasion networks.
8. Subsidy and Dumping Wars
Definition
Subsidy wars occur when governments financially support domestic industries to make their products cheaper internationally. Dumping happens when a country exports goods at below-market prices to gain unfair advantage.
Characteristics
Violates fair trade principles under WTO rules.
Leads to retaliatory tariffs and anti-dumping duties.
Common in sectors like steel, solar panels, and agriculture.
Examples
China’s Steel and Solar Subsidies: China has been accused by the U.S. and EU of subsidizing its steel and solar industries, flooding global markets.
Boeing vs. Airbus Dispute: The U.S. and EU accused each other of illegally subsidizing their aerospace giants, leading to WTO arbitration.
Impact
Market distortions and overcapacity.
Trade tensions within global manufacturing networks.
Long-term damage to fair competition.
9. Digital and Data Sovereignty Trade Wars
Definition
Digital trade wars revolve around data localization, privacy laws, and control over digital infrastructure. Governments use these measures to assert sovereignty over cyberspace and digital economies.
Characteristics
Focuses on control of citizens’ data and digital ecosystems.
Involves laws restricting cross-border data flows.
Part of broader efforts to reduce dependency on foreign technology.
Examples
EU’s GDPR (General Data Protection Regulation): Imposes strict data rules affecting U.S. tech companies operating in Europe.
India’s Data Localization Policy: Requires foreign companies to store user data locally, creating tensions with the U.S. tech industry.
China’s Cybersecurity Law: Restricts foreign companies’ access to Chinese digital markets.
Impact
Fragmentation of the global internet (“splinternet”).
Rising compliance costs for tech companies.
Reduced cross-border digital innovation.
10. Environmental and Green Trade Wars
Definition
As nations transition toward sustainable economies, green trade wars arise when environmental policies create new trade barriers or advantages.
Characteristics
Based on carbon emissions, climate regulations, and renewable technologies.
Can penalize “dirty” industries or reward green production.
Intersects with industrial and climate policy.
Examples
EU Carbon Border Adjustment Mechanism (CBAM): Imposes tariffs on imports from countries with weaker climate regulations.
U.S. Inflation Reduction Act (2022): Offers subsidies for domestic clean energy industries, criticized by the EU as protectionist.
China’s Solar Dominance: Accusations of unfair advantages in solar manufacturing due to state subsidies.
Impact
Reshapes global energy and industrial competition.
Encourages climate-friendly innovation.
Risk of conflict between developed and developing nations over “green protectionism.”
Conclusion
Global trade wars have evolved from simple tariff disputes to multifaceted economic conflicts involving technology, digital data, energy, and environmental policy. Each type—whether tariff-based, technological, or green—reflects deeper struggles for economic dominance, national security, and strategic autonomy.
While trade wars may provide short-term domestic protection, they often harm global growth, increase inflation, and reduce consumer welfare. Modern economies are too interconnected for isolationist strategies to succeed without consequences. The challenge for policymakers lies in balancing national interests with global cooperation—ensuring that competition fosters innovation rather than conflict.
Ultimately, understanding the types of global trade wars helps policymakers, investors, and citizens grasp how economic rivalries shape the future of globalization, technology, and international relations.
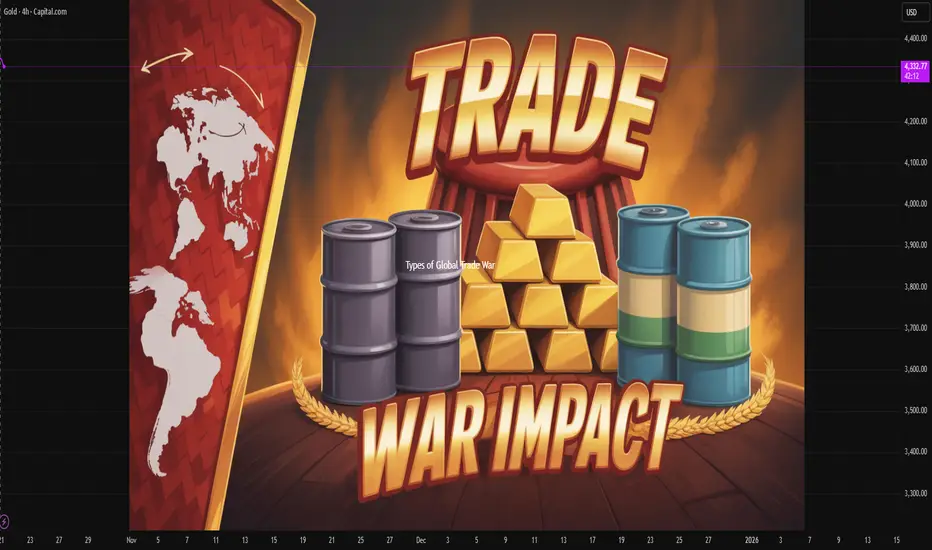
Capital Flows: Concept and Characteristics1. Introduction
Capital flows are among the most dynamic and influential forces in the modern global economy. They represent the movement of money across countries in search of investment opportunities, higher returns, and economic stability. These flows link financial markets, shape exchange rates, influence domestic interest rates, and contribute significantly to global economic growth. However, they can also generate volatility and crises if not managed properly. Understanding the concept, nature, and characteristics of capital flows is therefore essential for policymakers, investors, and economists alike.
In the broadest sense, capital flows refer to the movement of financial capital — funds for investment, trade, or production — between countries. These movements can take various forms, such as foreign direct investment (FDI), portfolio investment, external loans, or banking capital. In the era of financial globalization, capital flows have become a key determinant of macroeconomic performance, affecting balance of payments, currency stability, and the pace of development in emerging economies.
2. Concept of Capital Flows
Capital flows describe the movement of money for the purpose of investment, trade, or business production between nations. These flows can either be inflows (foreign capital entering a country) or outflows (domestic capital moving abroad). The fundamental objective of capital movement is to allocate global savings efficiently, directing funds from capital-abundant economies to those with productive investment opportunities.
From a macroeconomic perspective, capital flows are part of the financial account in a country’s balance of payments (BoP). The BoP records all international financial transactions over a specific period. When foreign investors purchase domestic assets or when international institutions provide loans, it results in capital inflows. Conversely, when residents invest abroad or repay foreign debt, capital outflows occur.
In essence, capital flows bridge the gap between savings and investment at the global level. Countries with savings surpluses lend to countries with deficits, facilitating growth and smoothing consumption over time. Yet, these movements also expose economies to risks, including sudden reversals, speculative attacks, and exchange-rate volatility.
3. Types of Capital Flows
Capital flows are typically categorized based on their nature, purpose, and duration. The major types include:
a. Foreign Direct Investment (FDI)
FDI represents long-term investments by foreign entities in productive assets such as factories, infrastructure, or businesses. It often involves control or significant influence over the management of the enterprise. FDI is considered stable because it is tied to physical and organizational capital. Examples include multinational corporations establishing subsidiaries or acquiring stakes in foreign firms. FDI contributes to job creation, technology transfer, and skill development, making it a preferred form of capital flow for developing nations.
b. Foreign Portfolio Investment (FPI)
FPI involves investment in financial assets such as stocks, bonds, or mutual funds without seeking management control. These investments are more liquid and short-term in nature compared to FDI. Portfolio flows respond quickly to changes in market conditions, interest rates, or investor sentiment, making them a major source of volatility in financial markets. While they provide liquidity and deepen capital markets, sudden withdrawals can destabilize economies.
c. Other Investment Flows
This category includes cross-border bank loans, deposits, and trade credits. These flows often occur through the banking system and can be highly cyclical. During global booms, banks expand international lending, but in crises, credit tends to contract rapidly, intensifying financial distress in emerging markets.
d. Official Flows
Official capital flows involve transactions between governments or international organizations. They include development aid, loans from international financial institutions like the IMF or World Bank, and sovereign bond investments. These flows often aim to stabilize economies, finance infrastructure, or promote development goals.
4. Characteristics of Capital Flows
Capital flows possess several defining characteristics that distinguish them from other forms of international transactions. These characteristics determine their behavior, impact, and policy implications.
a. Bidirectional Nature
Capital flows are inherently bidirectional, encompassing both inflows and outflows. Inflows refer to the foreign investment entering a country, while outflows denote domestic investment abroad. The balance between the two reflects the country’s attractiveness to global investors and its economic fundamentals.
b. Volatility
One of the most notable features of capital flows, especially portfolio and short-term flows, is their volatility. Capital moves swiftly across borders in response to changes in global interest rates, risk perception, or political stability. This “hot money” behavior can cause rapid appreciation or depreciation of currencies and abrupt shifts in liquidity conditions.
c. Sensitivity to Interest Rate Differentials
Capital flows respond strongly to differences in interest rates between countries. When a nation offers higher returns, it attracts inflows as investors seek better yields. Conversely, when interest rates fall, capital tends to exit in search of more profitable opportunities elsewhere. This dynamic is closely linked to the “carry trade” phenomenon in global finance.
d. Dependence on Economic Fundamentals
Sustained capital inflows generally depend on macroeconomic fundamentals such as GDP growth, inflation control, fiscal discipline, and political stability. Investors prefer economies with sound policies, strong institutions, and transparent regulatory environments.
e. Short-Term vs. Long-Term Orientation
FDI tends to be long-term and relatively stable, reflecting confidence in a country’s future prospects. In contrast, portfolio and banking flows are often short-term and speculative, seeking quick gains. The composition of capital flows thus affects the degree of stability in a country’s financial system.
f. Role in Currency Movements
Capital inflows increase demand for the domestic currency as foreign investors convert foreign currency into local money to purchase assets. This can lead to currency appreciation. Conversely, outflows can cause depreciation pressures. Hence, managing capital flows is crucial for exchange-rate stability.
g. Impact on Domestic Liquidity
Large capital inflows can expand domestic money supply, influencing inflation and credit growth. Central banks often intervene to sterilize excessive liquidity through open-market operations. Similarly, sudden outflows can tighten liquidity and trigger financial stress.
h. Influence of Global Sentiment
Capital flows are highly influenced by global risk appetite. During periods of optimism, investors pour money into emerging markets seeking higher returns. But during crises, they retreat to “safe havens” such as U.S. Treasury bonds or gold. This cyclical behavior often amplifies boom-bust patterns in developing economies.
5. Determinants of Capital Flows
Several factors drive international capital movements:
Interest Rate Differentials: Higher returns attract investors to a country’s financial assets.
Exchange Rate Expectations: Anticipated appreciation of a currency can attract inflows, while depreciation expectations cause outflows.
Economic Growth Prospects: Strong growth signals future profitability and attracts investment.
Political and Policy Stability: Transparent governance and sound fiscal management boost investor confidence.
Financial Market Development: Deep, liquid, and efficient markets encourage both FDI and portfolio inflows.
Global Liquidity Conditions: Quantitative easing or tightening by major central banks (like the U.S. Federal Reserve) influences global capital availability.
Risk Perception and Geopolitical Events: Wars, pandemics, or trade tensions can redirect flows toward safer economies.
6. Benefits of Capital Flows
When managed effectively, capital flows bring multiple economic benefits:
a. Investment Financing
Capital inflows supplement domestic savings, allowing countries to finance large-scale infrastructure, industrial, and technological projects. This accelerates economic growth and modernization.
b. Technology and Skill Transfer
Through FDI, developing countries gain access to advanced technologies, management expertise, and global value chains, boosting productivity and competitiveness.
c. Financial Market Development
Portfolio inflows promote the development of capital markets by increasing liquidity, improving asset pricing, and diversifying investor bases.
d. Job Creation and Income Growth
FDI generates employment opportunities, enhances wages, and stimulates demand in related sectors.
e. Fiscal and Monetary Gains
Capital inflows increase tax revenues and foreign exchange reserves, strengthening fiscal and monetary stability.
7. Risks and Challenges of Capital Flows
Despite their benefits, capital flows also pose several macroeconomic and financial risks:
a. Exchange-Rate Volatility
Large and sudden inflows can appreciate the domestic currency, reducing export competitiveness — a phenomenon known as “Dutch disease.” Conversely, abrupt outflows can cause sharp depreciation and inflation.
b. Financial Instability
Short-term speculative flows can amplify asset bubbles in equity or real-estate markets. When these bubbles burst, they lead to capital flight and banking crises.
c. Policy Dilemmas
Managing capital flows involves trade-offs between maintaining exchange-rate stability, monetary independence, and free capital mobility — often referred to as the “impossible trinity” in international economics.
d. Reversal Risk
The sudden reversal of capital flows, often triggered by global shocks, can lead to balance-of-payments crises and depletion of foreign reserves, as seen during the Asian Financial Crisis (1997) and the Global Financial Crisis (2008).
8. Policy Management of Capital Flows
Governments and central banks employ various strategies to manage capital flows:
Exchange-Rate Flexibility: Allowing exchange rates to adjust helps absorb shocks from volatile flows.
Foreign-Exchange Reserves: Maintaining adequate reserves provides a buffer against sudden outflows.
Macroprudential Regulations: Measures like capital adequacy ratios, reserve requirements, and lending limits safeguard financial stability.
Capital Controls: Temporary restrictions on short-term inflows or outflows can prevent excessive volatility.
Coordination with Fiscal Policy: Prudent fiscal management complements monetary policies to maintain investor confidence.
9. Capital Flows in Emerging Economies
Emerging markets, such as India, Brazil, and Indonesia, are particularly affected by global capital movements. Their growing markets and higher returns attract inflows, but structural weaknesses make them vulnerable to reversals. For instance, U.S. monetary tightening often leads to “capital flight” from emerging economies, putting pressure on their currencies. Hence, many developing countries focus on attracting stable FDI while managing short-term speculative flows carefully.
10. Conclusion
Capital flows form the lifeblood of the global financial system, linking nations through investment, trade, and finance. They enable countries to bridge savings gaps, finance development, and integrate into global markets. However, their benefits come with challenges — volatility, policy constraints, and potential crises. The key lies in maintaining sound macroeconomic fundamentals, transparent financial systems, and prudent regulation to harness the advantages of capital mobility while minimizing its risks.
In today’s interconnected world, capital flows symbolize both opportunity and vulnerability. For policymakers, the ultimate objective is not to restrict these flows but to manage them wisely — ensuring that global finance contributes to stable, inclusive, and sustainable growth.
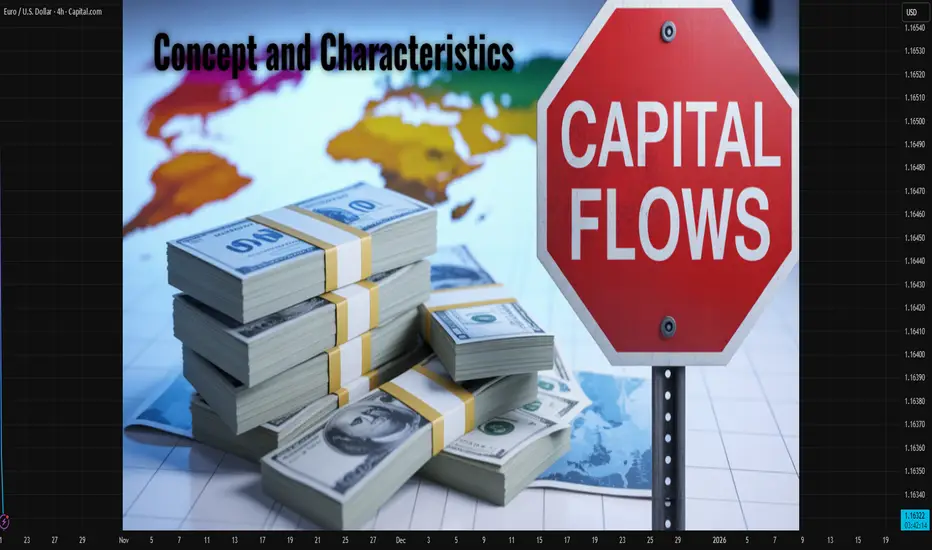
How to Analyze Daily Time Frame on Gold. 5 Important Things
There are 5 important things that you should analyze on Gold on a daily time frame to accurately predict long term, midterm and short term movements.
In this article, I will share with you a step-by-step guide for daily time frame analysis that you can apply on Gold or any other financial instrument.
1 - Identify the market trend
When you analyze a daily time frame, you should identify long term, midterm and short term market trends.
Long-term trend is based on the analysis of one year long price action.
In the example above, Gold is trading in a long term bullish trend because the price keeps setting new higher high and new higher lows during the year.
Midterm trend is based on the analysis of a price action for the last 4–5 months.
Above, we can clearly see that a mid-term trend is bullish because again, the price sets new higher highs and higher lows over time.
Short-term trend is based on the analysis of price movements for the last 2 months.
Short-term price action is also bullish on Gold, with a clear sequence of higher highs and higher lows.
According to the trend analysis, long-term, mid-term and short-term trends are bullish.
2 - Identify the directional bias
The directional bias defines a highly probable future direction on the market.
In our example, we can anticipate that Gold will keep growing among all the dimensions: long-term, mid-term and short-term.
3 - Execute structure analysis
Identify important historic horizontal and vertical structures.
That will be the points from where you should look for trading opportunities.
When you analyze key levels, identify the structures that are lying close to the current price levels.
Make sure that all the structures that you spotted were respected by the market in the past.
4 - Look for price action patterns
Price action patterns are the language of the market.
Proper identification of the patters will help you correctly understand the intentions of the market participants.
You can see that a bearish breakout of a rising channel triggered a correctional movement on the market.
Gold started to fall steadily within a bullish flag pattern and after it tested a key support, the price violated the resistance of the flag.
5 - Analyze candlesticks
Candlestick patterns can provide extra clues and confirmations.
You can see that the market formed multiple rejections from key support, an inside bar formation and bullish engulfing candle.
Violation of the inside bar to the upside with a strong bullish candle is an important bullish signal.
Combining trend analysis, structure analysis, price action and candlestick analysis, and you can make predictions and look for trading opportunities.
You can also make your analysis even more sophisticated, for example, analyzing fundamental analysis or applying technical indicators.
❤️Please, support my work with like, thank you!❤️
I am part of Trade Nation's Influencer program and receive a monthly fee for using their TradingView charts in my analysis.
Industry Shifting Digital Legacy in the Trading MarketIntroduction
Over the past few decades, the global trading market has undergone a profound transformation driven by rapid technological innovation. The shift from traditional, paper-based, and manual trading systems to digital, automated, and AI-powered environments marks one of the most significant industrial revolutions in financial history. This transformation, often referred to as the “digital legacy” in trading, represents the accumulated technological evolution that has permanently reshaped how trading is conducted, managed, and perceived. From stock exchanges going electronic to blockchain-based settlements and AI-driven predictions, the trading landscape is now defined by data, connectivity, and automation.
This essay explores the multifaceted journey of the trading industry’s digital shift—its origins, technological milestones, benefits, challenges, and the future trajectory of digital trading markets in an increasingly interconnected global economy.
1. The Legacy of Traditional Trading
Before the digital era, trading was largely a human-centric activity. Traders gathered on physical exchange floors—like the New York Stock Exchange (NYSE) or the Bombay Stock Exchange (BSE)—to shout orders, signal bids, and negotiate prices. Transactions were recorded manually, confirmations took hours or even days, and information asymmetry dominated the market.
This traditional model, while effective for its time, was characterized by several inefficiencies:
Delayed Execution: Manual order matching slowed transaction speed.
Limited Access: Only brokers and institutional investors could participate directly.
Higher Costs: Commissions, paperwork, and delays increased transaction expenses.
Lack of Transparency: Price discovery relied on human interaction and could be prone to manipulation.
However, this legacy laid the groundwork for digital transformation—creating systems, regulations, and market principles that technology would later enhance rather than replace.
2. The Dawn of Digital Transformation
The 1970s and 1980s marked the beginning of electronic trading. The introduction of NASDAQ in 1971 as the world’s first electronic stock market revolutionized trading operations by allowing traders to buy and sell securities through a computer-based system. This digital shift eliminated the need for physical presence on trading floors and opened the door to faster, more efficient, and data-driven decision-making.
Key milestones in this phase included:
Electronic Communication Networks (ECNs): Platforms like Instinet and Archipelago enabled direct trading between investors without intermediaries.
Algorithmic Trading (1990s): Advanced software allowed traders to execute large volumes of trades based on pre-defined conditions, minimizing human error and emotion.
Online Retail Trading (2000s): The emergence of platforms like E*TRADE and Zerodha democratized market participation, allowing individuals to trade directly from home.
These developments represented a paradigm shift—from human intuition to data algorithms, from manual execution to automation, and from exclusivity to inclusivity.
3. Building the Digital Legacy: Key Technologies Shaping Modern Trading
The modern trading ecosystem is built upon a combination of advanced digital technologies that collectively form the “digital legacy” of the industry. Let’s explore the most influential ones.
a. Artificial Intelligence (AI) and Machine Learning (ML)
AI has become a cornerstone of modern trading, offering predictive analytics, sentiment analysis, and automated decision-making. Machine learning algorithms process massive datasets to identify market trends, price anomalies, and risk factors—often in real time.
AI trading bots now execute trades faster than humans can blink.
Natural language processing (NLP) analyzes news, reports, and social media to gauge market sentiment.
Reinforcement learning models help algorithms adapt and improve trading performance over time.
b. Blockchain and Distributed Ledger Technology (DLT)
Blockchain introduced transparency, security, and decentralization to trading systems. By recording transactions on an immutable distributed ledger, blockchain eliminates the need for intermediaries like clearinghouses and reduces settlement times from days to seconds.
Platforms such as Binance, Coinbase, and decentralized exchanges (DEXs) exemplify how blockchain has redefined asset trading—especially in cryptocurrencies and tokenized securities.
c. Cloud Computing and Big Data
The rise of cloud infrastructure enables real-time data storage, analytics, and computational scalability. Traders and institutions can now access massive historical datasets and process live data streams for faster and smarter decisions.
Big data analytics helps identify correlations across markets, forecast volatility, and measure investor behavior, contributing to more accurate pricing and risk management.
d. Internet of Things (IoT) and Edge Computing
In commodities and logistics trading, IoT sensors track shipments, production rates, and weather conditions, offering traders real-world data that can influence pricing strategies. Edge computing ensures low-latency data processing, critical in high-frequency trading (HFT) environments.
e. Quantum Computing (Emerging Frontier)
Quantum computing, though still in its infancy, promises to revolutionize financial modeling. It could process complex simulations for portfolio optimization, risk assessment, and derivatives pricing exponentially faster than current computers.
4. Digital Trading Platforms and Market Accessibility
One of the most visible impacts of the digital legacy is democratization of market access. Online trading platforms like Robinhood, Zerodha, Upstox, and Interactive Brokers have enabled millions of individuals worldwide to participate in markets previously dominated by institutions.
Features of modern digital platforms include:
User-friendly interfaces for beginners.
Mobile trading apps for anytime, anywhere access.
Low or zero brokerage fees.
Real-time charts, news feeds, and analytics.
Integration with AI assistants for personalized investment advice.
This accessibility not only increases market liquidity but also empowers retail investors to compete on a near-equal footing with professionals.
5. The Rise of Algorithmic and High-Frequency Trading
Algorithmic trading (algo trading) represents the digital market’s technological pinnacle. These automated systems use complex mathematical models to execute trades based on predefined criteria like timing, price, or volume.
High-Frequency Trading (HFT), a subset of algo trading, involves executing thousands of trades in milliseconds. While it increases liquidity and efficiency, it also introduces systemic risks, such as flash crashes when algorithms malfunction or act unpredictably.
The shift to algorithmic systems embodies the automation legacy of digital markets—reducing human bias but demanding robust regulatory oversight to ensure fairness and stability.
6. Digitalization in Commodities and Forex Markets
The transformation is not limited to equities. Commodity trading, once reliant on physical exchanges and phone calls, now operates through sophisticated electronic systems like MCX (India) and CME (U.S.), which provide instant access to global commodities—from gold and oil to agricultural products.
Similarly, the foreign exchange (Forex) market has evolved into a 24/7 digital ecosystem, processing over $7 trillion in daily transactions. AI-powered forex robots and blockchain-based currency settlement systems are redefining global currency trade efficiency and transparency.
7. The Role of Regulatory Technology (RegTech) and Cybersecurity
With great digital power comes great responsibility. As markets become more interconnected and data-driven, cybersecurity and regulatory compliance are more critical than ever.
RegTech solutions leverage automation, AI, and blockchain to:
Monitor trading activities in real time for suspicious behavior.
Ensure compliance with global financial regulations (MiFID II, SEBI norms, etc.).
Prevent market manipulation and insider trading.
At the same time, cybersecurity frameworks protect sensitive trading data from breaches, fraud, and ransomware attacks. The digital legacy, therefore, is as much about trust as it is about technology.
8. Advantages of the Digital Shift in Trading
The benefits of digital transformation are vast and transformative:
Speed and Efficiency: Orders execute within milliseconds.
Global Access: Traders worldwide can access multiple markets simultaneously.
Lower Costs: Automation reduces transaction fees and operational expenses.
Data Transparency: Real-time pricing and reporting increase market fairness.
Enhanced Liquidity: Electronic markets attract higher participation and volume.
Innovation: New asset classes, such as crypto tokens and NFTs, expand investment opportunities.
In essence, the digital shift has made markets faster, smarter, and more inclusive.
9. Challenges and Risks in the Digital Era
Despite its benefits, the industry’s digital legacy is not without challenges:
Cyber Threats: Hackers targeting exchanges and wallets pose constant risks.
Systemic Risk from Automation: Algorithmic failures can trigger rapid market collapses.
Data Overload: Traders must filter massive data volumes effectively.
Inequality in Technology Access: Not all market participants can afford high-end trading infrastructure.
Regulatory Complexity: Cross-border digital trading creates jurisdictional challenges.
Balancing innovation with stability remains a critical concern for policymakers and financial institutions alike.
10. The Future: Toward a Fully Digital and Decentralized Trading Ecosystem
As we look forward, the trading industry is on the brink of a new digital frontier. The convergence of AI, blockchain, quantum computing, and decentralized finance (DeFi) will continue to reshape how markets function.
Key future trends include:
Tokenization of Assets: Real-world assets (stocks, real estate, art) will be represented as digital tokens tradable 24/7.
Decentralized Exchanges (DEXs): Peer-to-peer platforms will reduce reliance on centralized intermediaries.
AI-driven Portfolio Management: Personal AI agents will handle customized investment strategies in real time.
Sustainable Trading Systems: Green and carbon trading markets will leverage blockchain for transparency in environmental impact.
Quantum-secure Trading: Quantum encryption will safeguard transactions against next-generation cyber threats.
Ultimately, the digital legacy will evolve into a self-sustaining digital ecosystem, where technology, transparency, and trust coexist harmoniously.
Conclusion
The shift of the trading industry toward a digital legacy marks not just a technological evolution but a complete redefinition of finance itself. From manual trading floors to AI-driven algorithms, from paper contracts to blockchain ledgers, and from elite broker networks to mass retail participation—the transformation has democratized finance and accelerated economic integration globally.
Yet, this digital legacy comes with responsibilities: ensuring ethical AI use, maintaining cybersecurity resilience, and designing fair regulatory frameworks. As technology continues to evolve, the challenge for future generations of traders, regulators, and innovators will be to preserve the human values of trust, transparency, and accountability within an increasingly automated world.
The digital revolution in trading is far from over—it is merely entering its next, more intelligent phase. Those who adapt and innovate will not only thrive but also define the next legacy of global trade in the digital era.

Emerging Market ImpactIntroduction
Emerging markets represent countries that are transitioning from developing to developed status, marked by rapid industrialization, growing middle classes, and increasing integration with the global economy. These nations—such as India, Brazil, China, Indonesia, Mexico, South Africa, and Turkey—play a crucial role in shaping global economic trends. Over the past three decades, emerging markets (EMs) have become engines of global growth, accounting for more than half of global GDP in purchasing power parity (PPP) terms. Their impact on trade, investment, innovation, and geopolitics is now undeniable.
The term “emerging market” was popularized by the International Finance Corporation (IFC) in the 1980s to describe economies offering high growth potential but carrying higher risks. Today, the significance of emerging markets has expanded beyond growth potential—they are vital to global supply chains, technological diffusion, and financial market stability. Understanding their impact involves examining their influence on global trade, investment flows, innovation, financial stability, and sustainable development.
1. Economic Growth and Global Output
Emerging markets have become the primary drivers of global economic growth. According to IMF data, EMs and developing economies contribute roughly 60% of global GDP (in PPP terms), up from less than 40% in the early 1990s. China’s meteoric rise is the most notable, transforming from a low-income agricultural nation to the world’s second-largest economy. India, Indonesia, and Vietnam are also rising powerhouses, benefiting from demographic advantages, urbanization, and digital transformation.
The rapid growth of EMs has helped stabilize the global economy, especially during periods of stagnation in advanced economies. For instance, after the 2008 global financial crisis, emerging markets—particularly China and India—led the recovery through infrastructure spending and consumption demand. The expanding middle class in these regions continues to fuel demand for goods, services, and technology, creating a multiplier effect across industries worldwide.
2. Global Trade and Supply Chains
Emerging markets have profoundly reshaped global trade patterns. Many EMs have become manufacturing hubs, supplying goods to developed nations at competitive costs. China’s role as the “world’s factory” is well-documented, but the global supply chain is diversifying. Countries like Vietnam, India, and Mexico are now major alternatives, benefiting from the “China+1” strategy adopted by global corporations to reduce geopolitical and logistical risks.
Emerging markets are not just exporters—they are also major consumers. Rising incomes have led to greater demand for automobiles, electronics, healthcare, and luxury goods. As a result, multinational corporations view EMs as strategic markets rather than just production bases.
Furthermore, emerging markets are increasingly integrating into South-South trade, trading directly with other developing nations. This intra-emerging market trade, supported by regional trade agreements like RCEP (Regional Comprehensive Economic Partnership) and BRICS initiatives, is reshaping global trade flows.
3. Foreign Direct Investment (FDI) and Capital Flows
Emerging markets attract significant foreign direct investment due to their large labor forces, expanding consumer markets, and improving infrastructure. FDI inflows help these economies develop industries, generate employment, and gain access to technology. For example, India’s digital and manufacturing sectors have seen record FDI inflows, while Southeast Asia has become a magnet for electronics and semiconductor investment.
However, EMs are also becoming outward investors. China’s Belt and Road Initiative (BRI) exemplifies how emerging economies are now major sources of capital and infrastructure investment. Middle Eastern nations are also channeling sovereign wealth funds into global ventures, further highlighting the two-way capital movement between emerging and developed markets.
Nevertheless, FDI in EMs comes with volatility risks. Political instability, regulatory uncertainty, and currency fluctuations often deter investors. Capital flight during crises—such as the Asian Financial Crisis (1997) or the pandemic shock (2020)—illustrates the vulnerability of EMs to global sentiment and U.S. monetary policy shifts.
4. Technological Advancement and Digital Transformation
A defining feature of modern emerging markets is their leapfrogging in technology adoption. Unlike developed economies that evolved through gradual innovation cycles, EMs often skip intermediate stages, embracing cutting-edge digital solutions. For example:
India revolutionized digital finance with the Unified Payments Interface (UPI), making mobile payments ubiquitous.
China dominates e-commerce and fintech through giants like Alibaba, Tencent, and Ant Group.
Kenya’s M-Pesa pioneered mobile money systems, influencing global financial inclusion strategies.
Emerging markets have also become major centers of innovation in renewable energy, AI, and biotech. China leads the world in solar and EV manufacturing, while India is advancing in pharmaceuticals and information technology. The diffusion of technology has improved productivity and expanded access to services such as healthcare, education, and banking.
However, digital inequality persists. Many EMs face challenges such as inadequate digital infrastructure, cybersecurity risks, and a shortage of skilled labor. Bridging this gap remains critical for sustainable digital transformation.
5. Financial Market Influence
Emerging markets play a growing role in global financial stability. EM debt and equity markets attract institutional investors seeking higher yields compared to developed economies. The rise of emerging market bonds and ETFs has diversified global portfolios but also increased interconnectedness.
However, EMs remain vulnerable to external shocks, particularly those arising from U.S. Federal Reserve policy changes. Rising interest rates in advanced economies often trigger capital outflows, currency depreciation, and inflationary pressures in EMs. For instance, during the 2013 “taper tantrum,” several emerging currencies plunged as investors withdrew funds amid expectations of tighter U.S. monetary policy.
On the positive side, financial reforms and stronger central banks in many EMs have enhanced resilience. Countries like India, Indonesia, and Brazil have improved foreign exchange reserves, fiscal management, and inflation targeting mechanisms, reducing systemic risk.
6. Role in Global Geopolitics
Emerging markets are reshaping the geopolitical balance of power. The rise of China, India, and Brazil has diluted Western economic dominance and promoted multipolarity. Organizations such as BRICS (Brazil, Russia, India, China, South Africa) and Shanghai Cooperation Organisation (SCO) illustrate efforts to foster South-South cooperation and reduce dependency on Western institutions like the IMF and World Bank.
China’s Belt and Road Initiative (BRI) and India’s International Solar Alliance exemplify how EMs are asserting global leadership roles. Moreover, emerging markets hold significant influence in global energy markets—OPEC members like Saudi Arabia, Nigeria, and Venezuela control major oil supplies, impacting global prices and trade balances.
In international diplomacy, emerging economies demand greater representation in institutions such as the United Nations, G20, and WTO. Their growing influence is prompting reforms in global governance frameworks to reflect the new economic reality.
7. Demographic Dividend and Labor Market Dynamics
Many emerging markets enjoy a demographic advantage, with young and growing populations that drive consumption and labor supply. India, for instance, is expected to have the world’s largest working-age population by 2030. This demographic dividend fuels economic growth through productivity and innovation.
However, the challenge lies in job creation and skill development. Without adequate employment opportunities, the demographic dividend can become a liability, leading to social unrest and economic inequality. Governments in EMs are thus investing heavily in education, vocational training, and entrepreneurship programs to harness the potential of their youth.
In contrast, some emerging markets—like China and Thailand—are now facing aging populations, which may strain public finances and slow growth. The demographic landscape is therefore diverse and evolving across regions.
8. Environmental and Sustainability Impact
Emerging markets have a dual relationship with sustainability. On one hand, rapid industrialization has led to environmental degradation, deforestation, and carbon emissions. On the other hand, EMs are at the forefront of renewable energy transition and green technology adoption.
China, for example, is the world’s largest producer of solar panels, wind turbines, and electric vehicles. India’s renewable energy capacity is growing rapidly, with ambitious goals to achieve net-zero emissions by 2070. The availability of natural resources also positions EMs as key players in the green energy supply chain—especially in lithium, cobalt, and rare earth minerals essential for EVs and batteries.
Sustainable finance initiatives—such as green bonds and ESG investing—are gaining traction in emerging economies, attracting global investors interested in climate-resilient growth.
9. Challenges and Risks
Despite their progress, emerging markets face several structural challenges:
Political Instability – Uncertain governance and corruption can deter investment and disrupt economic progress.
Debt Burden – High public and private debt levels make EMs vulnerable to external shocks.
Currency Volatility – Dependence on foreign capital can cause instability when global conditions tighten.
Infrastructure Gaps – Insufficient transport, energy, and digital infrastructure limit competitiveness.
Income Inequality – Rapid growth often benefits urban elites more than rural populations, widening disparities.
Addressing these vulnerabilities is critical for ensuring long-term sustainable growth.
10. The Future of Emerging Markets
The next decade is likely to be defined by the emergence of a new wave of EM leaders—countries that combine strong governance, digital innovation, and sustainability. Nations like Vietnam, Indonesia, and the Philippines are positioned to follow the growth trajectories of China and India.
Global corporations are diversifying supply chains toward these regions, while technology adoption and green energy initiatives continue to accelerate development. The growth of fintech, e-commerce, and artificial intelligence will deepen financial inclusion and create new economic opportunities.
Furthermore, cooperation among EMs through forums like BRICS+, G20, and regional trade blocs will amplify their collective influence on global decision-making. The long-term impact of emerging markets will thus be not just economic but transformative—reshaping global norms, industries, and governance structures.
Conclusion
The impact of emerging markets on the global economy is profound and far-reaching. They have become engines of growth, innovation hubs, and geopolitical influencers. Their rising share in global GDP, trade, and investment signifies a shift toward a more multipolar and interconnected world.
While challenges such as inequality, debt, and political risk persist, the potential of EMs remains immense. As they embrace digital transformation, sustainability, and stronger governance, emerging markets are poised to define the next phase of global development. The world’s future economic stability, innovation, and prosperity will increasingly depend on how effectively emerging markets harness their potential and navigate their challenges.

Eurodollar Secrets: The Hidden Engine of Global FinanceIntroduction
The Eurodollar market is one of the least understood yet most powerful forces in the global financial system. Despite its name, the Eurodollar has nothing to do with Europe’s single currency, the euro. Instead, it refers to U.S. dollar deposits held in banks outside the United States, primarily in Europe but also across the world.
The Eurodollar system operates largely beyond the control of U.S. regulators, making it a key component of the global shadow banking system. It underpins international trade, corporate borrowing, global liquidity, and even central bank policy — all while functioning outside traditional monetary oversight.
In this article, we will uncover the origins, mechanics, advantages, risks, and modern relevance of the Eurodollar market, revealing why it remains the hidden backbone of global finance.
1. Origins of the Eurodollar Market
The Eurodollar market traces its roots back to the 1950s Cold War era. The term “Eurodollar” was coined because large dollar deposits were held by European banks outside the jurisdiction of the United States.
The origins are tied to two main developments:
a. Post-War Dollar Dominance
After World War II, the U.S. dollar emerged as the world’s reserve currency under the Bretton Woods system. Global trade and reconstruction efforts required vast amounts of dollars, leading many foreign banks to hold U.S. dollar deposits for international transactions.
b. Avoiding U.S. Regulation
During the Cold War, the Soviet Union and Eastern Bloc nations wanted to keep their dollar holdings outside the U.S. banking system to avoid potential asset freezes. Thus, they placed their dollars in European banks — particularly in London.
By the late 1950s, British banks began actively accepting and lending these offshore dollars, creating the Eurodollar market. London’s light regulation and time zone advantage made it the ideal hub. Over time, this market exploded in size, becoming the center of global dollar liquidity.
2. Understanding What a Eurodollar Is
A Eurodollar is simply a U.S. dollar deposit held outside the United States — whether in a London bank, a Swiss financial institution, or a Singapore branch.
These deposits are not subject to U.S. Federal Reserve reserve requirements or U.S. banking regulations. That means banks can offer higher interest rates and greater flexibility.
Example:
A Japanese corporation might deposit $50 million in a London bank account denominated in U.S. dollars. That deposit is a Eurodollar. The London bank may then lend those dollars to a Canadian energy company — all in dollars, but outside the U.S. banking system.
This offshore system has created a parallel dollar-based economy, vast in scale and largely invisible to the average investor.
3. How the Eurodollar Market Works
The Eurodollar market functions through a network of offshore banks, corporations, and financial institutions engaged in borrowing and lending U.S. dollars.
a. Depositors
Corporations, governments, and investors deposit their U.S. dollars in offshore banks to earn interest or finance international operations.
b. Borrowers
Multinational corporations, hedge funds, and even governments borrow Eurodollars to fund trade, investment, or speculative activities.
c. Interbank Market
Much of the Eurodollar trading occurs between banks themselves — known as the interbank market — where banks lend and borrow dollars to manage liquidity.
Interest rates in this market are often benchmarked to the London Interbank Offered Rate (LIBOR) (now replaced by SOFR and other benchmarks). For decades, LIBOR served as the heartbeat of Eurodollar lending.
4. Advantages of the Eurodollar Market
The Eurodollar system provides several key benefits that made it indispensable to global finance:
a. Regulatory Freedom
Eurodollars exist outside U.S. banking regulation. Offshore banks are not subject to Federal Reserve requirements, allowing them to operate with greater leverage and flexibility.
b. Higher Yields
Because offshore banks face fewer regulatory costs, they can offer higher interest rates to depositors. This attracted vast inflows of funds from corporations and investors.
c. Global Liquidity
The Eurodollar market acts as a global liquidity pool. It ensures that U.S. dollars are available around the world, facilitating trade, investment, and financial transactions.
d. Efficient Funding
Corporations and banks can access dollar-denominated loans without needing to go through U.S. institutions, making cross-border finance more efficient.
5. The Hidden Power: Eurodollars and Global Monetary Policy
Perhaps the most important — and least understood — aspect of Eurodollars is their influence on global monetary policy.
While the Federal Reserve controls the supply of base dollars inside the U.S., the Eurodollar market creates offshore dollars through bank credit expansion, effectively multiplying the global dollar supply beyond the Fed’s control.
a. Shadow Money Creation
When a London bank makes a $100 million Eurodollar loan, it is essentially creating dollar credit outside the U.S. system. This credit functions like real dollars in global trade and finance.
b. Implications for the Federal Reserve
The Fed’s control over global dollar liquidity is limited. Even if it tightens domestic policy, offshore banks can continue to expand dollar credit abroad, influencing global interest rates and capital flows.
c. Global Dependence on Dollar Liquidity
Countries, corporations, and banks worldwide rely on Eurodollar funding for transactions and debt servicing. When Eurodollar liquidity tightens (as in 2008 or 2020), the entire world feels the squeeze.
6. Eurodollars and the Rise of the Shadow Banking System
The Eurodollar market is a cornerstone of what economists call the “shadow banking system” — financial institutions and instruments that perform bank-like functions without traditional regulation.
Offshore banks, money market funds, and repo markets all interconnect with Eurodollar flows. This system provides immense liquidity but also systemic risk, since it operates largely outside regulatory oversight.
Key Shadow Components:
Eurodollar deposits
Offshore repo agreements
Eurobond markets
Synthetic dollar funding via derivatives
Together, these elements create a web of global credit that underpins everything from corporate loans to emerging market debt.
7. The Eurodollar Futures Market
To manage interest rate risk, traders developed Eurodollar futures — standardized contracts that allow participants to hedge or speculate on future U.S. dollar interest rates.
These contracts, traded on the Chicago Mercantile Exchange (CME) since 1981, became one of the world’s most liquid financial instruments.
How It Works:
Each Eurodollar futures contract represents a $1 million three-month deposit. The price moves inversely to interest rates — when rates rise, the futures price falls.
Uses:
Banks hedge funding costs.
Corporations manage borrowing exposure.
Speculators bet on central bank policy changes.
Even after LIBOR’s phaseout, Eurodollar futures remain crucial for managing short-term dollar rate exposure.
8. Eurobonds and Eurocredit: Expanding the Ecosystem
The Eurodollar market paved the way for Eurobond and Eurocredit markets — global debt instruments denominated in foreign currencies but issued outside the issuer’s home country.
For example, a Japanese company might issue a Eurodollar bond in London to raise dollar funds. Investors love such bonds for their higher yields and flexibility.
Eurocredit loans
These are large, syndicated loans in the Eurodollar market — often used by governments or multinational corporations. The Eurocredit market boomed in the 1970s and 1980s, financing everything from oil projects to emerging market infrastructure.
9. Risks and Crises in the Eurodollar System
Despite its efficiency, the Eurodollar system carries significant risks, primarily due to its opacity and lack of regulation.
a. Lack of Central Bank Backstop
Unlike U.S. banks, offshore Eurodollar institutions cannot access the Federal Reserve’s emergency lending facilities. In crises, they face funding shortages.
b. Contagion Risk
Because the system is interconnected, a liquidity crunch in one part (e.g., London) can quickly ripple through Asia or Latin America.
c. 2008 Global Financial Crisis
The 2008 crisis exposed the fragility of the Eurodollar system. When U.S. funding markets froze, offshore banks could not roll over short-term dollar debt, leading to a global dollar shortage. The Fed had to intervene with swap lines to supply offshore liquidity.
d. Regulatory Blind Spot
Since Eurodollars are created outside the U.S., no single regulator tracks their total supply or leverage. Estimates suggest the offshore dollar system could exceed $15–20 trillion, but the true figure is unknown.
10. Modern Evolution: From LIBOR to SOFR and Beyond
In recent years, the Eurodollar market has undergone transformation. The phaseout of LIBOR (due to manipulation scandals) led to new benchmarks like the Secured Overnight Financing Rate (SOFR) in the U.S. and SONIA in the U.K.
While these reforms aim to improve transparency, the Eurodollar ecosystem remains resilient. Offshore dollar deposits and loans continue to dominate international finance, especially as global trade and digital banking expand.
11. Eurodollars in the 21st Century: Digital and Decentralized Future
The next evolution may involve digital Eurodollars — tokenized U.S. dollar deposits or stablecoins like USDT and USDC. These digital assets function as modern Eurodollars, circulating globally outside U.S. regulation but denominated in dollars.
a. Stablecoins as New Eurodollars
Stablecoins backed by U.S. dollar reserves essentially replicate the Eurodollar structure — offshore, unregulated dollar liquidity.
b. Central Bank Digital Currencies (CBDCs)
In response, central banks are exploring CBDCs to regain control over global dollar flows. The digital dollar could one day reshape how Eurodollar liquidity operates.
12. Why the Eurodollar Still Matters
The Eurodollar market remains the lifeblood of global trade and finance.
Over 80% of international trade is invoiced in U.S. dollars.
Emerging markets depend on Eurodollar funding for growth.
Global corporations borrow and lend in this market daily.
Even though it operates outside official channels, the Eurodollar market’s health directly affects interest rates, liquidity, and financial stability worldwide.
Conclusion: The Invisible Dollar Empire
The Eurodollar system is one of the greatest financial innovations — and enigmas — of modern capitalism. Born from geopolitical necessity, it evolved into a vast offshore network that creates and circulates U.S. dollars beyond U.S. borders.
Its power lies in its invisibility: it influences global liquidity, shapes monetary policy, and fuels international trade, all without direct oversight.
However, with great power comes great risk. The Eurodollar market’s opacity and lack of regulation mean it can amplify crises when liquidity dries up. Understanding its mechanics is crucial for grasping how global finance truly operates beneath the surface.
In essence, the “Eurodollar secret” is that the world runs not on official U.S. dollars alone, but on a shadow network of offshore dollars — a system both indispensable and dangerously fragile.
As global finance shifts toward digital assets and decentralized networks, the spirit of the Eurodollar — global, flexible, and unregulated — may continue to define the next era of money itself.

FIIs Impact on Investments1. Understanding Foreign Institutional Investors (FIIs)
Foreign Institutional Investors are professional investors who bring in large pools of capital from abroad into domestic financial markets. They typically invest in equities, bonds, derivatives, and sometimes real estate. Unlike retail investors, FIIs operate on a large scale, and their investment decisions are based on rigorous market analysis, macroeconomic factors, and global financial trends.
FIIs are distinct from Foreign Direct Investment (FDI). While FDI involves long-term investments in physical assets such as factories or infrastructure, FIIs primarily invest in financial instruments with a relatively shorter horizon. Their capital is highly liquid and can enter or exit markets quickly, leading to both opportunities and risks.
2. FIIs and Stock Market Performance
One of the most visible impacts of FIIs is on stock markets. When FIIs pour money into a market, they increase demand for equities, pushing stock prices higher. Conversely, massive outflows can lead to sharp declines in stock prices.
Liquidity Injection: FIIs bring substantial liquidity into domestic markets. Increased liquidity facilitates smoother trading, reduces transaction costs, and enhances market efficiency.
Market Sentiment: FIIs are considered smart money. Their investment choices often influence the confidence of domestic retail and institutional investors. A surge in FII inflows is often seen as a positive signal about the country’s growth prospects.
Volatility: While FIIs enhance liquidity, their large and often speculative movements can also increase market volatility. Markets can swing sharply on news or global economic developments that trigger FII inflows or outflows.
For example, in emerging markets like India, FIIs have historically influenced market indices such as the Sensex and Nifty. Periods of high FII inflows correspond with bullish market trends, while outflows often coincide with corrections or downturns.
3. FIIs and Bond Market Dynamics
Apart from equities, FIIs also invest in government and corporate bonds. Their presence in the debt market has multiple effects:
Interest Rates: Large FII participation in bonds can impact interest rates. High demand for government securities can lower yields, making borrowing cheaper for the government. Conversely, sudden FII withdrawal can push yields higher.
Capital Costs: Corporate bonds may also benefit from FII investment, as increased demand can reduce yields, lowering the cost of capital for businesses.
Foreign Exchange Impact: Bond market investments often involve currency conversion. When FIIs invest in domestic bonds, they buy local currency, which can strengthen it. Conversely, selling bonds and converting the proceeds back into foreign currency can weaken the domestic currency.
FIIs’ presence in the bond market adds depth and stability, but it also introduces sensitivity to global risk sentiment. For example, geopolitical tensions, rising interest rates in developed countries, or global liquidity tightening can trigger massive FII exits, affecting domestic bond yields and financing costs.
4. Impact on Currency Markets
FIIs impact not just stock and bond markets but also the foreign exchange (forex) market. Large inflows and outflows from FIIs create demand and supply pressures for domestic currencies.
Currency Appreciation: When FIIs invest heavily in equities or bonds, they need to convert foreign currency into the domestic currency. This increased demand can lead to appreciation of the local currency.
Currency Depreciation: Conversely, when FIIs withdraw capital, the selling pressure on the domestic currency can lead to depreciation. Sudden depreciation can increase import costs, affect inflation, and influence monetary policy decisions.
Hence, the central bank often monitors FII activity closely, as it directly affects currency stability, external debt repayment, and inflation management.
5. Influence on Domestic Investment Climate
FIIs influence the domestic investment climate in several ways:
Boosting Confidence: Sustained FII inflows indicate international confidence in a country’s economic and political stability. This can encourage domestic investors to participate more actively in markets.
Setting Benchmark for Corporate Governance: FIIs usually invest in companies with strong corporate governance, transparency, and performance metrics. Their focus often encourages domestic companies to adopt higher standards, enhancing market integrity.
Crowding Effects: While FII inflows are generally positive, excessive reliance on them can create “crowding effects.” Markets may become overly dependent on foreign capital, making them vulnerable to global shocks.
Countries with a robust domestic investor base are better insulated from FII volatility, while those heavily reliant on foreign inflows can experience sharp market swings.
6. Sectoral Impacts of FII Investments
FIIs do not invest uniformly across all sectors; they tend to target sectors with high growth potential, transparency, and liquidity. This selective investment creates sectoral imbalances:
Equity Concentration: Sectors like technology, finance, and consumer goods often attract more FII attention. This can drive sector-specific stock price appreciation.
Neglected Sectors: Conversely, sectors with low liquidity or higher regulatory risk may struggle to attract foreign capital, potentially affecting overall economic balance.
Capital Formation: By channeling funds into high-growth sectors, FIIs indirectly support capital formation, innovation, and expansion.
Understanding FII sectoral preferences helps policymakers and domestic investors identify investment trends and potential market opportunities.
7. Risks Associated with FII Investments
Despite their benefits, FII investments carry certain risks for domestic markets:
Market Volatility: FIIs can exit markets quickly in response to global events, triggering sharp market corrections. This volatility can affect retail investors and long-term domestic institutional investors.
Exchange Rate Risks: Sudden FII outflows can destabilize the domestic currency, impacting import-export balances, inflation, and external debt servicing.
Economic Dependence: Over-reliance on FII inflows for financing fiscal deficits or stock market growth can be risky. A sudden stop in foreign investments may lead to liquidity crises.
Policymakers often attempt to balance FII participation with measures that strengthen domestic institutional and retail investor participation to mitigate such risks.
8. Role in Portfolio Diversification
For domestic investors, FIIs contribute indirectly to portfolio diversification:
Liquidity and Trading Opportunities: FII participation increases market liquidity, making it easier for domestic investors to buy and sell assets efficiently.
Benchmarking: FIIs often invest in well-researched, high-quality assets. Their investment decisions provide a benchmark for domestic portfolio managers.
Risk Management: The inflow of foreign capital helps stabilize markets in the long term, although short-term volatility remains a concern.
9. Policy Implications and Regulatory Considerations
Governments and regulatory authorities closely monitor FII activity due to its macroeconomic impact:
Investment Caps: Many countries impose caps on FII investments in specific sectors or companies to avoid excessive foreign control.
Reporting Requirements: FII inflows and outflows are tracked meticulously to assess their impact on market stability and currency flows.
Monetary Policy Coordination: Central banks consider FII movements when designing monetary policy, interest rates, and currency interventions.
Regulators aim to attract long-term, stable FII capital while preventing speculative volatility that could destabilize domestic markets.
10. Case Study: India
India is an illustrative example of FII impact on investments:
Stock Market Influence: FIIs have historically driven major movements in the Sensex and Nifty. Periods of strong economic growth and favorable policy reforms attract high FII inflows, boosting market performance.
Bond Market Participation: FIIs actively invest in government securities, influencing yields and borrowing costs. During periods of global liquidity tightening, sudden exits have led to higher bond yields.
Currency Volatility: The Indian Rupee often experiences appreciation during FII inflows and depreciation during outflows, demonstrating the strong link between foreign investment and forex stability.
India’s regulatory framework, including SEBI guidelines, aims to encourage responsible FII participation while protecting market integrity and domestic investor interests.
11. Conclusion
Foreign Institutional Investors are both a boon and a challenge for domestic markets. Their capital inflows enhance liquidity, drive equity and bond market growth, and boost investor confidence. FIIs often bring discipline, professionalism, and global best practices to domestic markets.
However, their presence also introduces risks—short-term volatility, currency fluctuations, and dependency on foreign capital. Policymakers, regulators, and domestic investors must carefully manage these dynamics to ensure that FII participation contributes to sustainable long-term growth rather than creating vulnerabilities.
Ultimately, FIIs act as catalysts for investment and development, shaping markets, influencing policies, and connecting domestic economies with global financial trends. Understanding their impact helps investors make informed decisions, mitigates risks, and capitalizes on the opportunities presented by the interconnected world of finance.

The Future of Arbitrage OpportunitiesIntroduction
Arbitrage, the simultaneous purchase and sale of an asset across different markets to exploit price discrepancies, has been a cornerstone of financial markets for centuries. From the simple practice of buying commodities in one region and selling them in another to complex, high-frequency trading strategies, arbitrage has consistently provided risk-free or low-risk profit opportunities for investors. In today’s interconnected global markets, arbitrage not only fosters market efficiency but also drives liquidity and price convergence. However, the future of arbitrage is poised for a transformation due to technological advancements, regulatory changes, evolving market structures, and global economic shifts. Understanding these dynamics is critical for investors, traders, and policymakers alike.
Technological Innovations and Arbitrage
One of the most profound influences on the future of arbitrage will be technology. Over the past two decades, financial markets have undergone rapid digitization. High-frequency trading (HFT) and algorithmic trading have revolutionized how arbitrage opportunities are detected and exploited. Algorithms can now scan thousands of markets and instruments in milliseconds, executing trades with minimal latency.
1. Artificial Intelligence and Machine Learning:
Artificial intelligence (AI) is becoming a game-changer in identifying subtle and fleeting arbitrage opportunities that human traders may overlook. Machine learning models can analyze historical price data, trading volumes, and market sentiment to predict short-term discrepancies in asset prices. This predictive capability can enhance the precision and profitability of arbitrage strategies.
2. Blockchain and Decentralized Finance (DeFi):
The rise of blockchain technology and decentralized exchanges (DEXs) is creating new arbitrage frontiers. Price differences across multiple DEXs or between centralized and decentralized platforms can be exploited efficiently using smart contracts, which automatically execute trades based on pre-defined conditions. This automated, trustless mechanism reduces execution risk and lowers transaction costs.
3. Quantum Computing Potential:
Although still in its infancy, quantum computing promises to reshape arbitrage by solving complex optimization problems much faster than classical computers. Quantum algorithms could, in the future, analyze multi-market, multi-asset scenarios instantaneously, uncovering arbitrage opportunities that are currently invisible due to computational constraints.
Market Globalization and Arbitrage Opportunities
Globalization has increased the interconnectivity of markets, creating both challenges and opportunities for arbitrage. Cross-border trading in currencies, equities, commodities, and derivatives allows traders to exploit inefficiencies arising from differences in interest rates, inflation, and regulatory policies.
1. Currency Arbitrage in a Globalized Economy:
The proliferation of emerging markets and currency trading platforms has expanded the scope for triangular arbitrage, where discrepancies in exchange rates among three currencies are exploited. However, geopolitical tensions, trade wars, and differing monetary policies can introduce both risk and opportunity in global currency arbitrage.
2. Commodity and Energy Arbitrage:
Global trade integration allows arbitrage in commodities such as oil, gold, and agricultural products. Price differences due to regional supply-demand mismatches, transportation costs, and regulatory constraints can be leveraged for profit. The future will see more sophisticated arbitrage strategies utilizing real-time logistics data, satellite imagery for crop yield estimates, and predictive analytics for energy demand.
Regulatory Evolution and Its Impact
Regulation plays a critical role in shaping arbitrage opportunities. While arbitrage thrives on inefficiencies, excessive or inconsistent regulation can reduce market discrepancies. Regulatory bodies worldwide are increasingly monitoring high-frequency trading and algorithmic strategies to prevent market manipulation and systemic risks.
1. Stricter Compliance Requirements:
As financial markets mature, regulators are introducing stringent reporting standards, know-your-customer (KYC) rules, and anti-money laundering (AML) measures. These rules may limit certain types of arbitrage, especially in cross-border contexts, but can also create new niches where regulatory arbitrage—exploiting differences in legal frameworks—becomes possible.
2. Harmonization of Global Standards:
With initiatives like Basel III, MiFID II, and evolving Securities and Exchange Commission (SEC) rules, market standards are gradually converging. This reduces the scope for classic arbitrage between markets with vastly different regulations but encourages sophisticated strategies that adapt quickly to regulatory nuances.
The Role of Data and Analytics
Data is the new currency in modern finance. Arbitrage increasingly relies on real-time information and predictive analytics.
1. Big Data Analytics:
By leveraging big data from multiple sources, including news feeds, social media, and satellite data, traders can detect price anomalies faster and with greater accuracy. Big data tools can also simulate potential arbitrage scenarios under various market conditions, optimizing strategy execution.
2. Sentiment Analysis and Alternative Data:
Beyond traditional financial data, market sentiment derived from social media, news sentiment, and alternative data sources can be integrated into arbitrage models. For example, a sudden surge in social media activity about a stock can create short-lived mispricing between exchanges that sophisticated models can exploit.
3. Integration of IoT in Commodities and Supply Chains:
Internet of Things (IoT) devices in logistics, agriculture, and energy sectors allow real-time monitoring of supply and demand, providing actionable insights for arbitrage in physical markets. For instance, temperature sensors in agricultural storage can signal supply issues, creating short-term price deviations across regional markets.
Challenges and Risks
Despite technological and global advancements, the future of arbitrage is not without challenges.
1. Market Efficiency:
As technology improves and more traders employ arbitrage strategies, price discrepancies are quickly corrected. This heightened efficiency reduces the profitability of traditional arbitrage opportunities.
2. Competition and Overcrowding:
The proliferation of algorithmic and high-frequency trading firms has intensified competition, leading to “crowded trades” where multiple players exploit the same opportunity simultaneously, reducing profit margins.
3. Cybersecurity and Operational Risks:
With increased reliance on digital infrastructure, arbitrage is exposed to cybersecurity threats, system failures, and execution risks. A minor glitch in automated trading systems can result in significant financial losses.
4. Regulatory Risks:
Rapidly changing regulatory landscapes can render some arbitrage strategies illegal or highly risky, particularly in emerging markets with inconsistent enforcement. Traders must maintain agile compliance frameworks to mitigate these risks.
Emerging Trends in Arbitrage
The future will witness the evolution of new types of arbitrage beyond traditional financial markets.
1. Environmental and Carbon Credit Arbitrage:
With the rise of carbon markets and ESG investing, opportunities will emerge in trading carbon credits, renewable energy certificates, and green bonds. Price discrepancies between different environmental markets could become a fertile ground for arbitrage.
2. Cryptocurrency and Digital Asset Arbitrage:
Cryptocurrencies and tokenized assets offer unique opportunities for arbitrage, particularly across exchanges with varying liquidity, regulations, and operational efficiencies. Smart contract-enabled automated trading could make crypto arbitrage both scalable and efficient.
3. Statistical and AI-driven Arbitrage:
Pairs trading, index arbitrage, and other statistical strategies will evolve with AI and deep learning. These approaches can identify complex, non-linear relationships between assets that traditional models cannot capture.
The Strategic Outlook
The future of arbitrage is likely to be shaped by a combination of technology, market evolution, and regulatory oversight. Investors and institutions must adapt by:
Investing in advanced technological infrastructure to identify and execute opportunities faster.
Diversifying across markets and asset classes to exploit cross-market inefficiencies.
Incorporating ESG and alternative asset classes into arbitrage strategies to tap into emerging trends.
Adapting to regulatory changes dynamically to ensure compliance while maximizing strategic advantage.
In essence, the competitive edge in future arbitrage will lie in the ability to combine speed, intelligence, and adaptability. Traders who can integrate real-time data, AI-driven insights, and robust risk management frameworks will thrive in a world where traditional inefficiencies are increasingly rare.
Conclusion
Arbitrage will continue to be a fundamental component of financial markets, ensuring price alignment, liquidity, and market efficiency. However, the landscape is shifting rapidly due to technological advancements, globalization, and regulatory evolution. The future of arbitrage will increasingly favor those who can harness AI, blockchain, big data, and alternative markets while navigating competitive pressures and regulatory frameworks. While classic arbitrage opportunities may diminish as markets become more efficient, new opportunities will emerge in digital assets, environmental markets, and algorithmically driven strategies. Ultimately, the evolution of arbitrage reflects the broader trajectory of global finance: dynamic, technology-driven, and increasingly interconnected.
Arbitrage will remain not just a mechanism for profit but a lens through which the efficiency, resilience, and innovation of financial markets can be observed and leveraged. The future belongs to those who anticipate these shifts and adapt their strategies to an ever-changing financial ecosystem.
